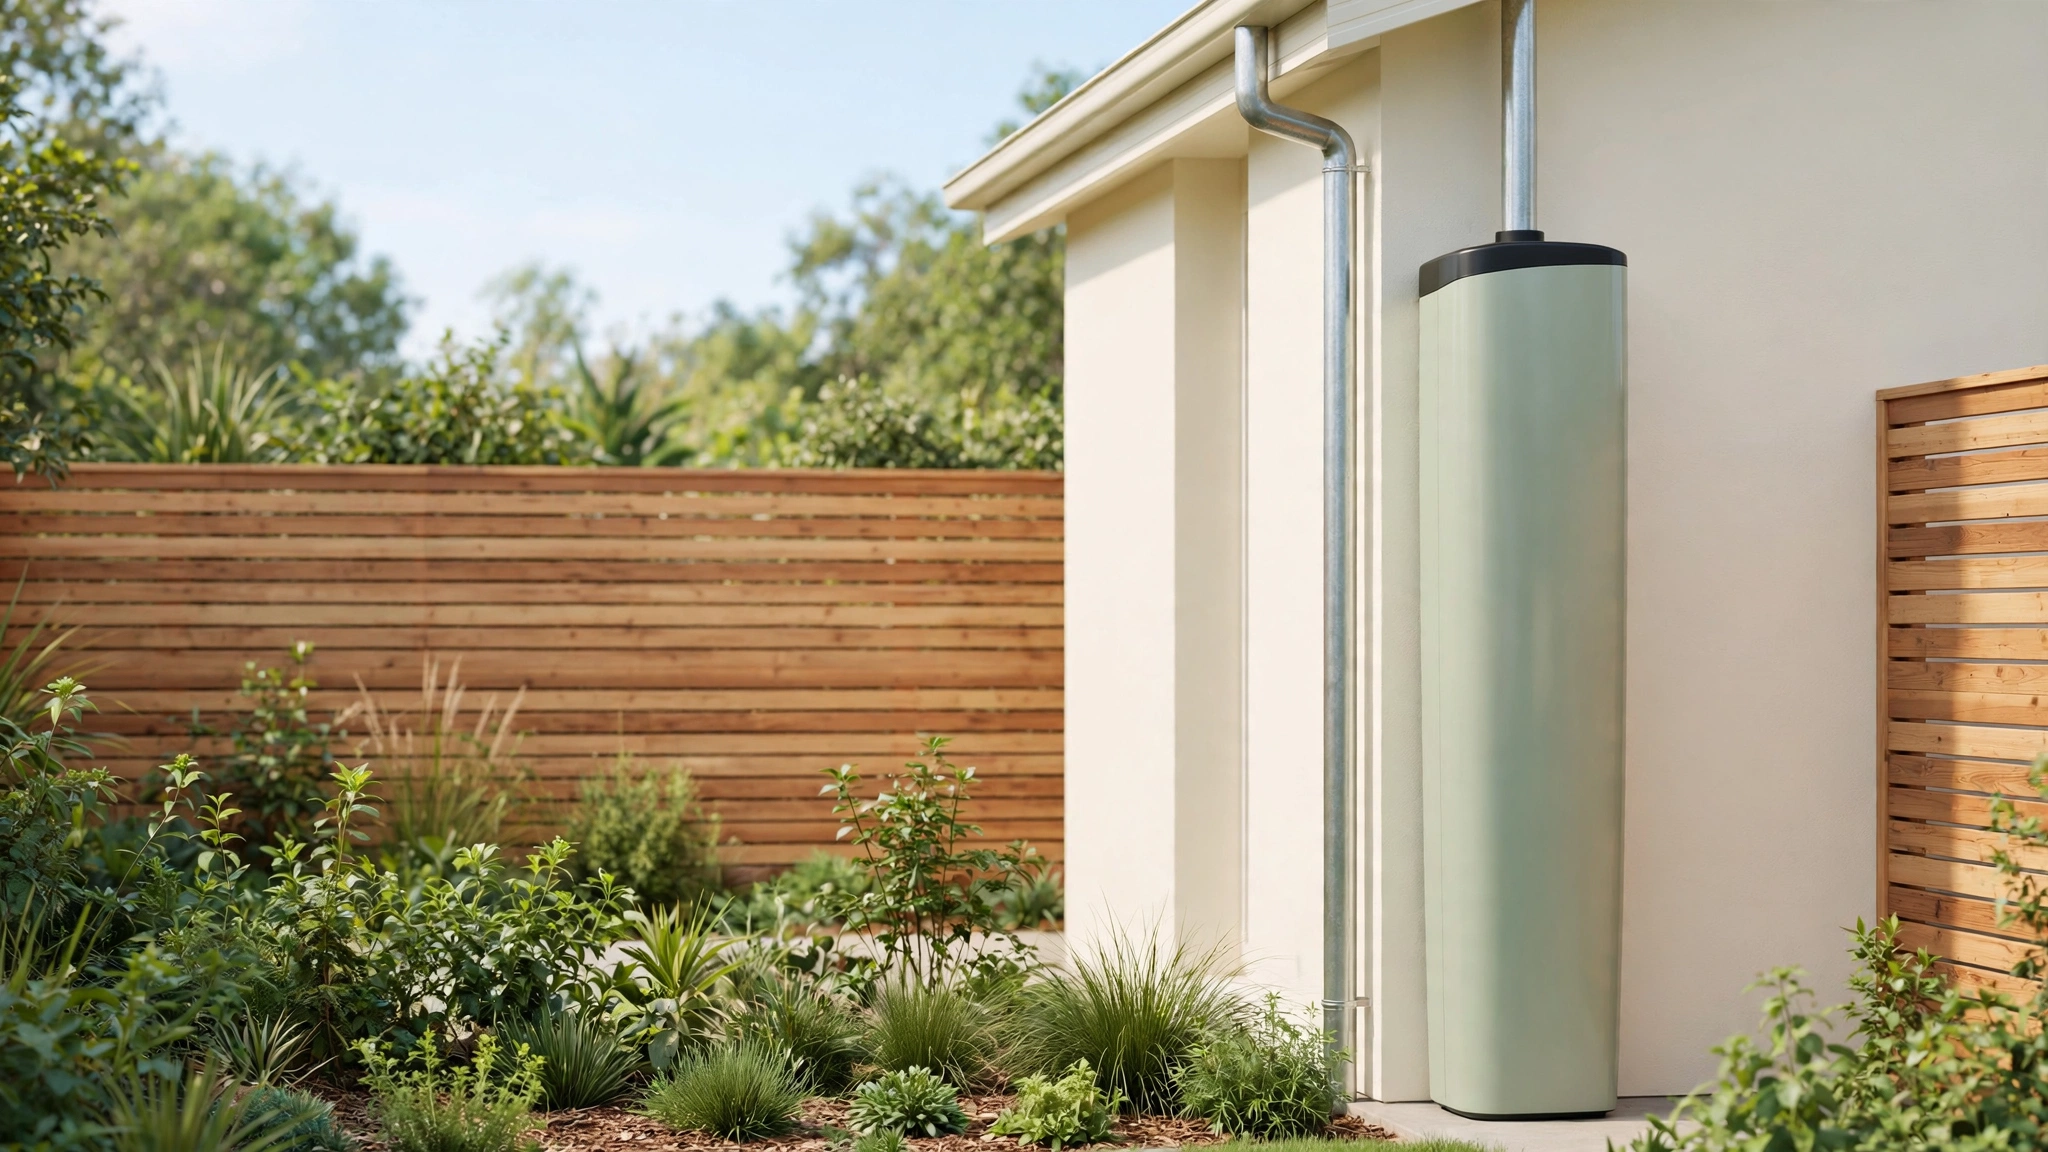
Picture this: a summer storm rolls through, and instead of watching all that water rush down the driveway and into the street, you watch it flow from your roof into a tank that will water your garden for weeks. That quiet moment of capture is exactly what a well planned harvesting system gives you. Every roof is a catchment area waiting to be put to work, and every downpour is free water for your plants.
You do not need a large property or a big budget to get there. All you need is a system that matches your roof, your storage space, and the way you water your garden. These 18 outdoor rainwater harvesting system ideas will help you design a setup that collects clean water, stores it safely, and delivers it exactly where your garden needs it most.
1. Size a Slimline Tank to Your Roof Area
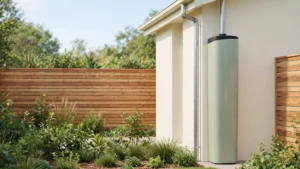
The smartest place to start is a simple calculation, not a shopping trip. Measure your roof catchment area and multiply it by your average rainfall to estimate how much water each storm can deliver. A slimline tank sized to that number will fill reliably without overflowing every time it rains, and it will hold enough to carry your garden through dry spells.
Slimline tanks fit neatly against a house wall or a fence, which makes them ideal for narrow side yards where a round tank would never fit. Choose a tank with a light colored finish to keep stored water cool, and place it on a level concrete or paver base near a downspout. When the tank size matches the roof, the whole system works with very little attention from you.
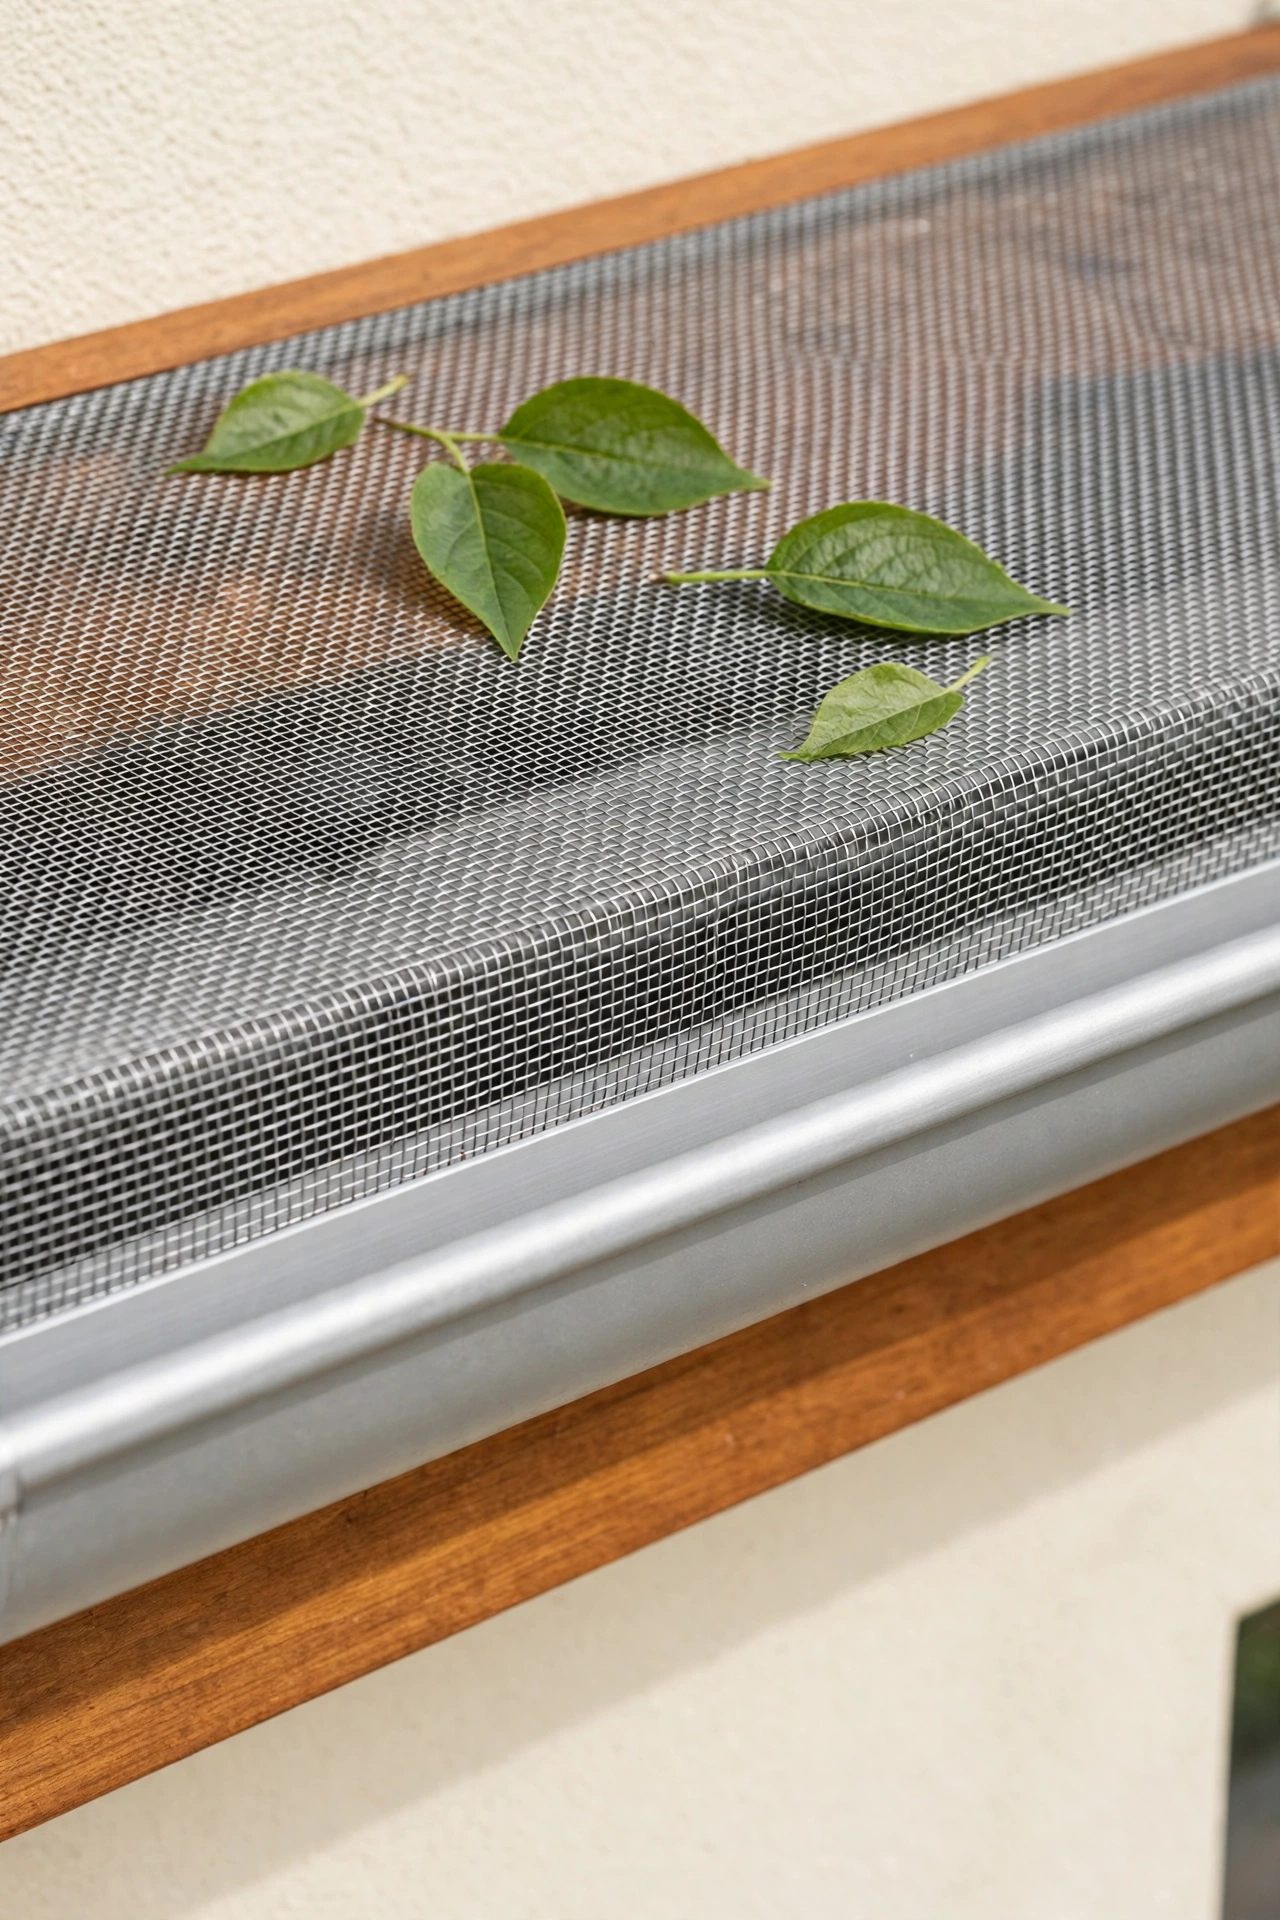
2. Screen Every Gutter With a Leaf Guard
Clean water starts at the roof, and a leaf guard across your gutters is the first line of defense. Mesh screens or slotted covers keep leaves, twigs, and roof debris out of the gutter channel while letting rain flow through freely. With less debris entering the system, your tank stays cleaner and your filters last far longer.
Check the guards twice a year, once after autumn leaf fall and once before the storm season, and brush off anything that has settled on top. A gutter system that runs clear will deliver a steady stream to the downspout even during heavy rain. This small upgrade protects every part of the harvesting system downstream.
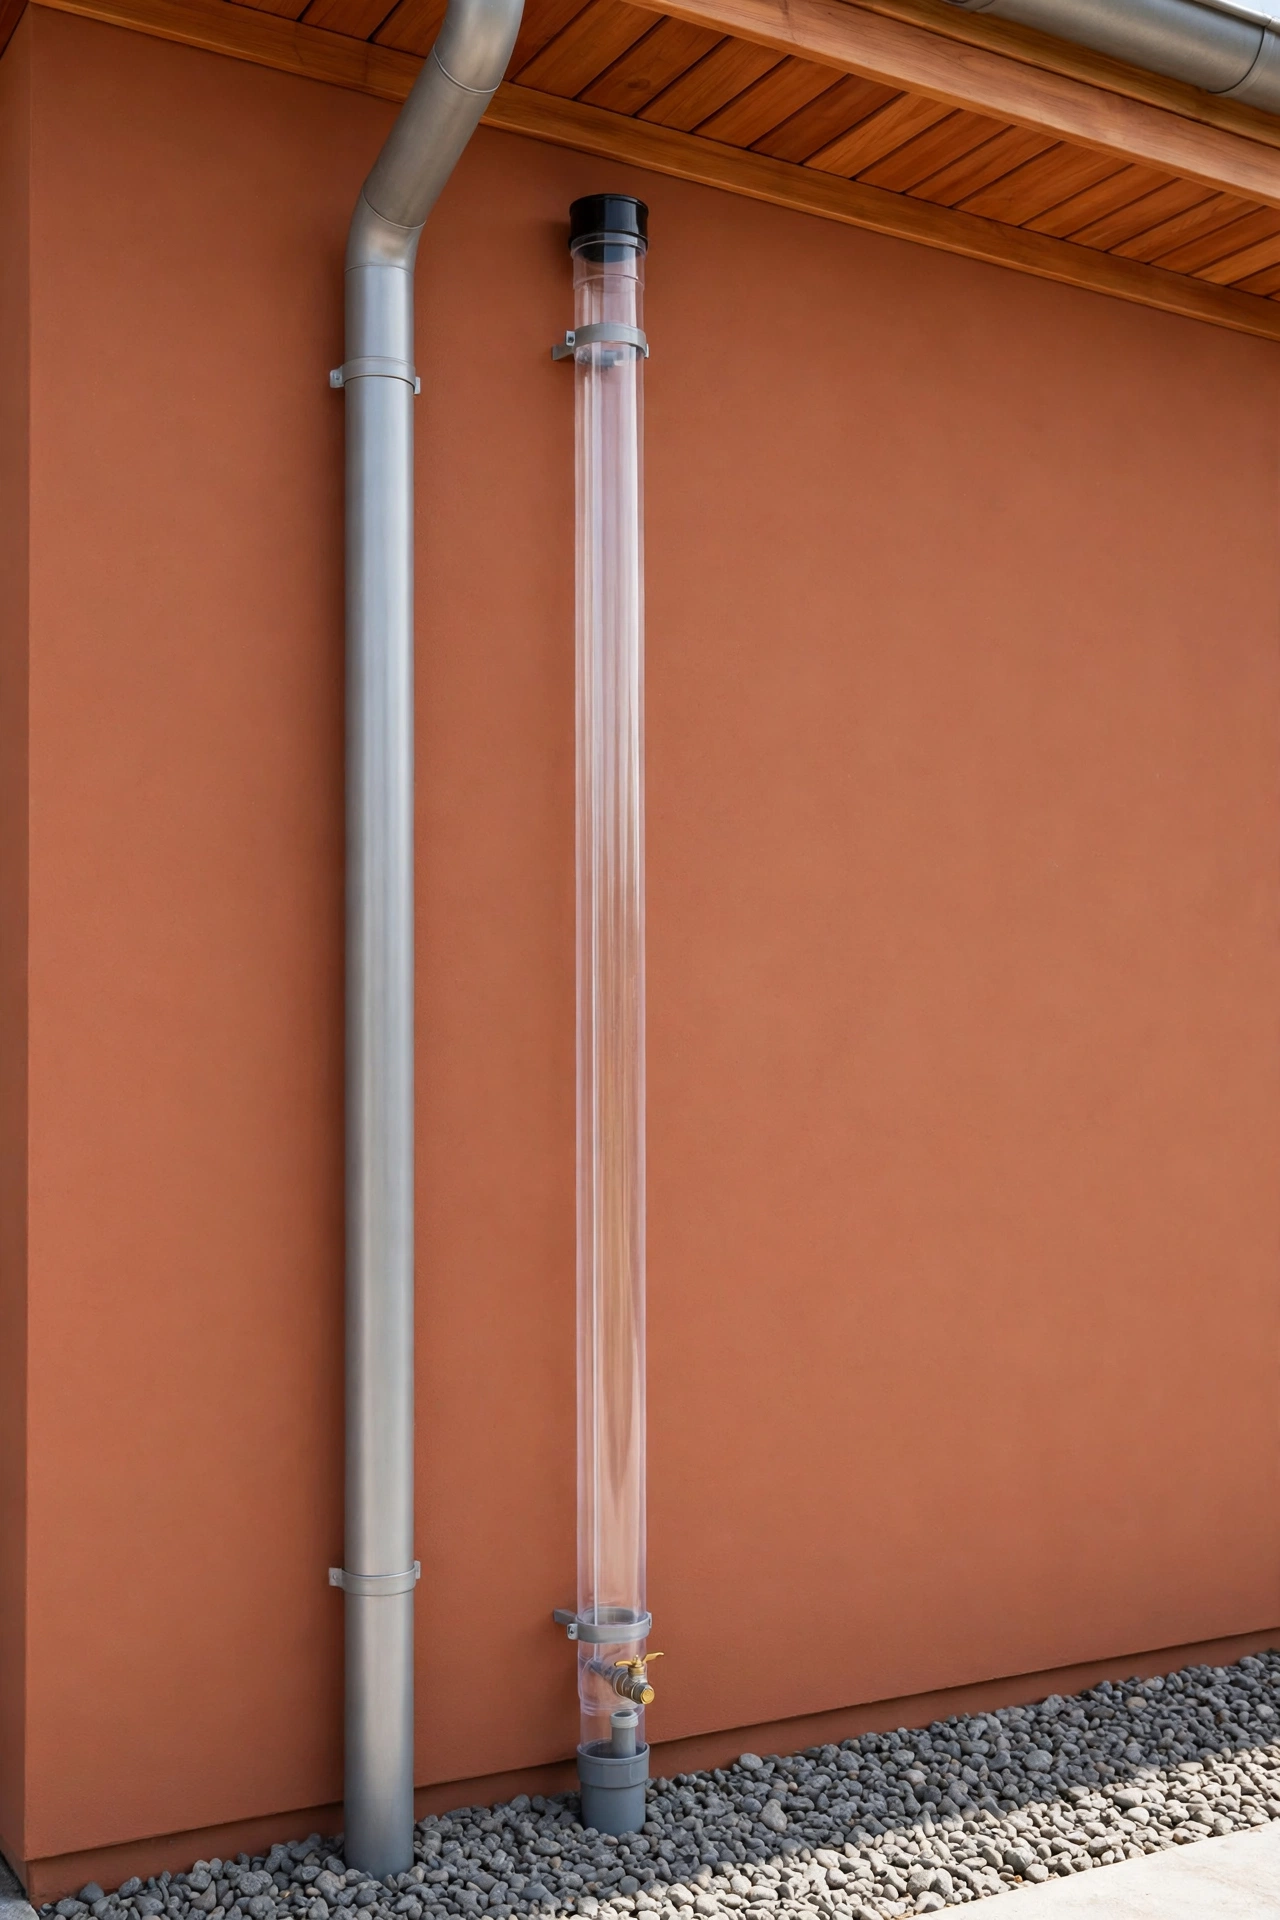
3. Add a First-Flush Diverter to the Downspout
The first wash of rain off a roof carries dust, bird droppings, and fine grit, and a first-flush diverter keeps that dirty water out of your tank. The diverter is a vertical pipe beside the downspout that captures the first few gallons of each storm, then seals itself so the cleaner water behind it flows on into storage. It is a simple device with no moving parts to break.
Size the diverter chamber to your roof area, and fit it with a slow release valve at the bottom so it empties itself between storms and resets on its own. A clear section of pipe lets you see the water level at a glance. With a first-flush diverter in place, the water reaching your tank is noticeably clearer from the very first storm.
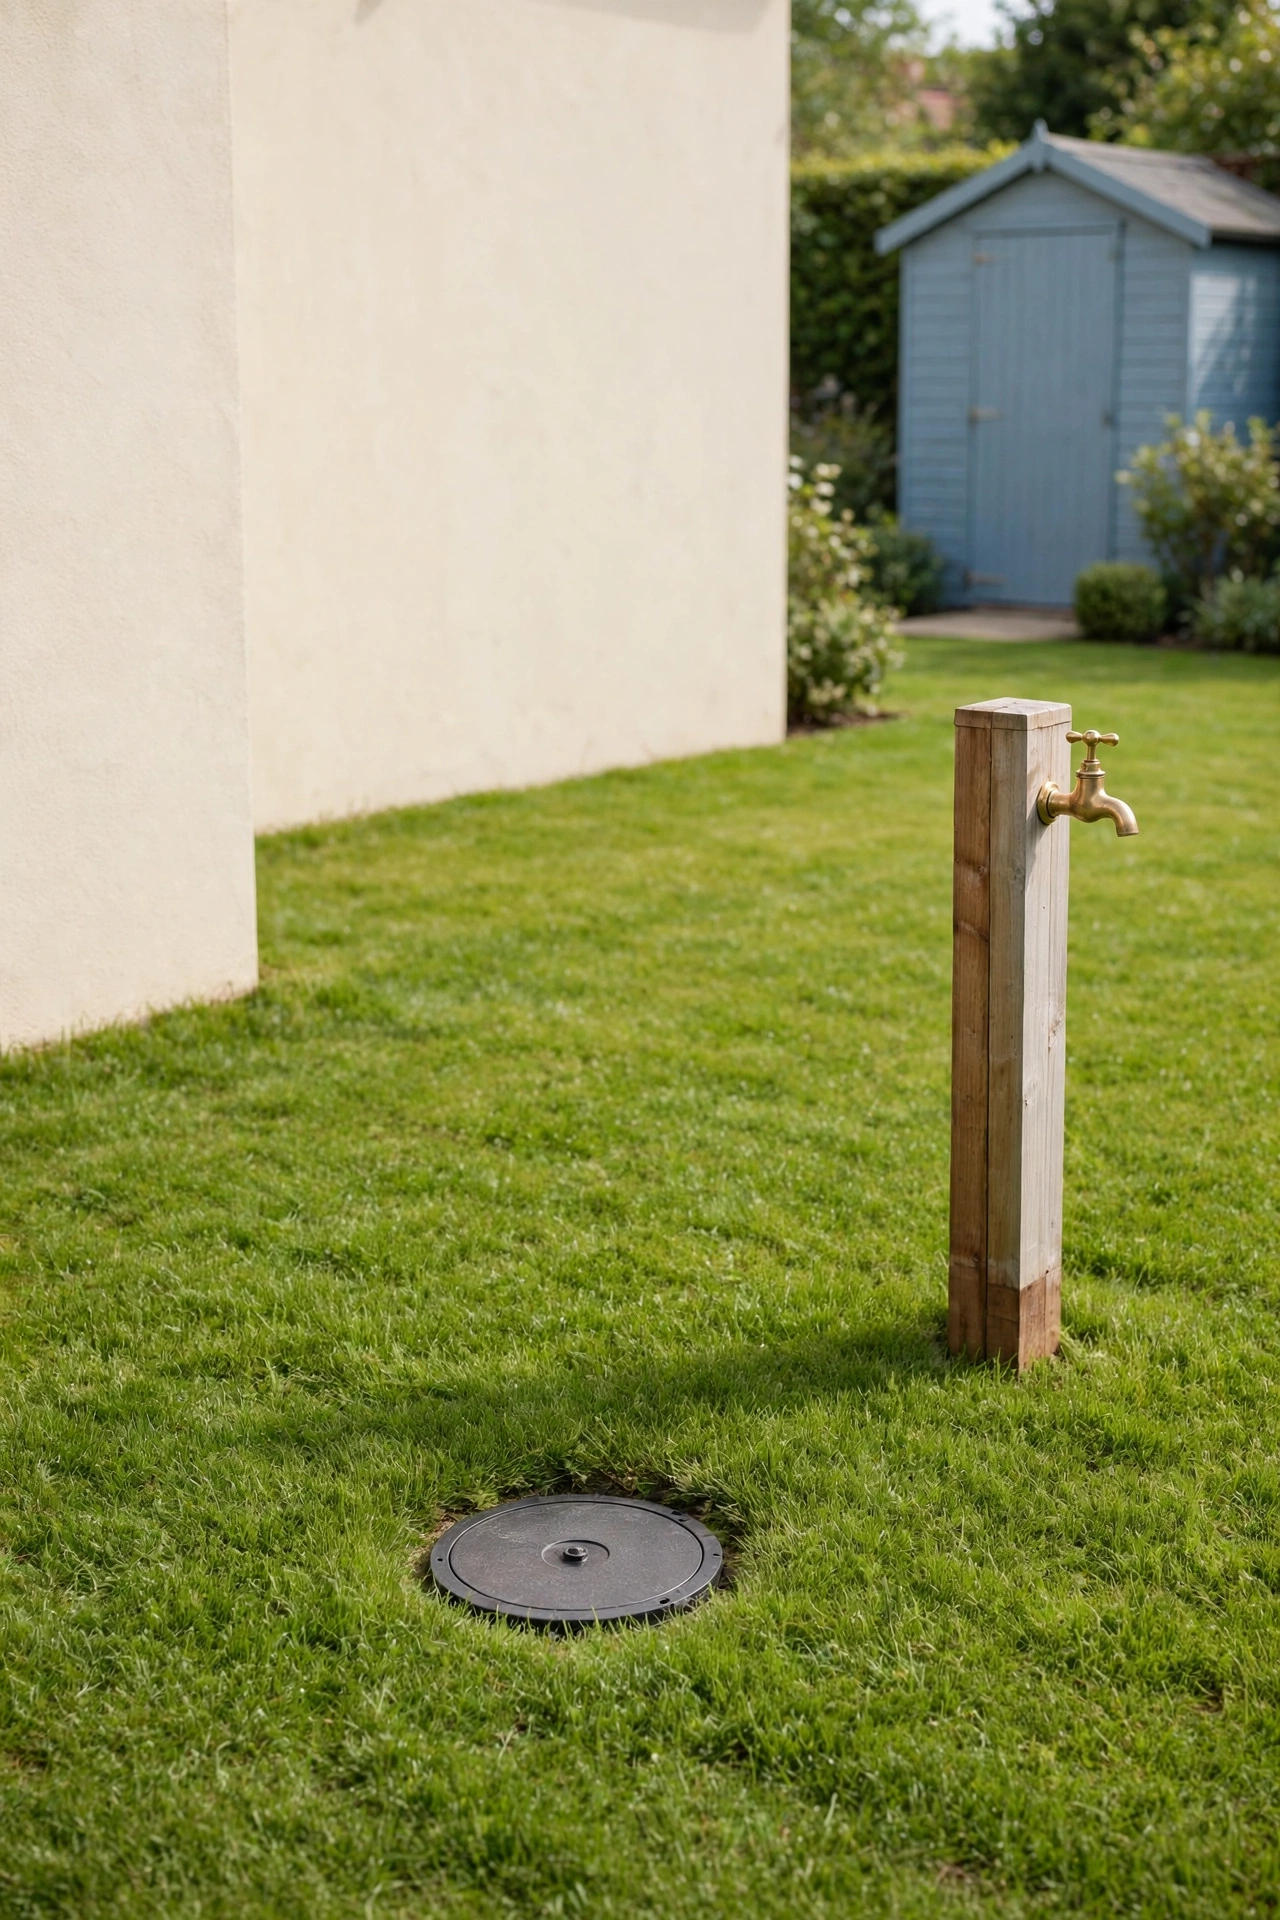
4. Bury an Underground Cistern Under the Lawn
When above ground space is limited, an underground cistern stores thousands of gallons out of sight. The tank sits below the lawn or driveway, fed by a buried pipe from the downspout, with only a small inspection lid visible at the surface. Your garden keeps every inch of its growing space while a large reserve waits below.
Underground storage keeps water cool and dark, which slows algae growth far better than a sunlit tank. A submersible pump inside the cistern delivers water to garden taps or irrigation lines on demand. Professional installation is worth the cost here, since proper bedding, backfill, and overflow routing make the difference between a system that lasts decades and one that causes trouble.
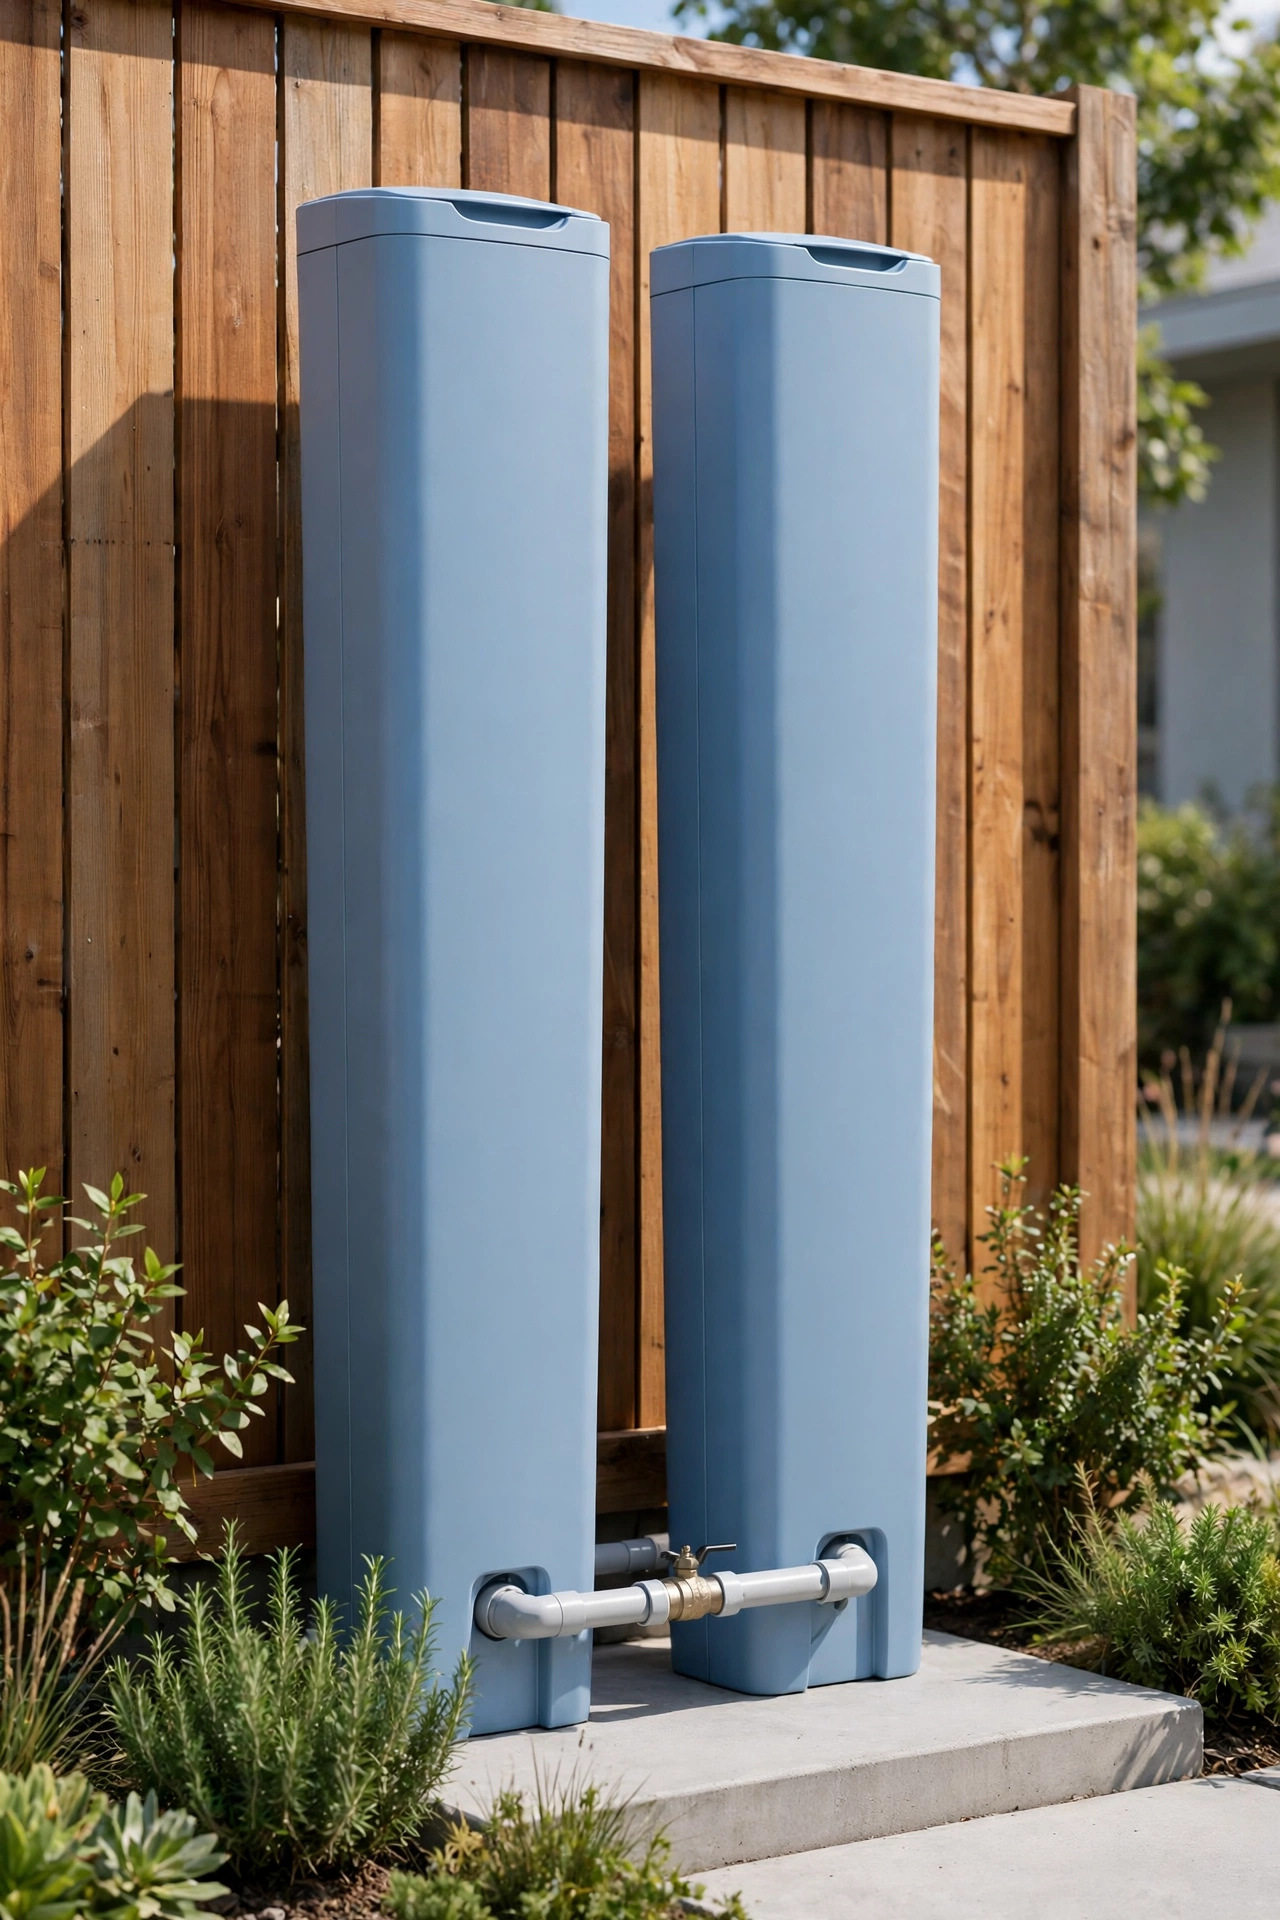
5. Link Two Slimline Tanks in Series
Two slimline tanks connected in series give you double the storage without needing a wider footprint. Rainwater fills the first tank, then flows through a balancing pipe into the second once the first reaches capacity. Both tanks drain at the same rate, so the system behaves like one large tank split across two slim profiles.
Run the connecting pipe near the base of both tanks with a shut-off valve in the middle, so you can isolate one tank for cleaning while the other keeps working. Match the tank heights and keep both on the same level base for even filling. This linked arrangement is an easy way to grow storage capacity as your garden grows.
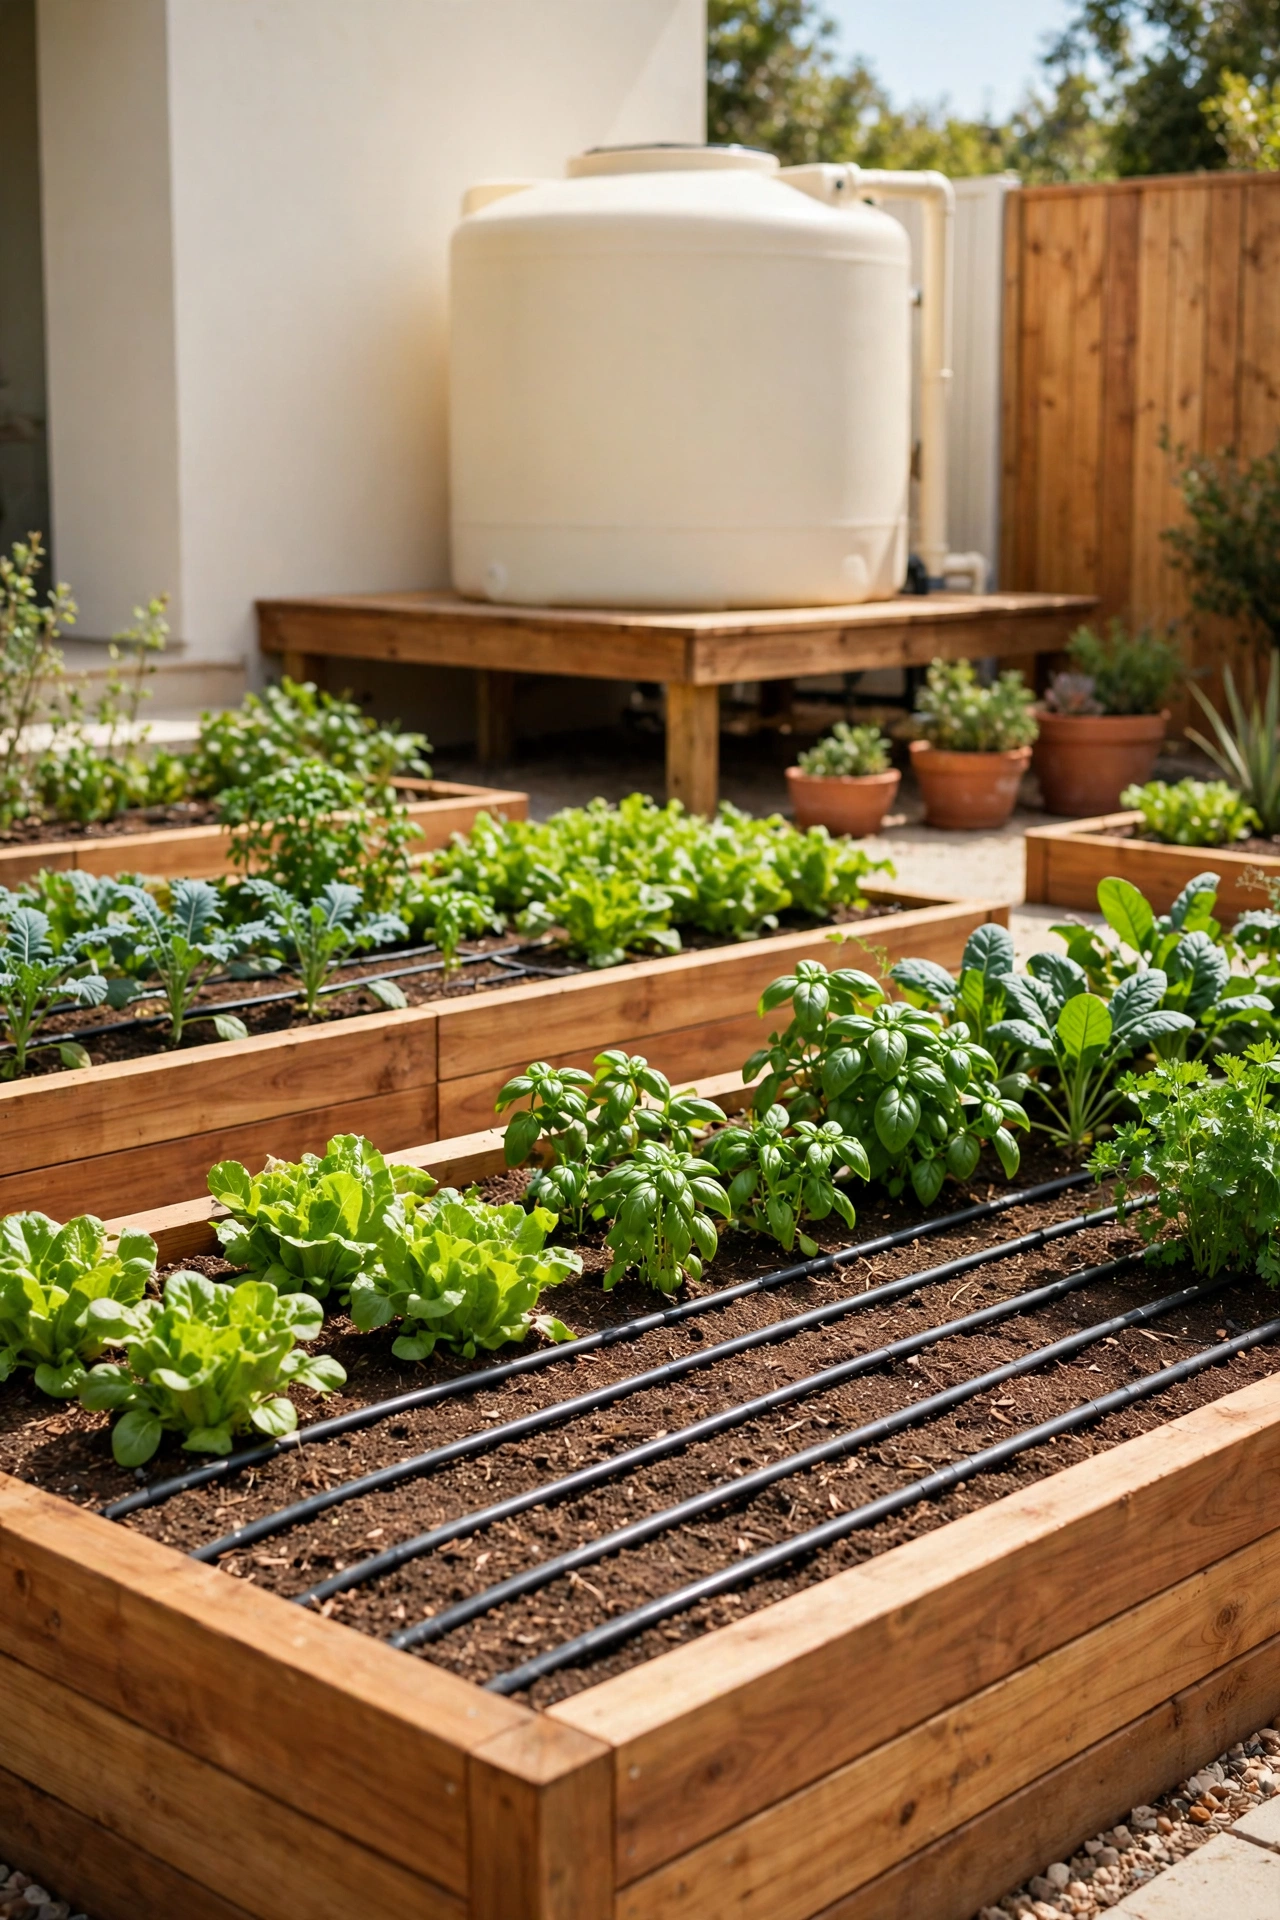
6. Feed a Gravity Drip Irrigation Network
A tank raised on a sturdy platform can feed an entire drip irrigation network with no pump at all. Gravity pushes water through main lines and drip emitters at a slow, steady rate that soaks soil deeply without waste. Elevating the tank by just two or three feet creates enough pressure for short runs of drip line across nearby beds.
Lay the drip lines under mulch to slow evaporation and keep the emitters protected from sun damage. A simple inline filter before the main line stops fine sediment from clogging the emitters. For beds that need even watering, these raised garden bed layout ideas pair beautifully with a gravity fed drip system, since each bed can have its own shut-off valve and watering schedule.
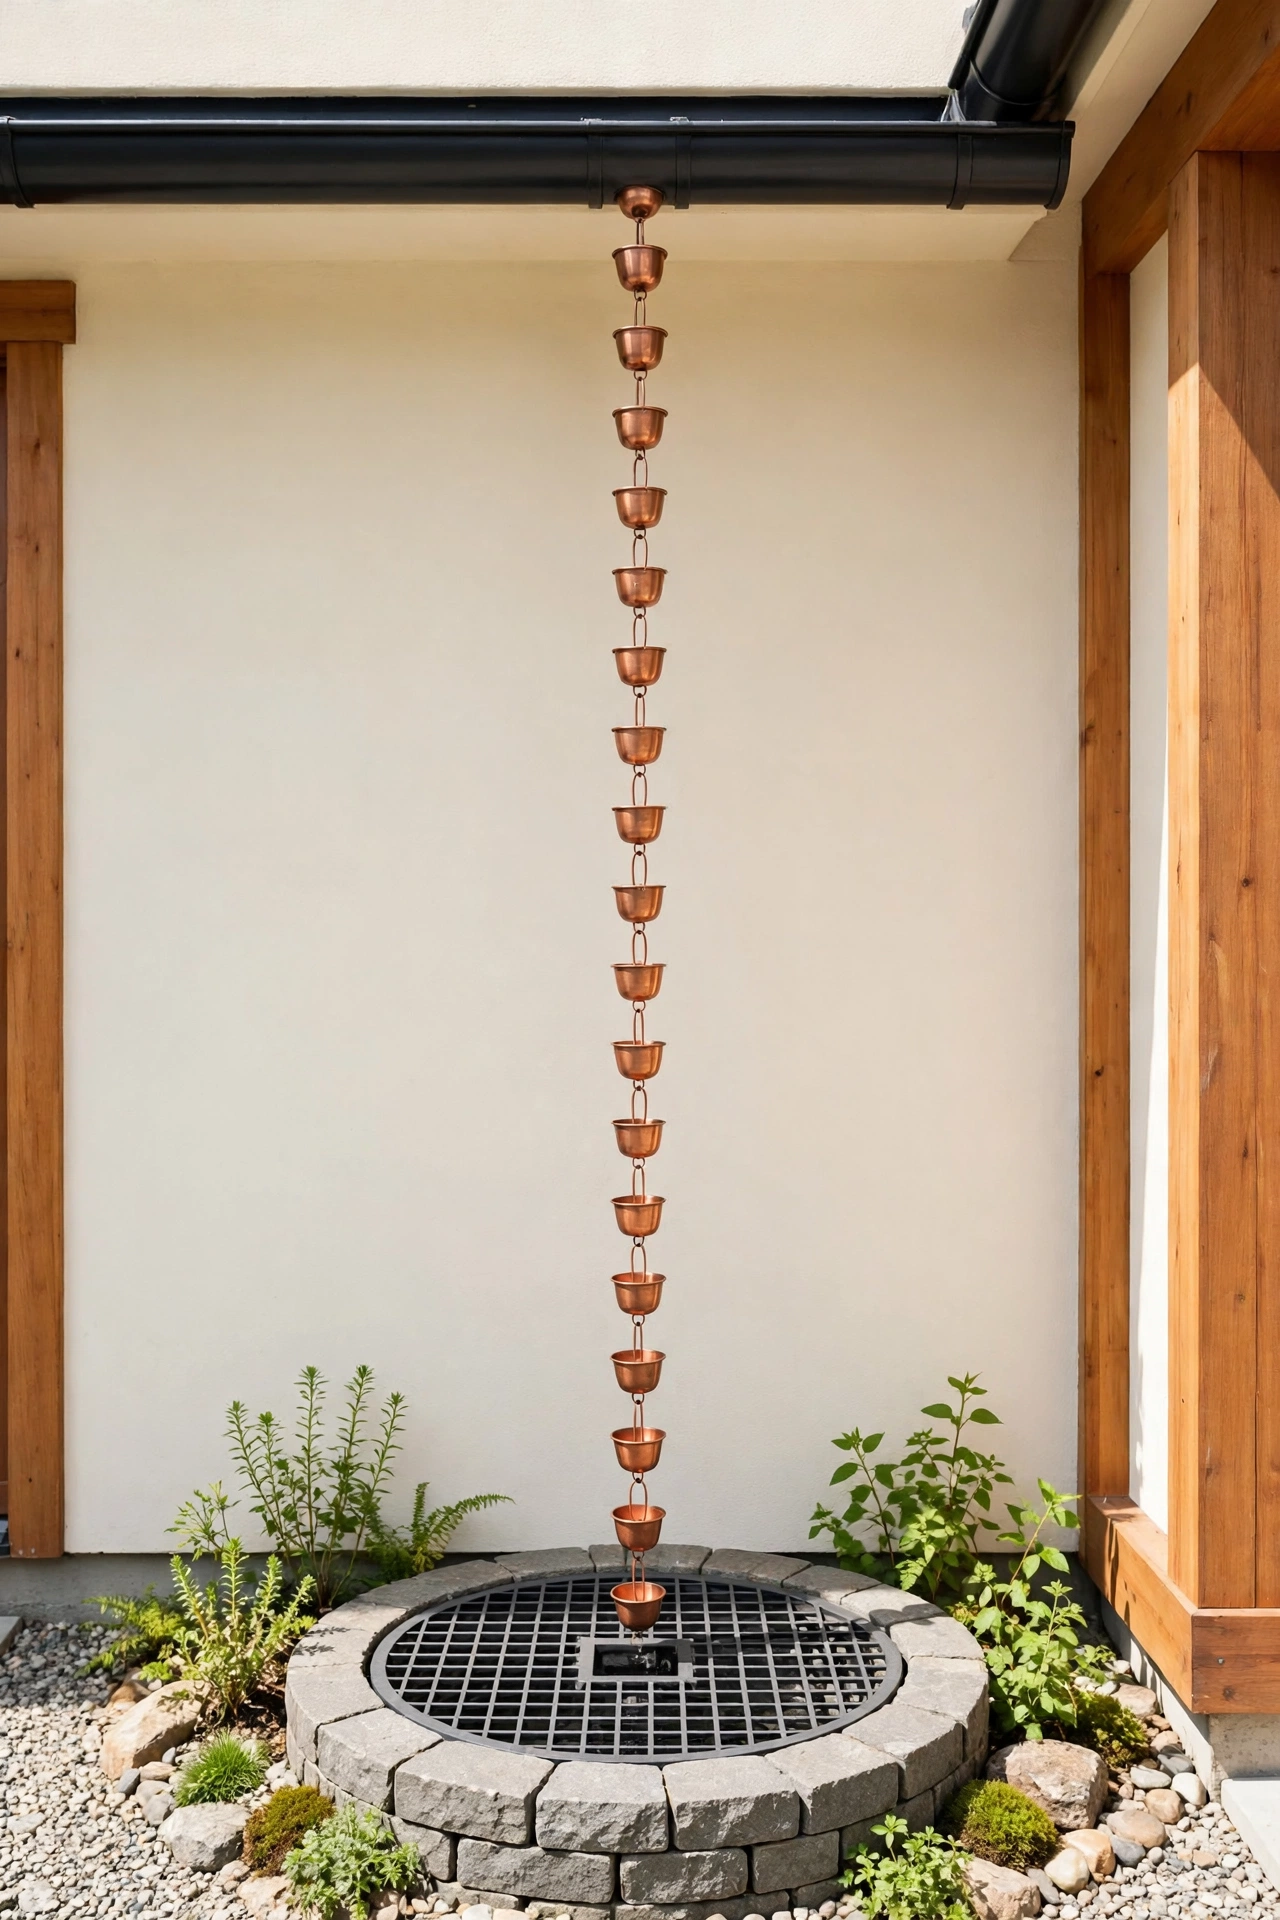
7. Hang a Rain Chain Into a Collection Basin
A rain chain replaces a plain downspout with a series of linked cups or rings that guide water down in a gentle, visible stream. The chain slows the falling water and turns a functional downspout into a garden feature worth watching during a storm. At the base, a wide collection basin catches the flow and directs it into a storage tank or a buried pipe.
Choose a basin with a removable grate so leaves can be lifted out easily, and set it on a bed of gravel for stable drainage. The basin also acts as a settling point where heavy grit drops out before water moves on. A rain chain suits front gardens and entry areas where you want the harvesting system to look beautiful as well as work hard.
8. Install a Pump and Pressure System for Hose Use
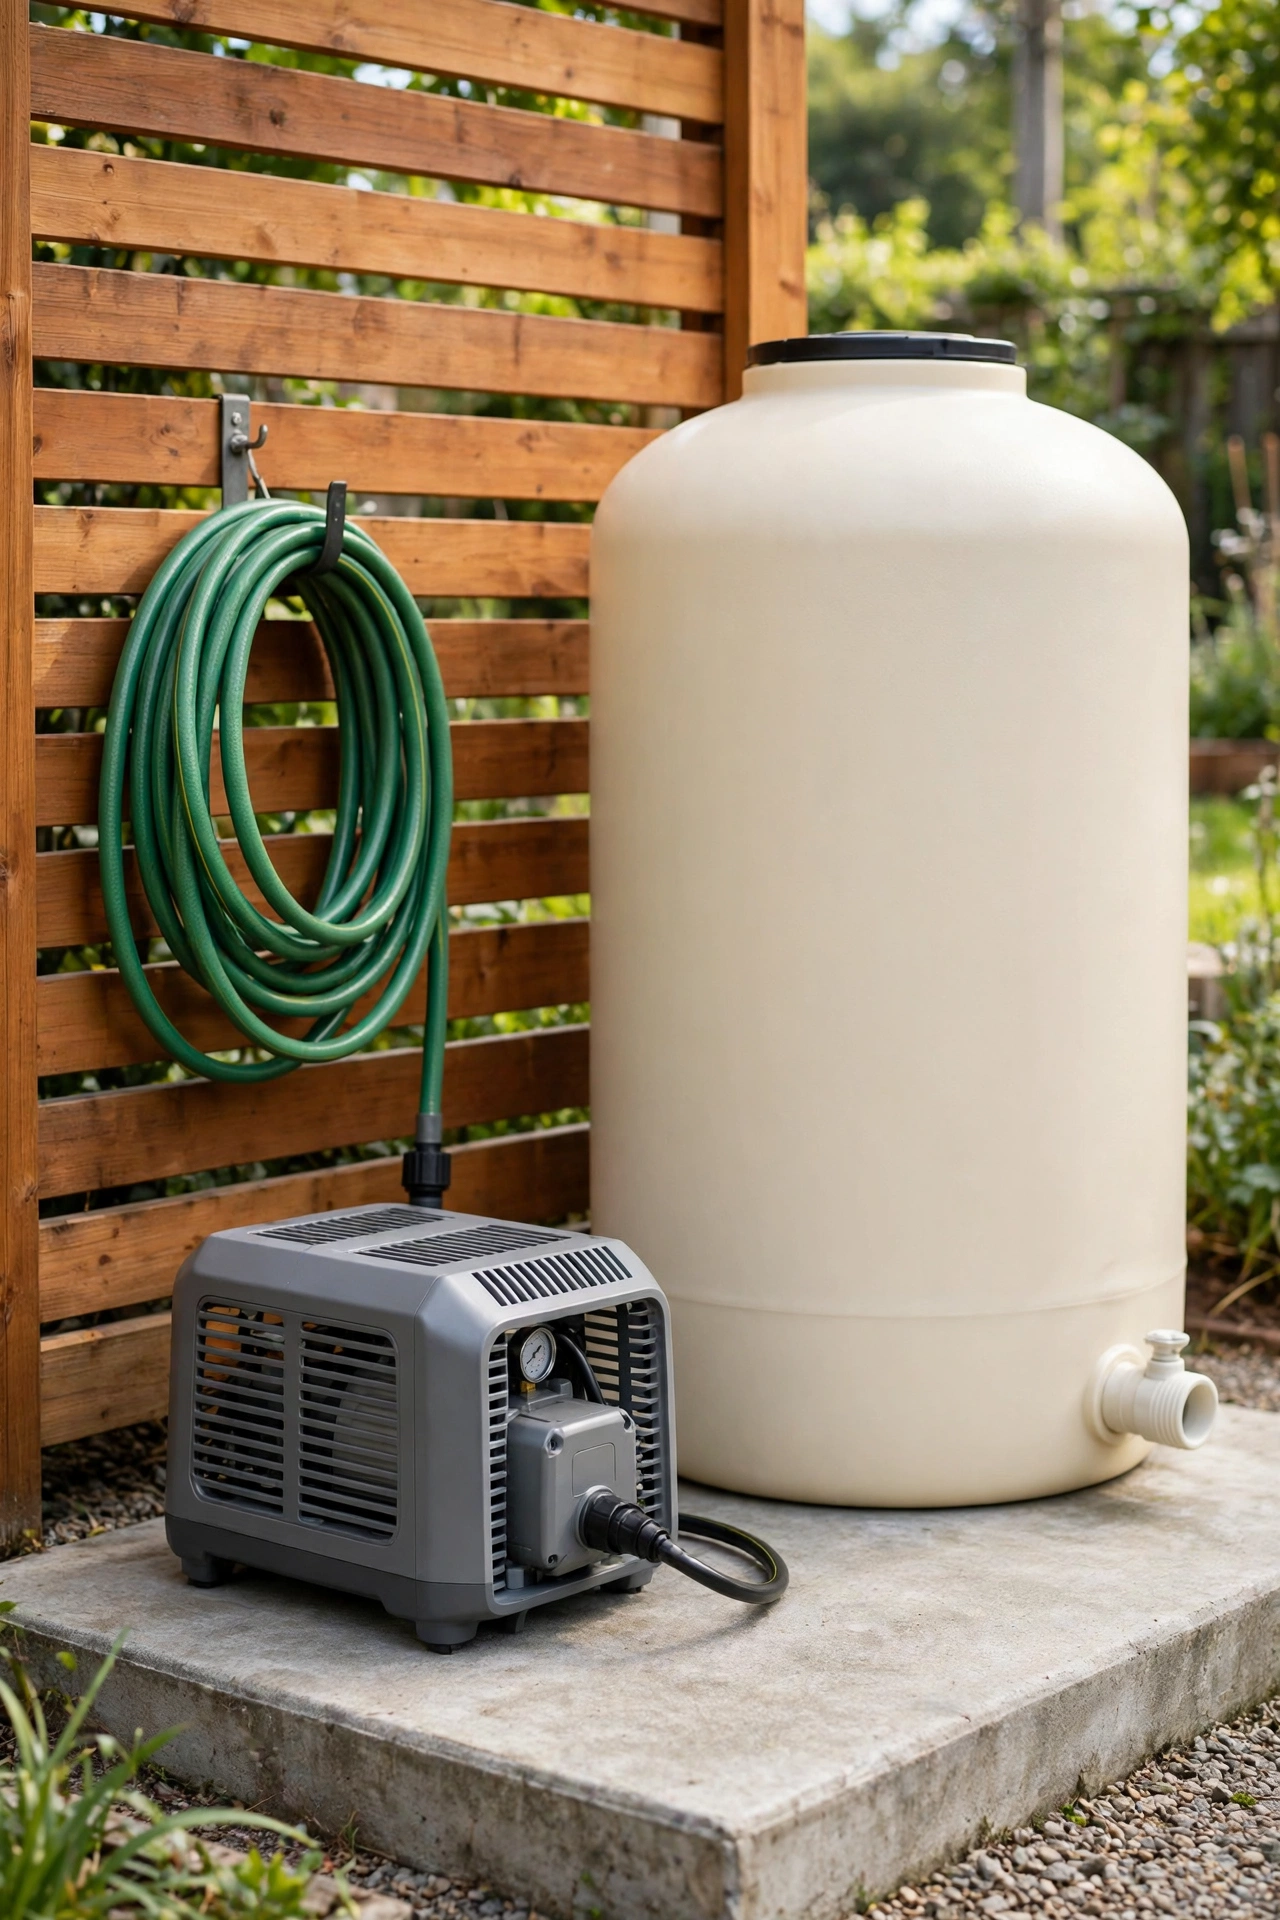
A small pressure pump turns stored rainwater into a proper hose supply with enough force for sprinklers, spray nozzles, and long hose runs. The pump sits beside the tank on a weatherproof pad and switches on automatically when you open the tap. A pressure tank smooths out cycling so the pump does not click on and off with every short burst.
Fit a dry run protector so the pump shuts down safely if the tank level drops too low. Mount the pump on rubber feet inside a ventilated cover to keep noise down and weather out. With a pump and pressure system in place, rainwater becomes as convenient as mains water for every garden task.
9. Filter With a Multi-Stage Sediment and Carbon Unit
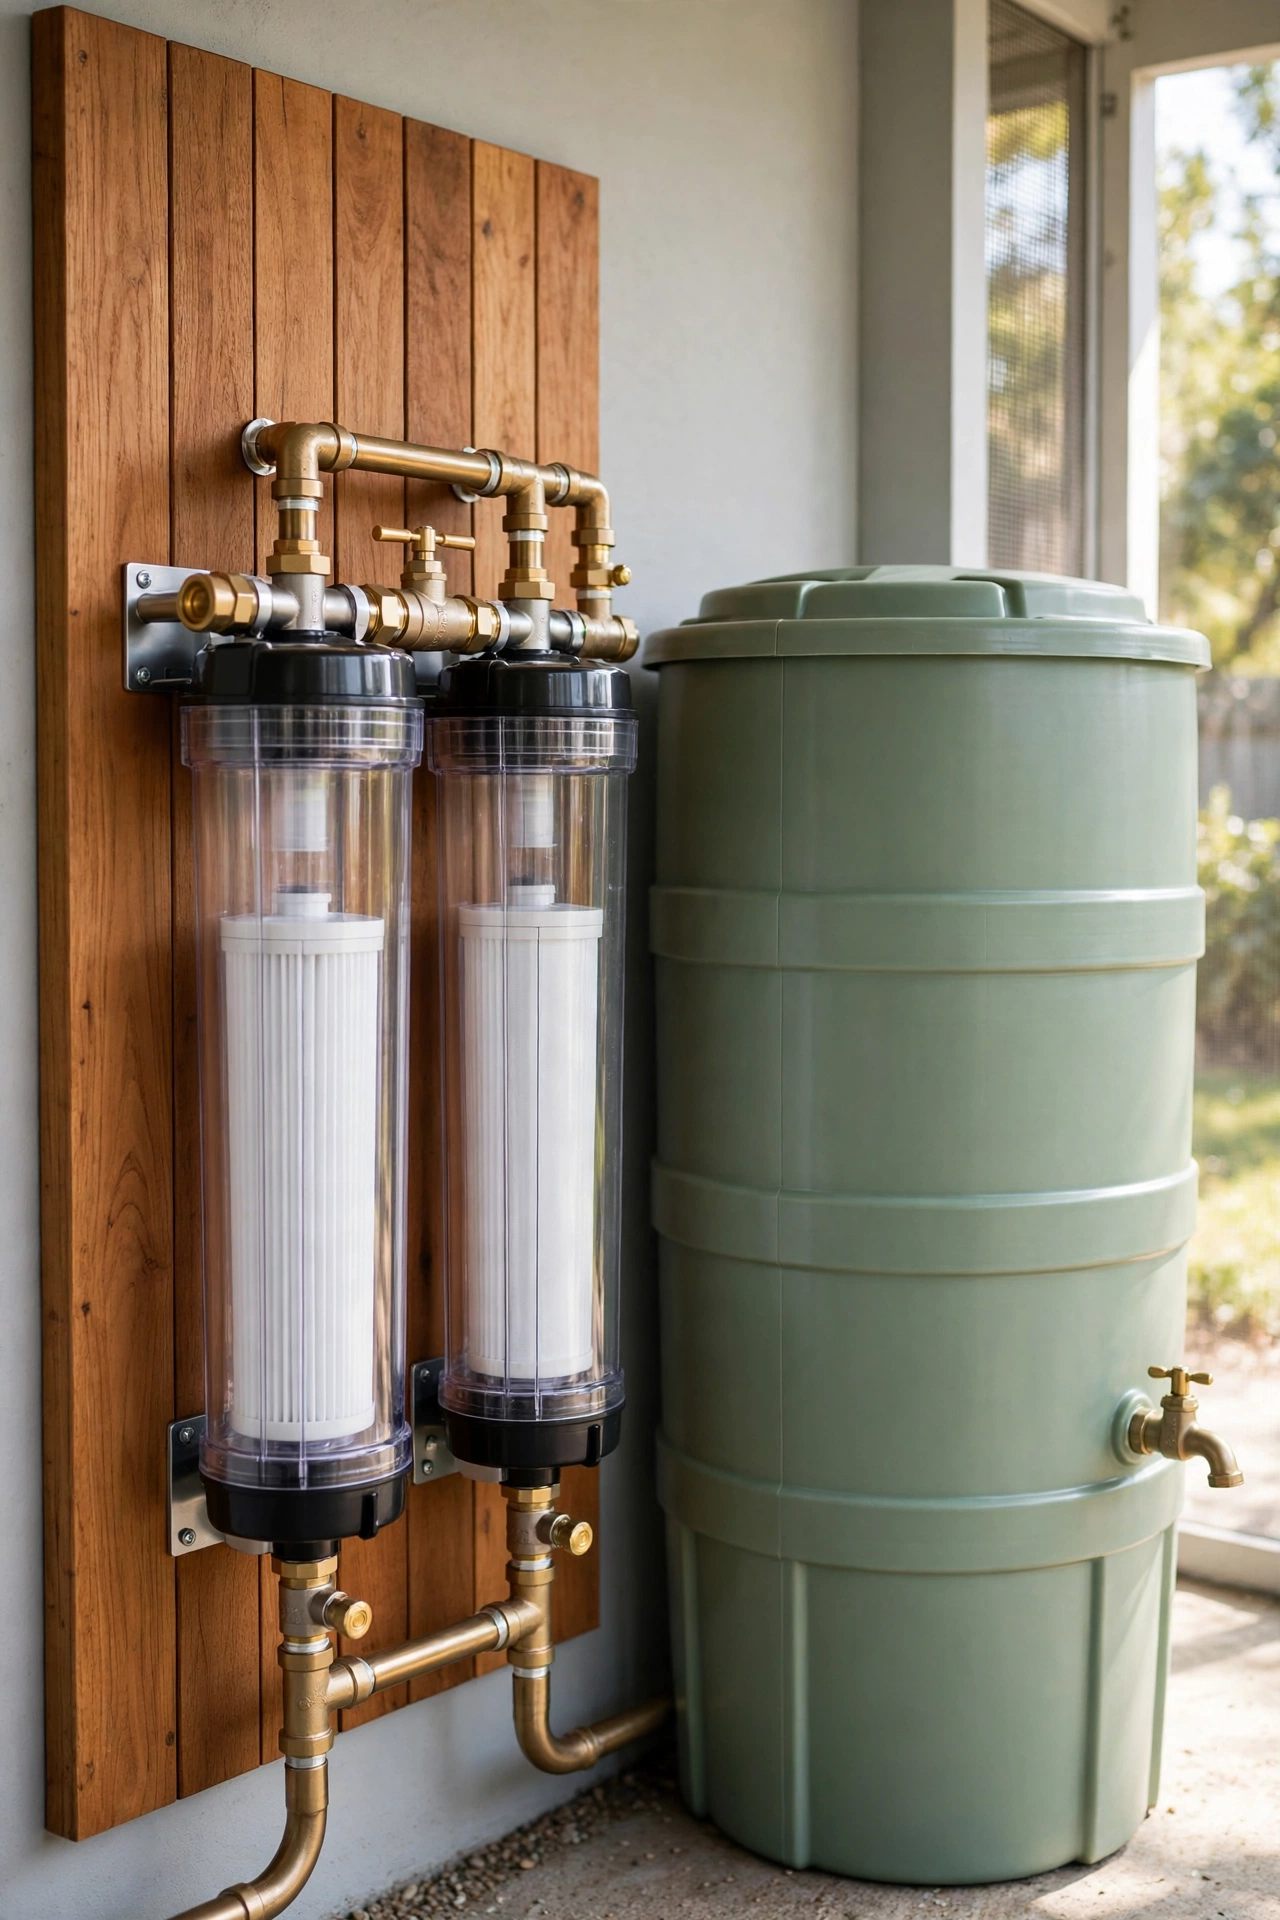
A multi-stage filter unit polishes stored rainwater before it reaches your garden taps and irrigation lines. The first stage catches sand and fine sediment in a washable mesh cartridge, while the second stage runs water through activated carbon that removes odors and organic color. The result is clear, fresh smelling water that will not stain leaves or clog fine emitters.
Mount the filter housing on the tank wall or a nearby post at a comfortable height for cartridge changes. Clear housings let you see when a cartridge needs attention, and a bypass valve lets you service the unit without draining the system. Clean filtered water also extends the life of pumps, valves, and drip lines throughout the garden.
10. Build an Overflow Channel to a Shallow Swale
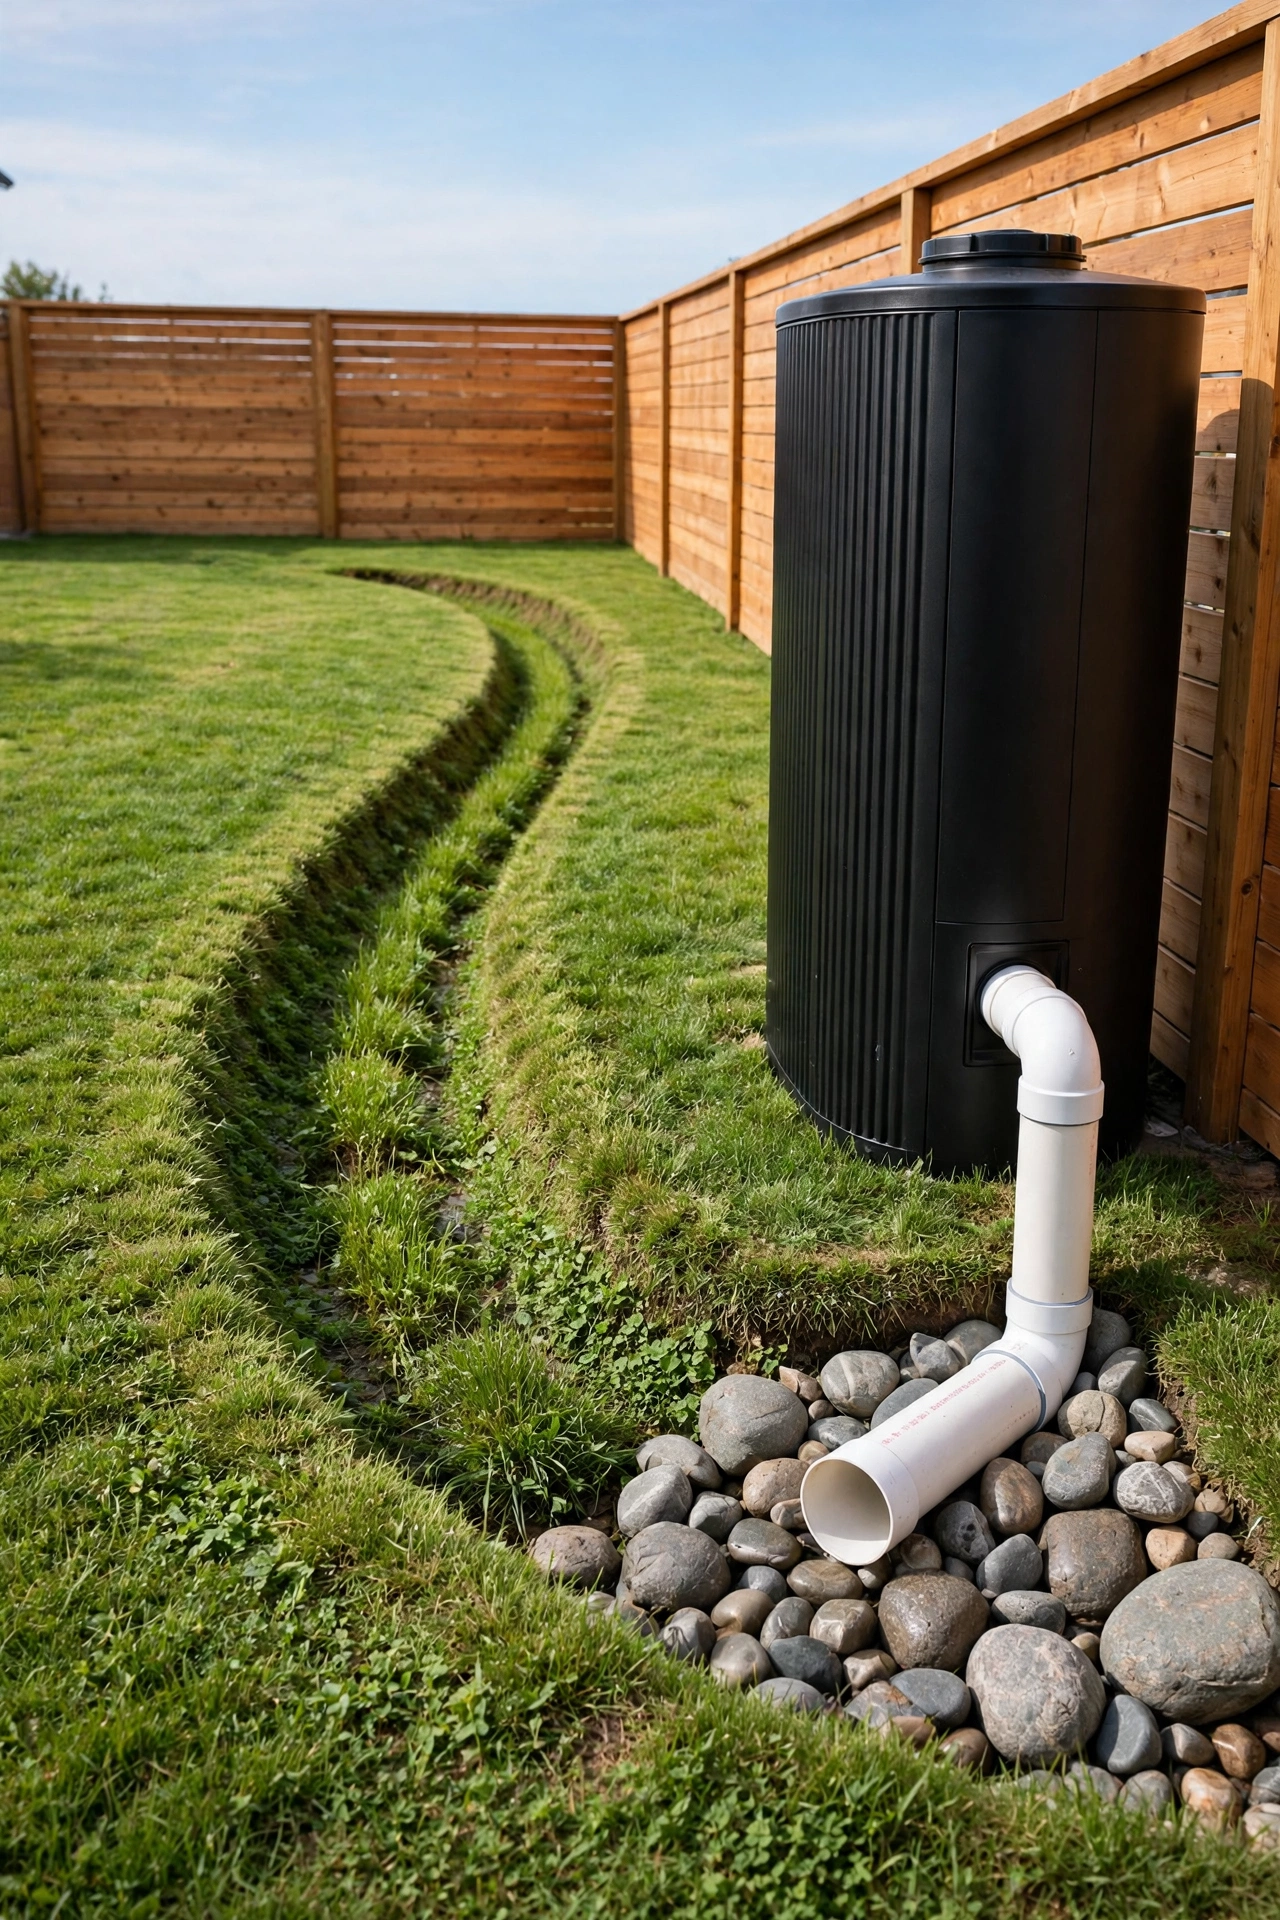
Every harvesting system needs a safe path for excess water during a heavy storm, and a shallow swale is the most garden friendly answer. The overflow pipe from the tank releases into a gently sloped, grass lined channel that carries surplus water slowly across the yard. The swale spreads the flow out so it soaks in instead of pooling or eroding soil.
Line the swale with river rock at the outlet point to stop scouring, and grade the channel so water moves away from house foundations and paths. A well built swale handles the biggest storms without drama and keeps the tank area dry. For a full plan that ties overflow into the wider yard, these backyard drainage landscaping ideas show how swales and channels can look like intentional garden features rather than afterthoughts.
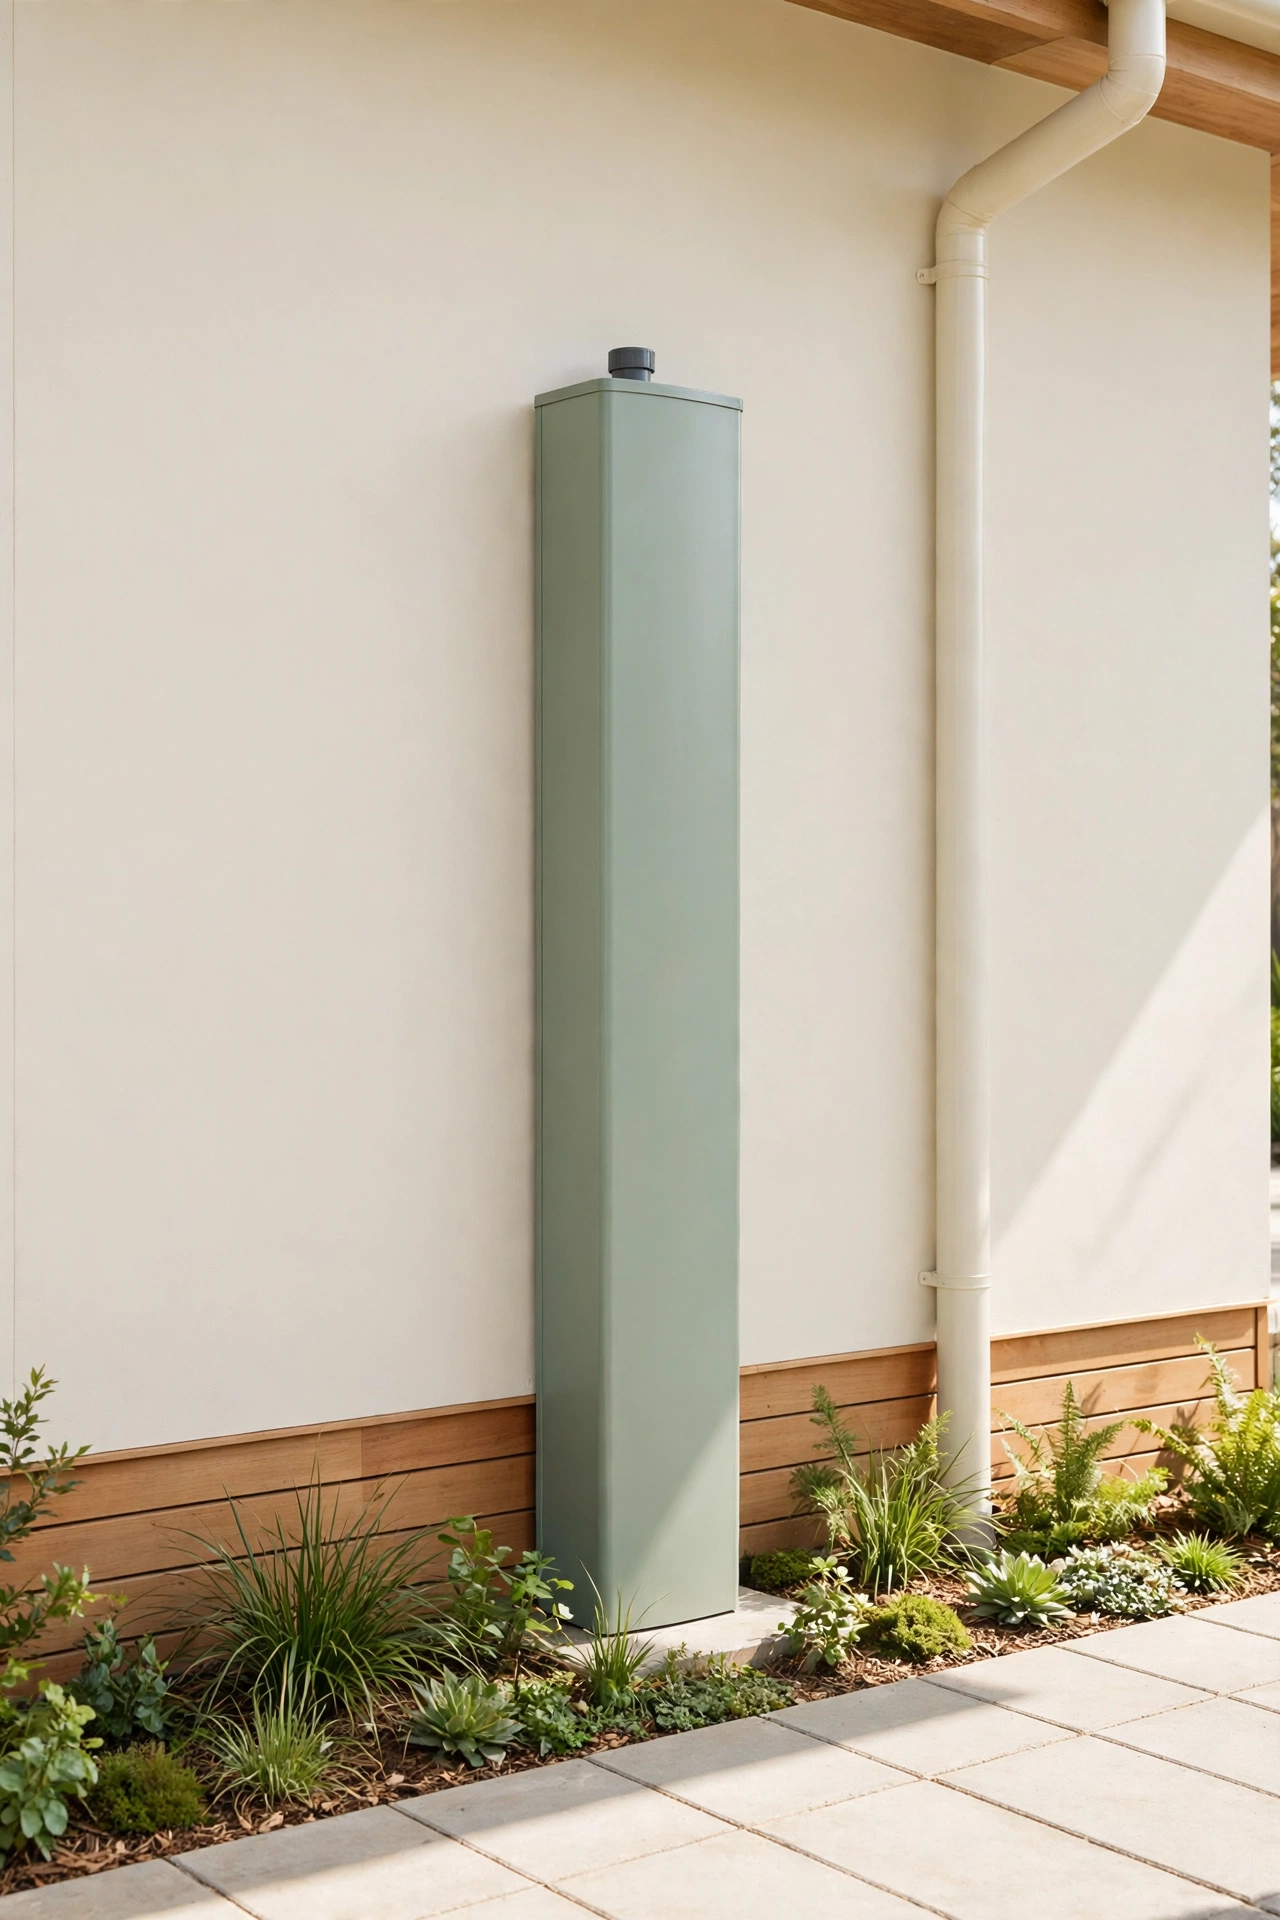
11. Mount a Flat Wall Tank Behind the Garage
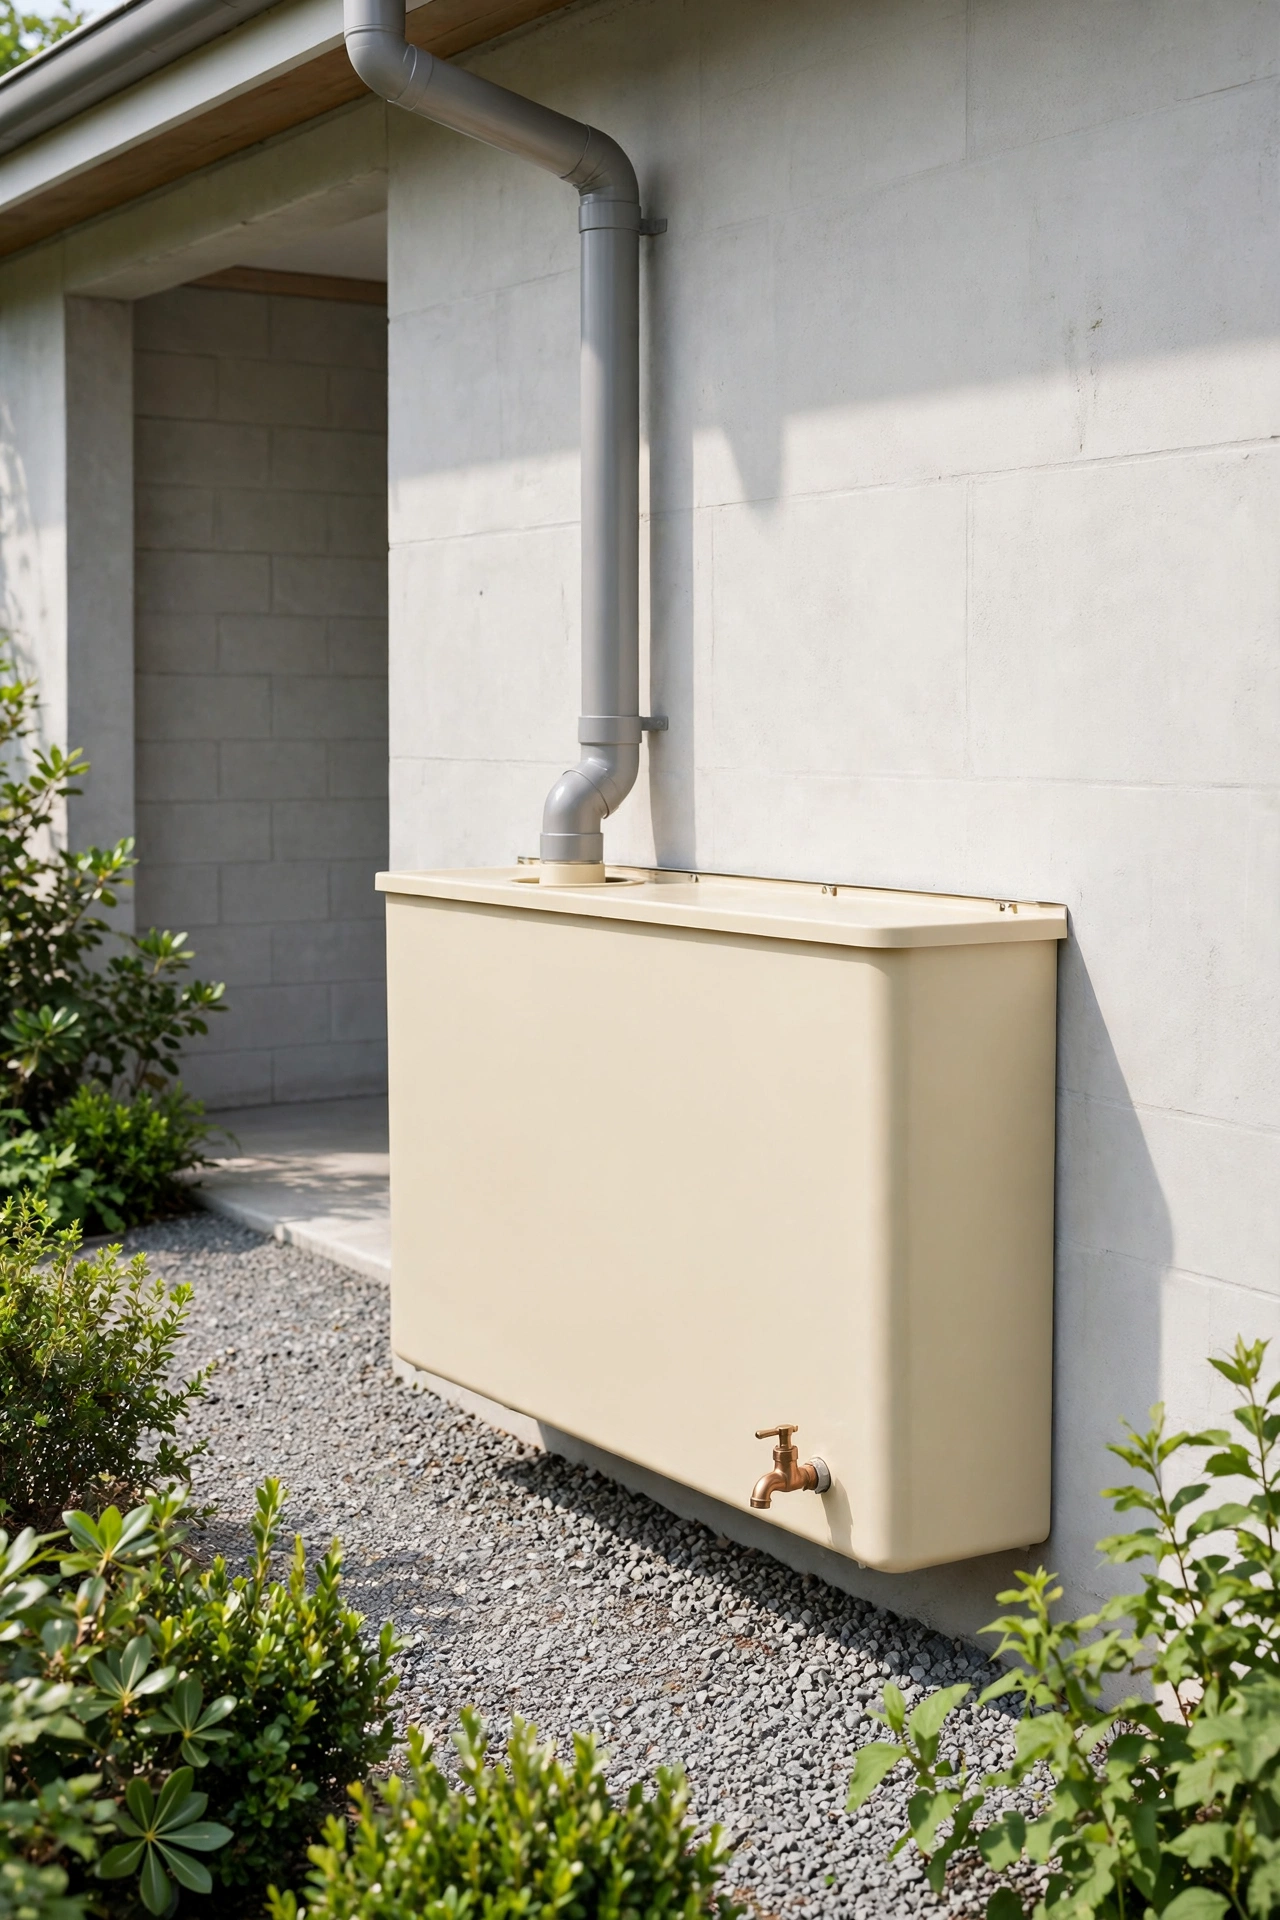
A flat wall tank hugs the back of a garage or shed where a standard tank would block a walkway. These shallow tanks hold a surprising volume because they spread it across a wide, tall panel, and they can be painted or clad to match the building. A narrow gap between tank and wall keeps air moving and prevents damp.
Plumb the garage roof downspout directly into the top of the tank and fit a tap at the base for watering nearby beds. Because the tank sits close to the building, pipe runs stay short and the system loses very little water to evaporation or leaks. This is an ideal harvest point for gardens that sit behind the house.
12. Harvest From a Greenhouse Roof
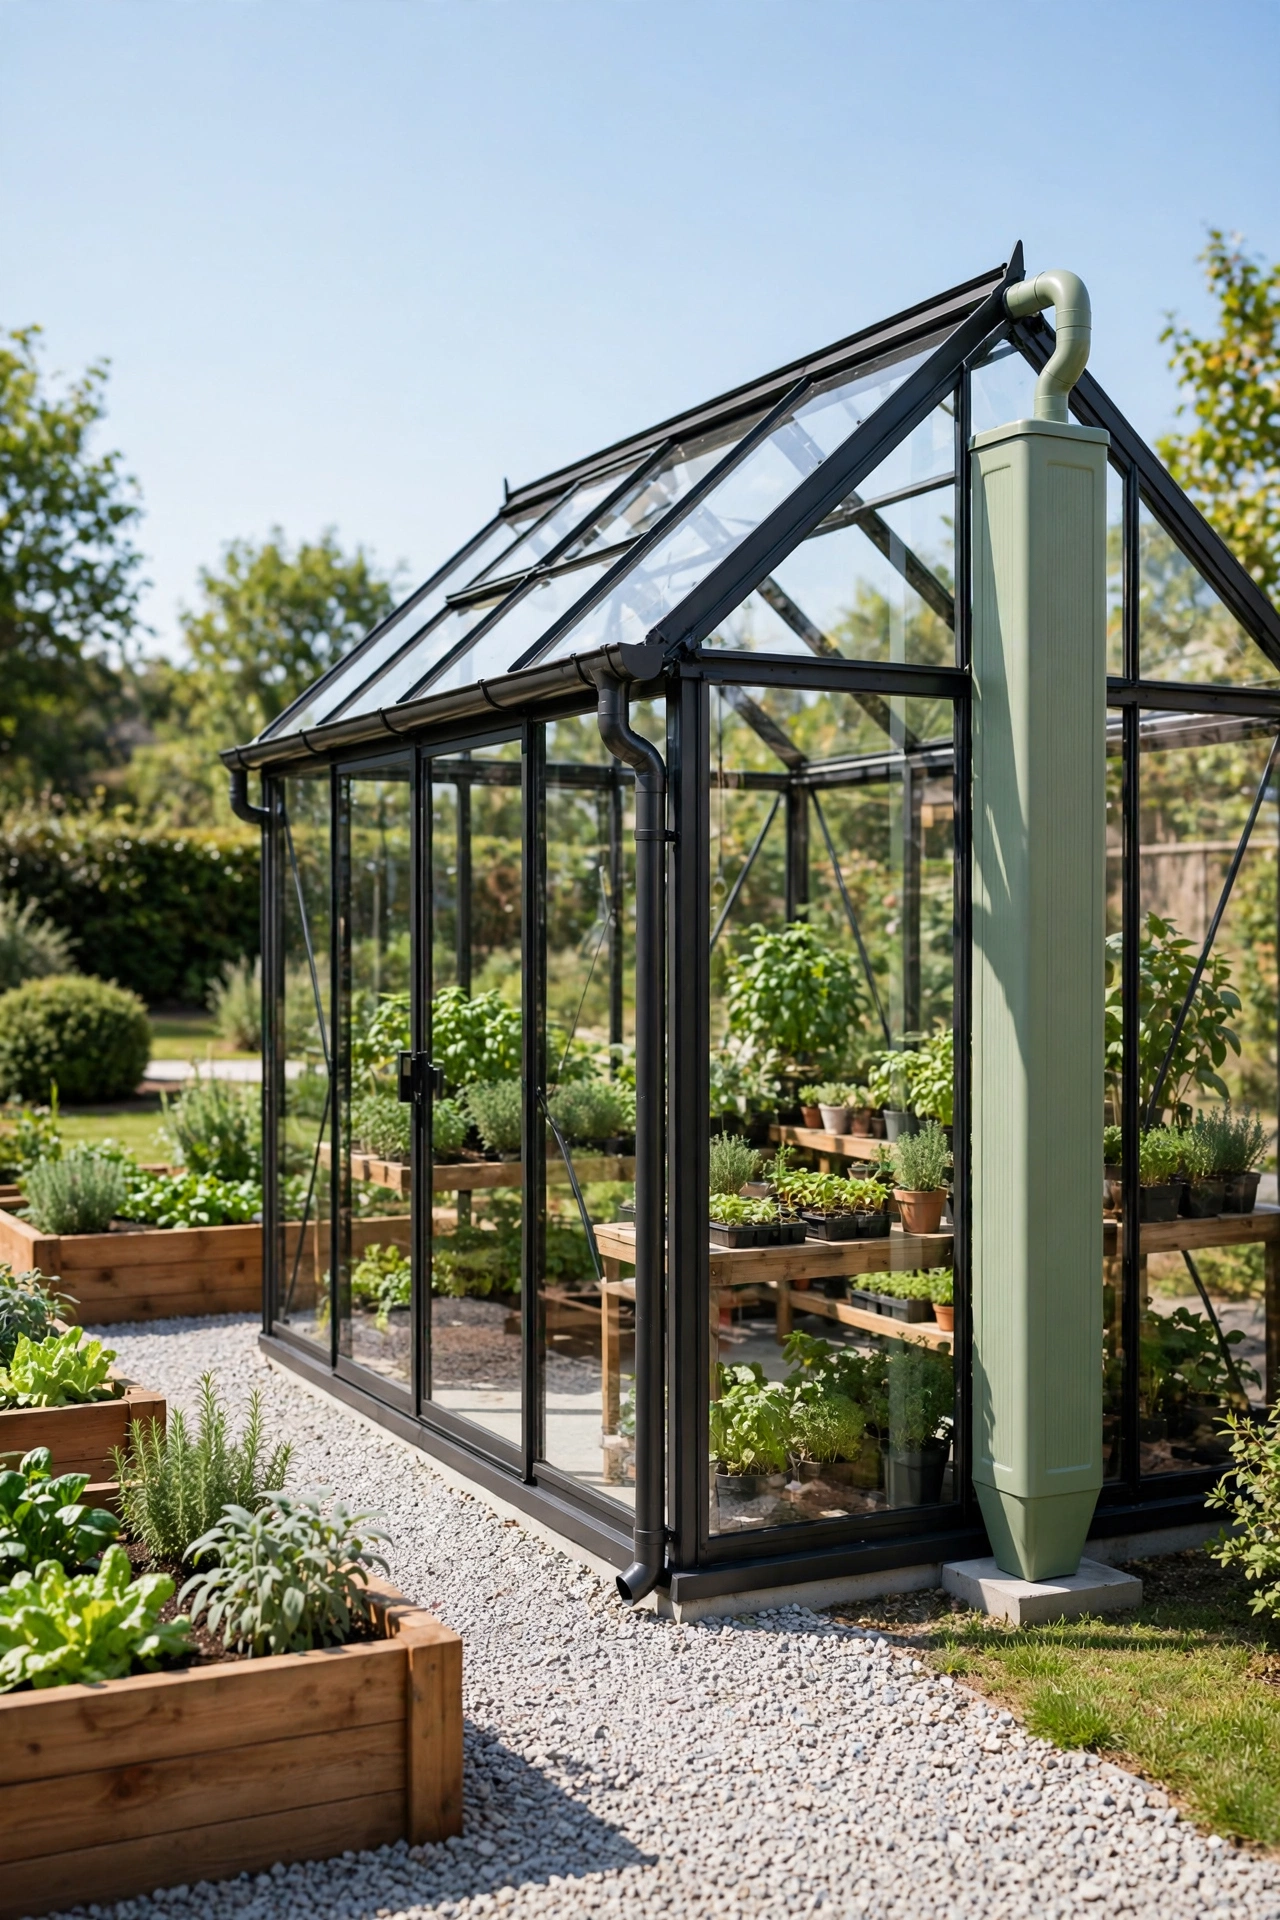
A greenhouse roof is a perfect catchment surface because it sits right above the plants that need the water. Gutters along both eaves collect rain and feed it into a slim tank at the gable end, giving you a dedicated supply for the beds inside. Short pipe runs mean less water loss and simpler plumbing than a house roof system.
Inside the greenhouse, run a header pipe along the ridge with drop lines to each bed, or connect the tank to a drip system on a timer. The stored water stays at greenhouse temperature, which seedlings prefer over cold mains water. If you are planning the structure itself, these backyard greenhouse ideas will help you choose a roof shape and gutter layout that harvests water efficiently from day one.
13. Fit a Floating Intake and Calmed Inlet
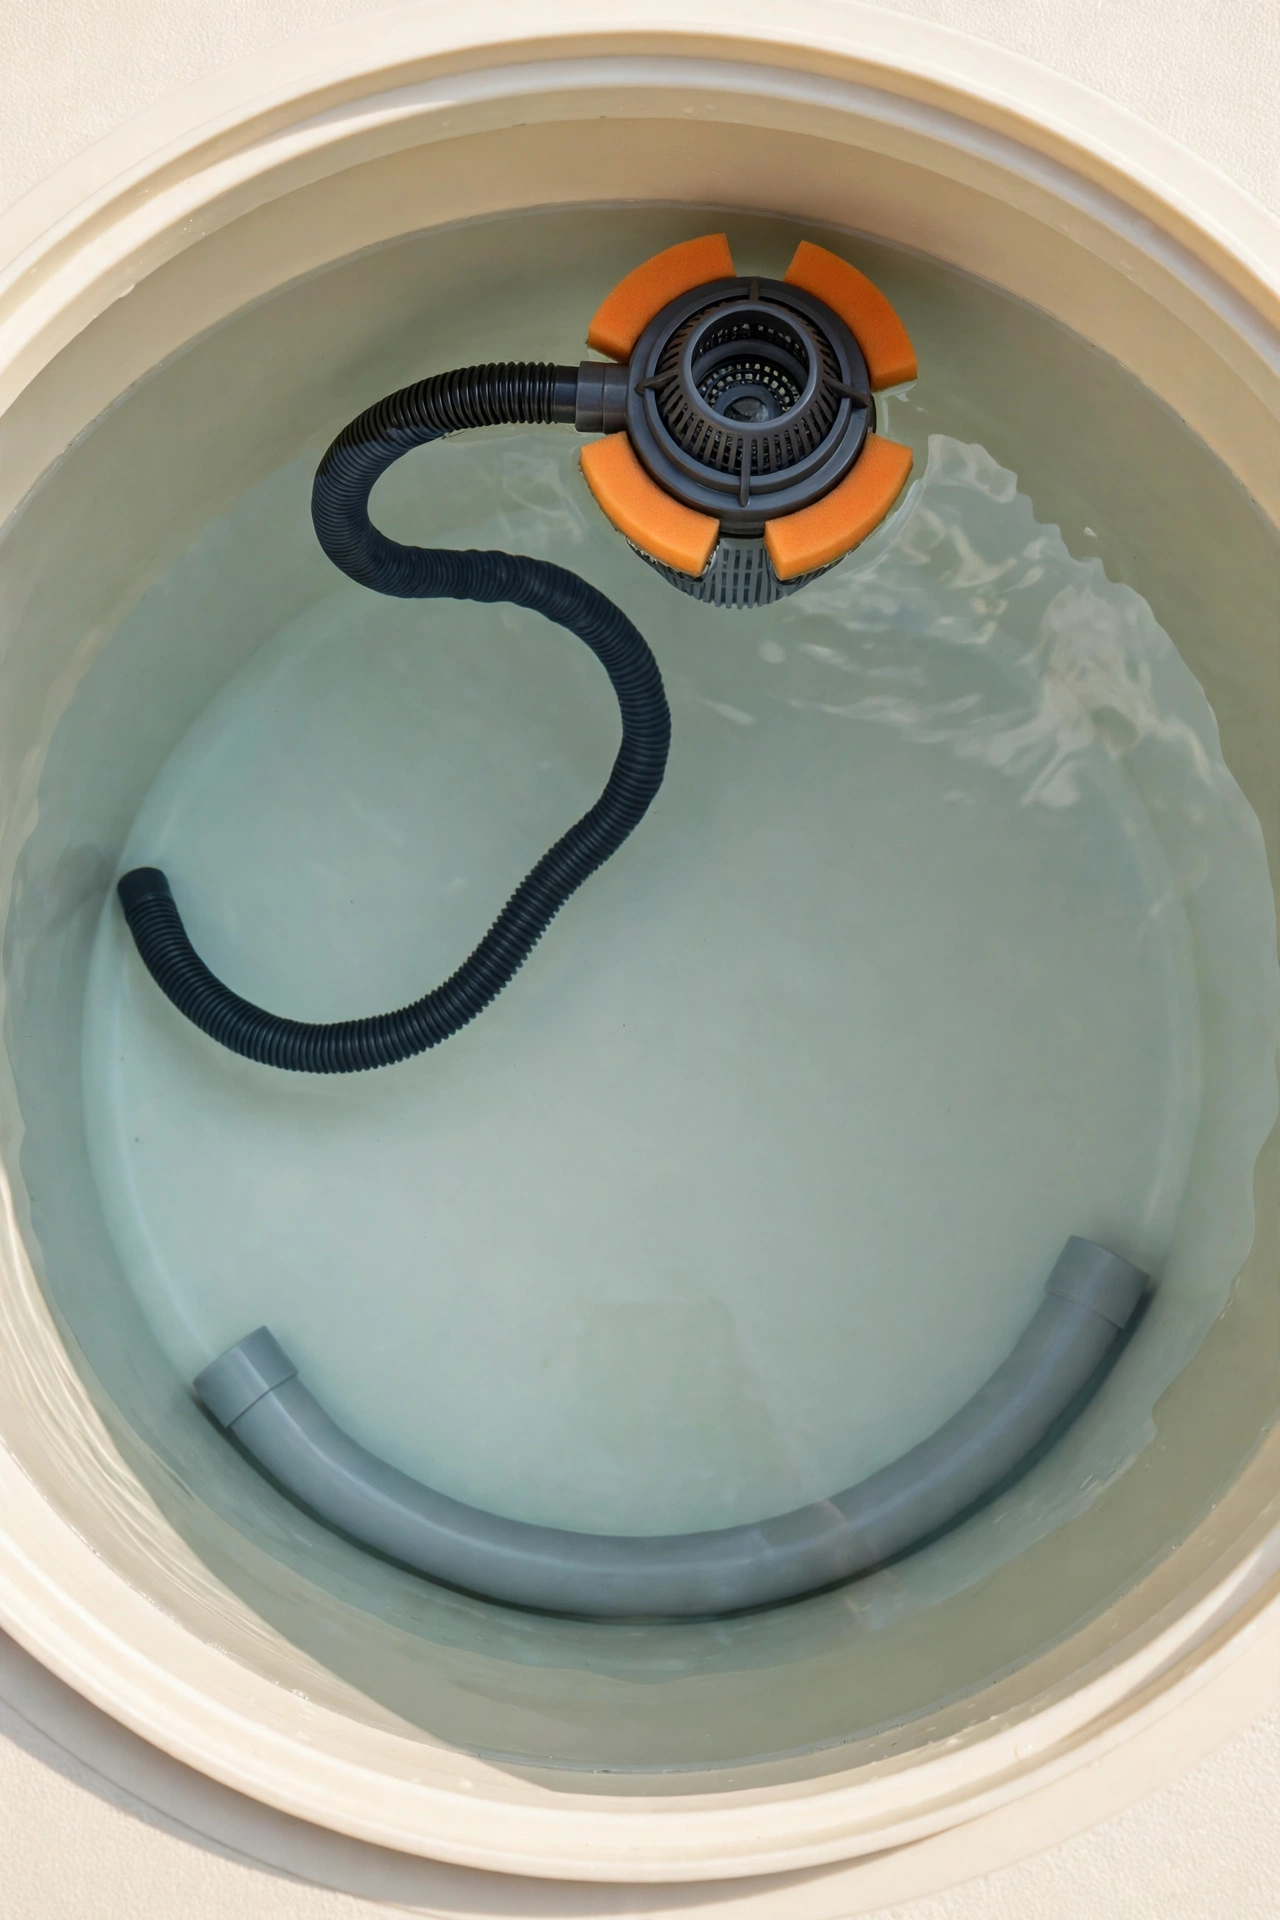
Water quality inside the tank depends on what happens at the inlet and the outlet, and two small fittings make a big difference. A calmed inlet at the bottom of the downspout pipe slows incoming water so it does not stir up settled sediment, while a floating intake draws water from just below the surface where it is cleanest. Together they keep the stored water clear without any power or chemicals.
The floating intake rides up and down on a flexible hose as the water level changes, always pulling from the cleanest layer. Both fittings are inexpensive and fit through the standard tank openings, so they can be added to an existing tank in an afternoon. Clearer water means cleaner irrigation and less filter maintenance all season.
14. Add a Level Gauge and Smart Monitor
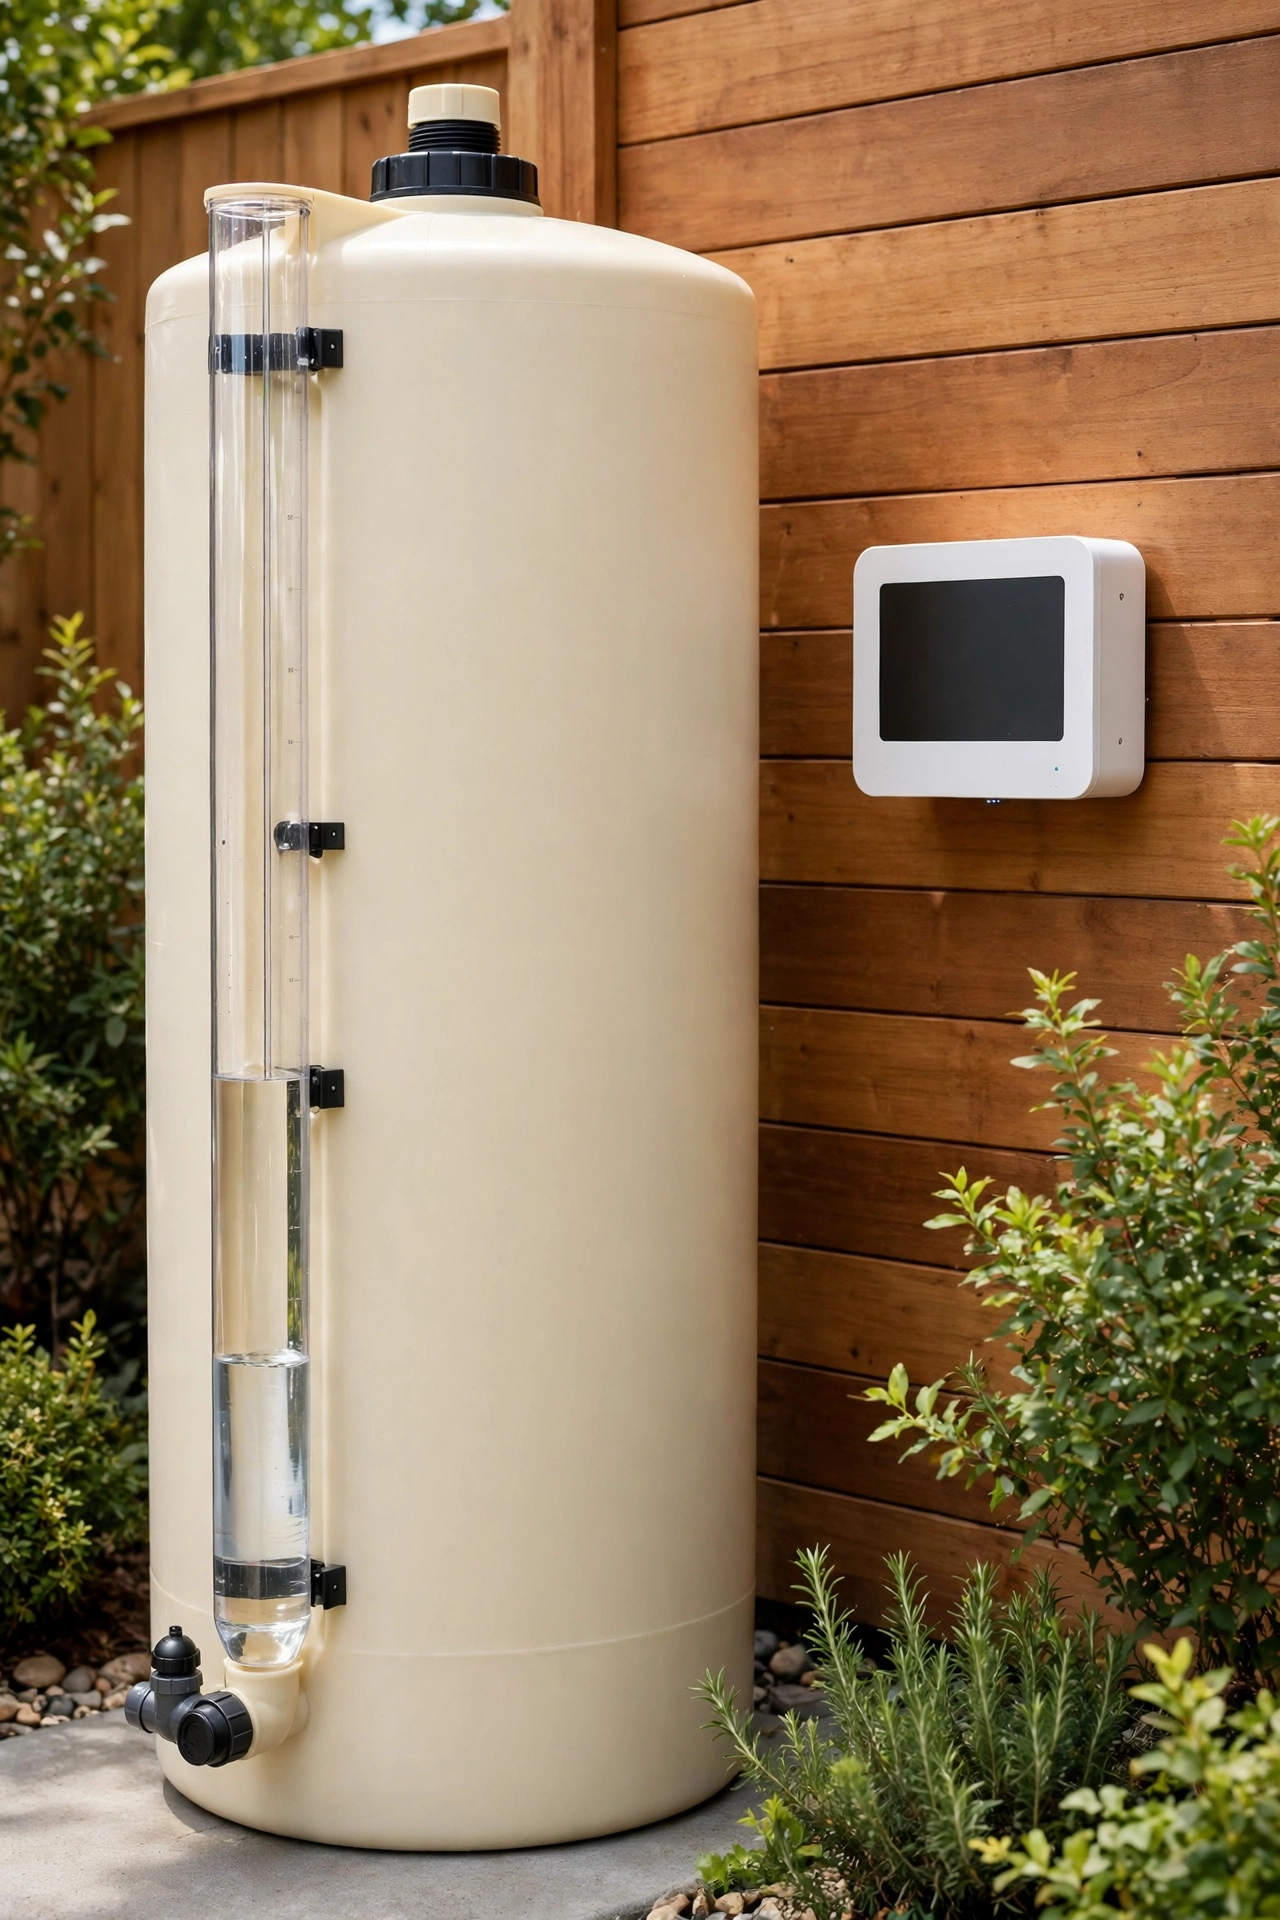
A level gauge takes the guesswork out of managing stored water. A simple sight tube on the outside of the tank shows the level at a glance, while a smart monitor sends readings to your phone and warns you before the tank runs low. Knowing the level helps you plan watering and spot leaks early.
Mount the sight tube on the shaded side of the tank to slow algae growth inside the tube, and calibrate the smart sensor against the sight tube when you first install it. Some monitors also track rainfall and estimate the next refill, which makes planning through dry spells much easier. A gauge is a small addition that makes the whole system feel under control.
15. Plumb a Dedicated Garden Tap Line
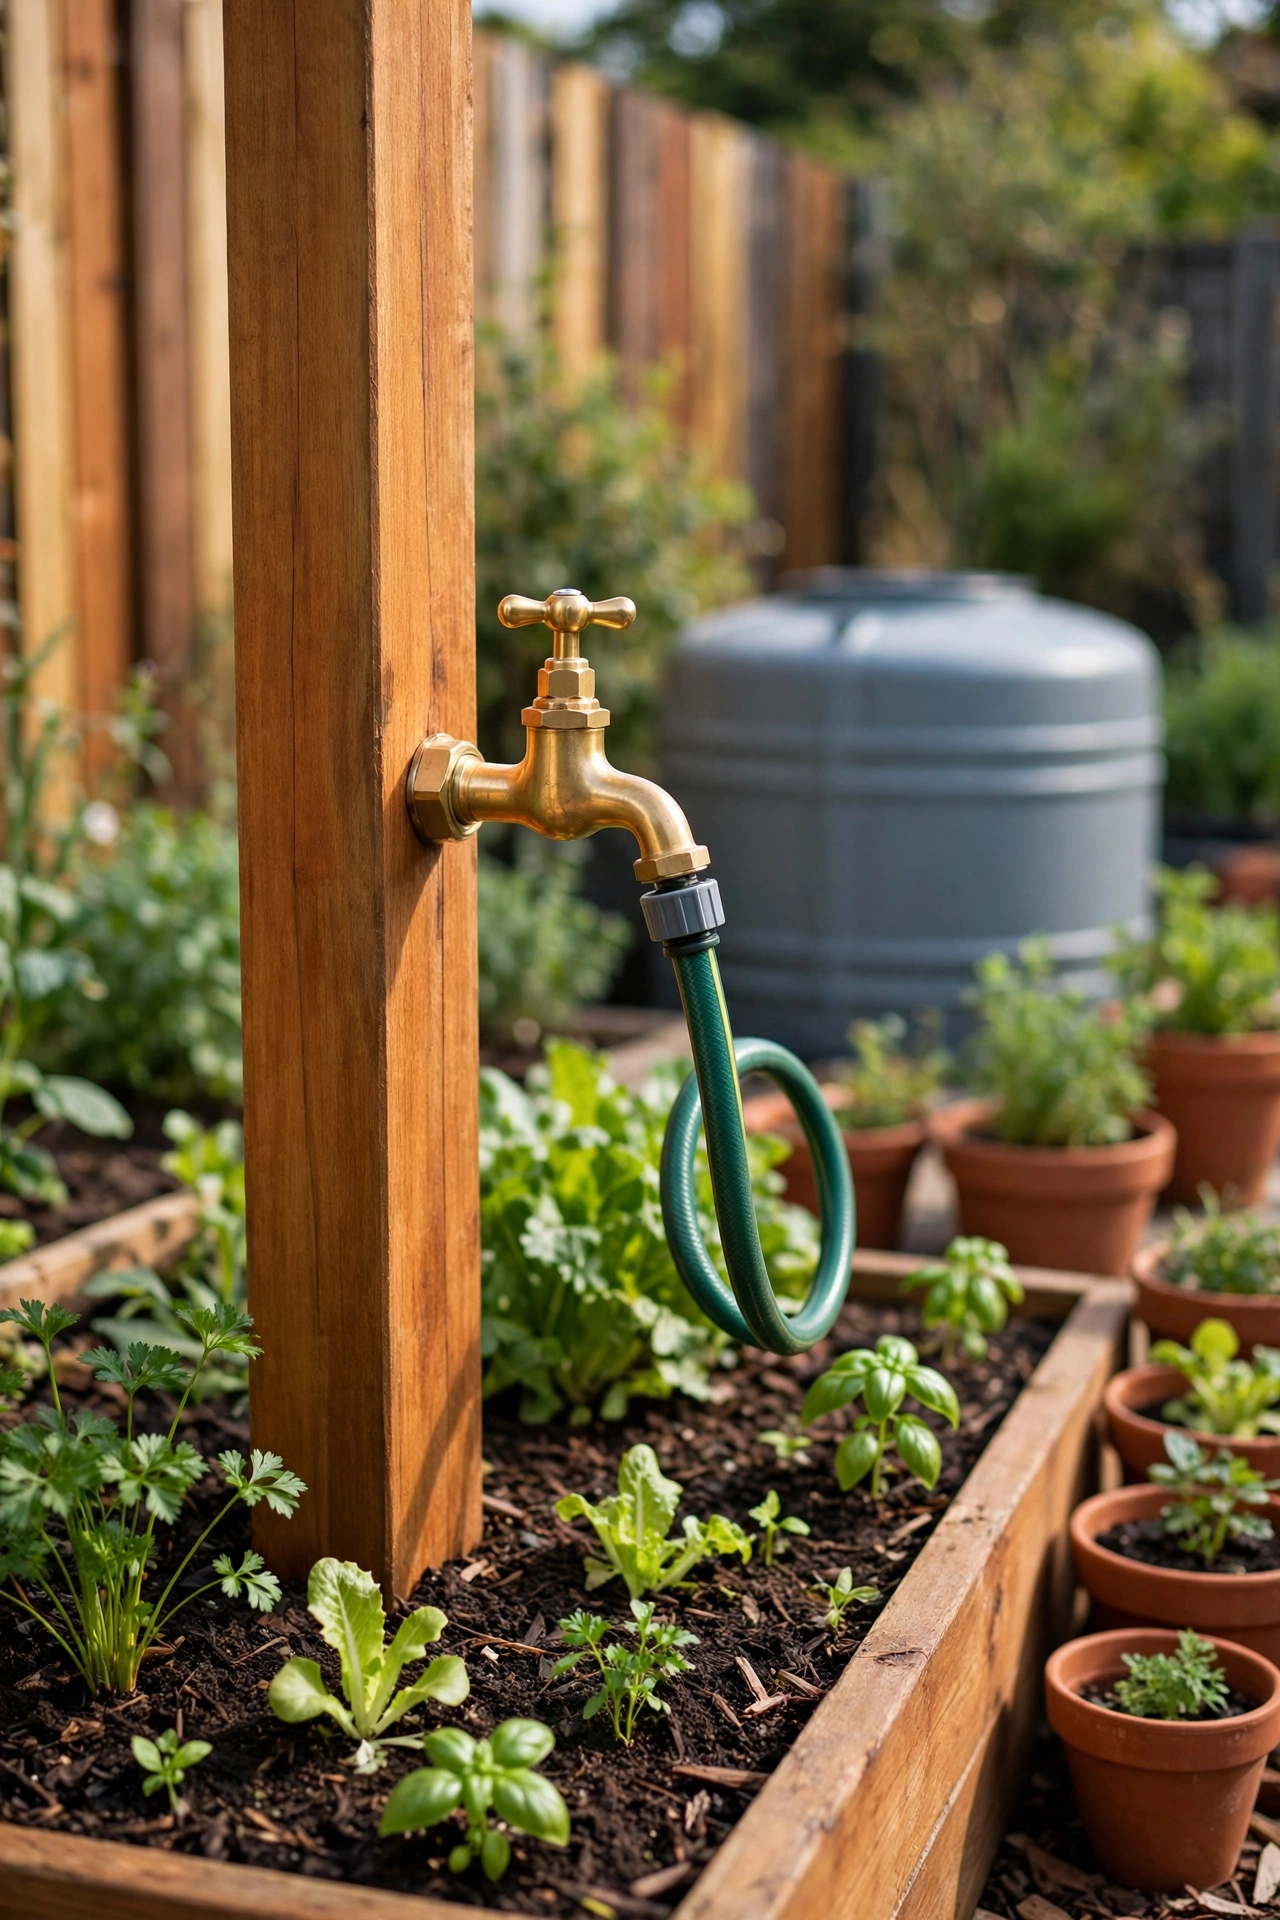
A dedicated tap line runs rainwater from the tank to one or more outdoor taps placed exactly where you water most. Instead of dragging a long hose from the house, you connect a short hose at the nearest tank fed tap and finish the job in half the time. Each tap gets its own shut-off valve so lines can be serviced individually.
Use buried pipe for runs across lawns and paths, with risers bringing the taps up at bed height for easy connection. Label each tap clearly so visitors know it carries rainwater for garden use. A dedicated tap line turns the tank into a proper outdoor water supply rather than a single outlet at the base of the tank.
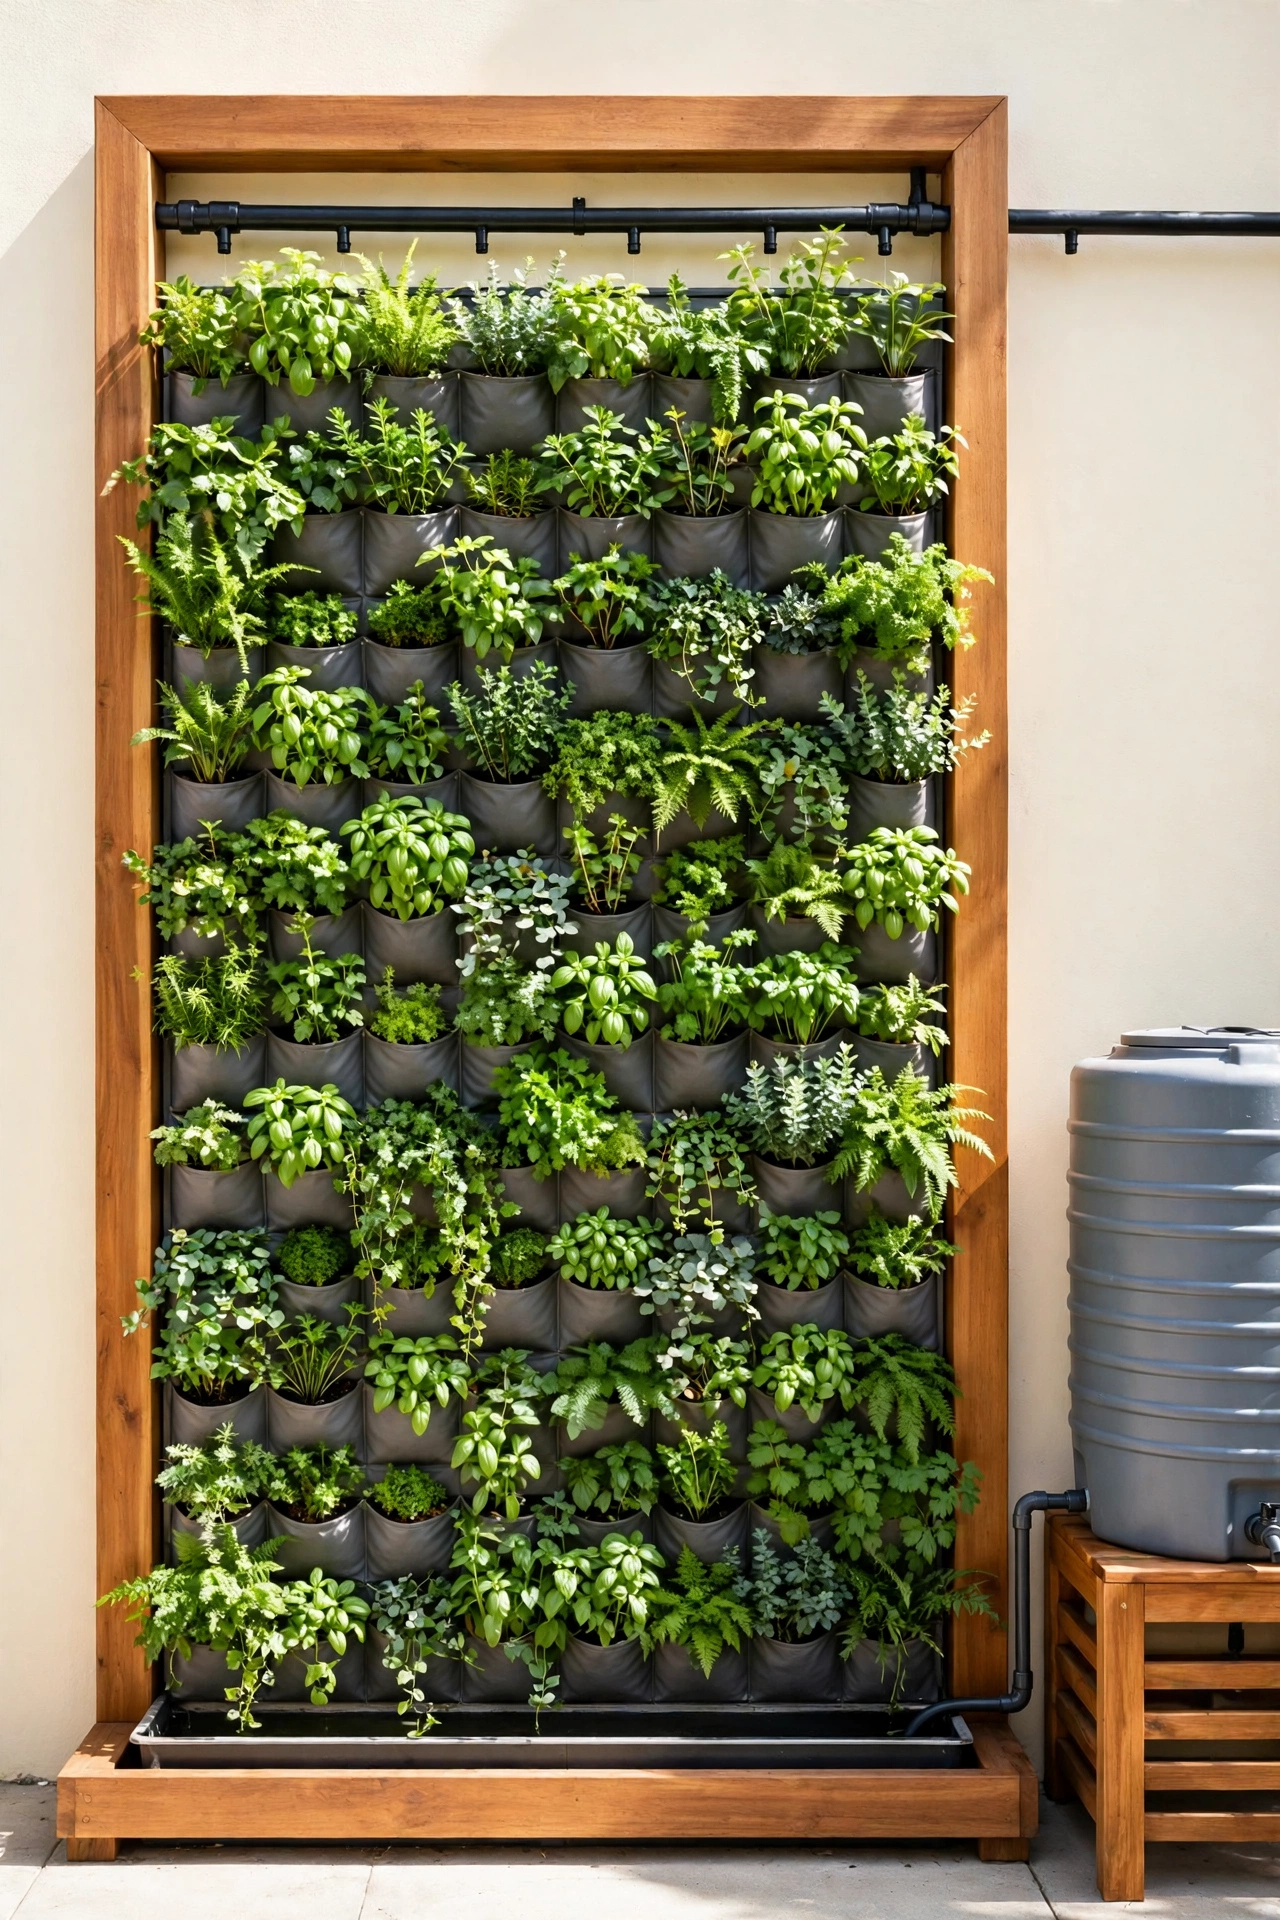
16. Feed a Vertical Garden Wall With Gravity Lines
A vertical garden wall needs frequent light watering, and a raised tank with gravity feed lines delivers it perfectly. A header pipe across the top of the wall drips water slowly through each planting pocket, with excess collected in a tray at the base and returned to the tank. The loop uses very little water because nothing runs off onto the ground.
Fit a small filter before the header pipe to keep the drip holes clear, and add a timer valve so the wall waters itself on a schedule. The steady moisture keeps wall plants lush through hot weather without daily hand watering. For wall designs that suit this setup, these vertical garden ideas show planting pockets and panel systems that pair well with a gravity fed water supply.
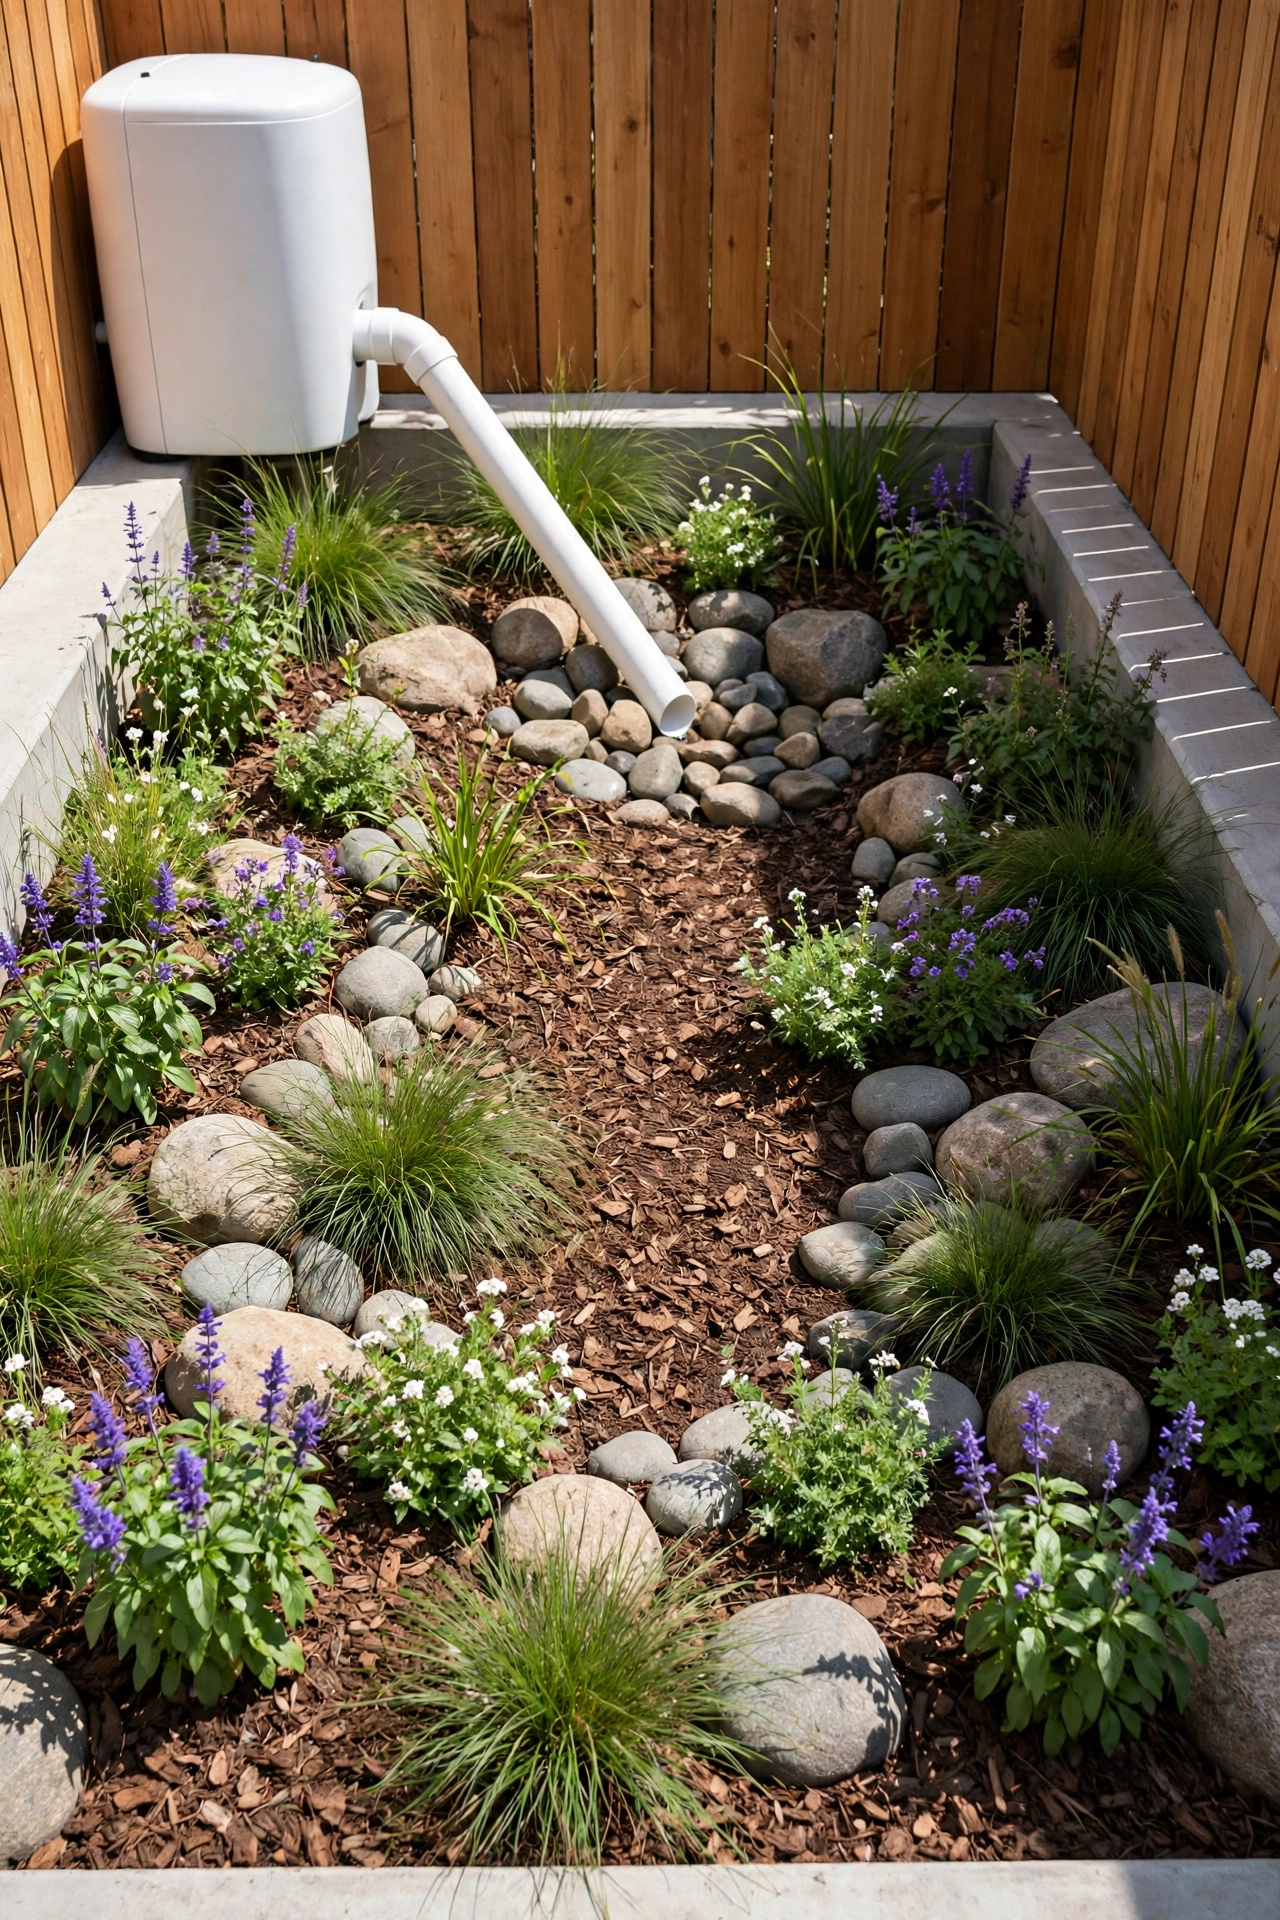
17. Direct Tank Overflow to a Rain Garden Basin
When the tank is full, the overflow pipe can deliver surplus water to a shallow planted basin designed to absorb it. The basin sits lower than the tank outlet so water flows in by gravity, then soaks away slowly through deep, free draining soil. This turns storm overflow from a problem into a resource for a dedicated planting zone.
Size the basin to handle the overflow volume of a typical storm, and shape the inlet with rock to prevent erosion where water enters. The basin stays dry between storms and fills only when the tank overflows, which keeps maintenance low. For planting and shaping guidance, these rain garden ideas show how an overflow basin can become a beautiful part of the garden rather than a bare hollow.
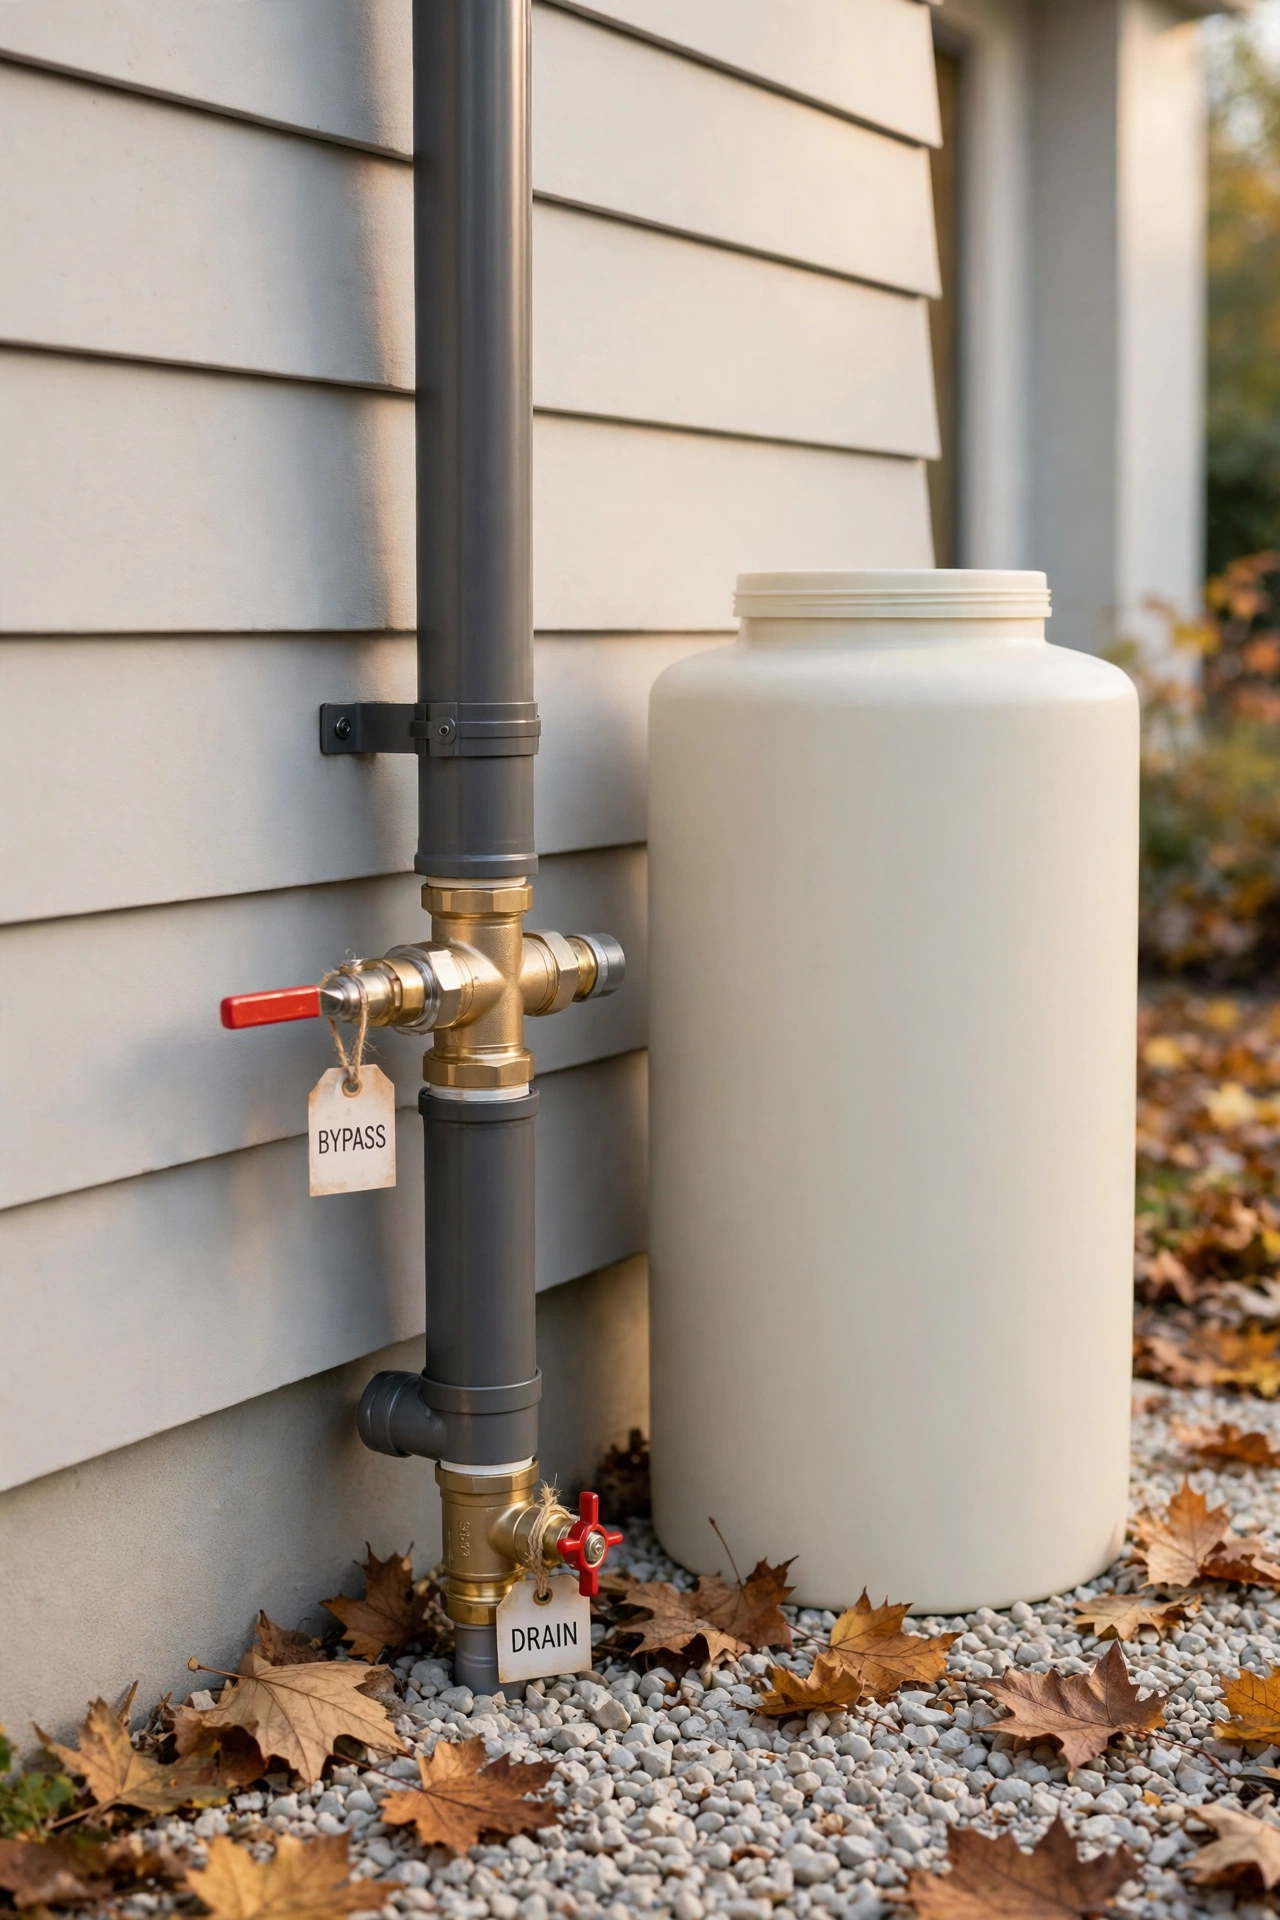
18. Winterize With a Drain-Down and Bypass System
Cold weather can crack pipes and damage pumps, so a drain-down and bypass system lets you shut the harvesting system down safely for winter. A bypass valve on the downspout sends roof water straight to the storm drain, while drain valves at the low points of every pipe run empty the system completely. The tank itself can stay full if it is rated for freezing, or be drained to a safe level.
Label every valve clearly and keep a simple one page winter checklist taped inside the tank lid. In spring, close the drain valves, open the bypass, and the system refills with the first rain. A proper winter shutdown takes less than an hour and protects hundreds of dollars worth of pumps, filters, and fittings.
Conclusion
A rainwater harvesting system does not have to be large or complicated to change the way you garden. From a slimline tank sized to your roof to a gravity fed drip network and a safe overflow swale, each idea in this list adds one smart layer to a system that works quietly in the background. The best setup is the one that fits your roof, your space, and the way you already water your plants.
Start with the parts that matter most for your garden, usually the tank, the first-flush diverter, and a simple delivery line, and add the rest one piece at a time. Every storm that fills your tank is water you did not have to buy, and every dry week it carries you through is proof that the system earns its place. Set it up this season, and let the next rain start working for your garden.
Frequently Asked Questions About Outdoor Rainwater Harvesting System Ideas for Gardens
How much rainwater can a roof collect?
A roof collects roughly 0.6 gallons of water per square foot for every inch of rain, after small losses to evaporation and splashing. A 1,000 square foot roof in an area with 30 inches of annual rainfall can yield more than 18,000 gallons a year. Your actual harvest depends on roof material, gutter efficiency, and how much storage you have available.
Is rainwater safe for vegetable gardens?
Yes, rainwater is excellent for vegetable gardens when it is collected cleanly. A first-flush diverter, gutter screens, and a covered tank keep out most contaminants, and drip irrigation delivers water to the soil rather than onto leaves. Avoid collecting from roofs with lead flashing or old asbestos materials, and wash all produce before eating as usual.
Do I need a permit to harvest rainwater?
Rules vary widely by location, and some areas limit tank size, require permits for large cisterns, or restrict certain uses of stored water. Check with your local water authority or council before installing a large system, especially an underground cistern. Small above ground tanks for garden use are allowed without a permit in most places.
How do I keep stored rainwater from growing algae?
Keep the tank covered, opaque, and out of direct sun, since algae needs light to grow. A calmed inlet and a floating intake keep sediment settled and draw from the cleanest water layer. Clean the tank interior once a year and keep gutters and screens clear so organic matter never enters the system.
What size tank do I need for a small garden?
A tank between 200 and 500 gallons suits most small gardens, holding enough for one to two weeks of drip irrigation between rains. If your roof area is large and rainfall is regular, a 500 gallon tank will refill often and rarely run dry. Size up if you water lawns or large beds, and link a second tank later if you find yourself running short.

Hi, I’m Emily! I turn messy corners into cozy, organized spots. DreamNestDecor is where I share simple, practical home ideas — decor, organization, and small-space solutions that work in real life, not just in photos. Every idea here is carefully researched before it’s shared.