
Every October the front porch turns into a small gallery of pumpkins, and the carved ones always get the applause. But carving means knives, slippery mess, and a pumpkin that starts to sag within a week. The good news is that a contest table loves color and cleverness just as much as it loves a carving knife. You can win with paint, paper, buttons, and a little imagination instead.
The ideas below are all no-carve projects. They are safe for kids, friendly to renters, and kind to pumpkins, because the skin stays whole and the decorations stay on the surface. Grab a few supplies you probably already own, pick the idea that makes you smile, and give your pumpkin a brand new personality. Some of these even reuse old craft supplies, which fits beautifully with sustainable home decorating for the season.
1. Rainbow Crayon Melt Pumpkin
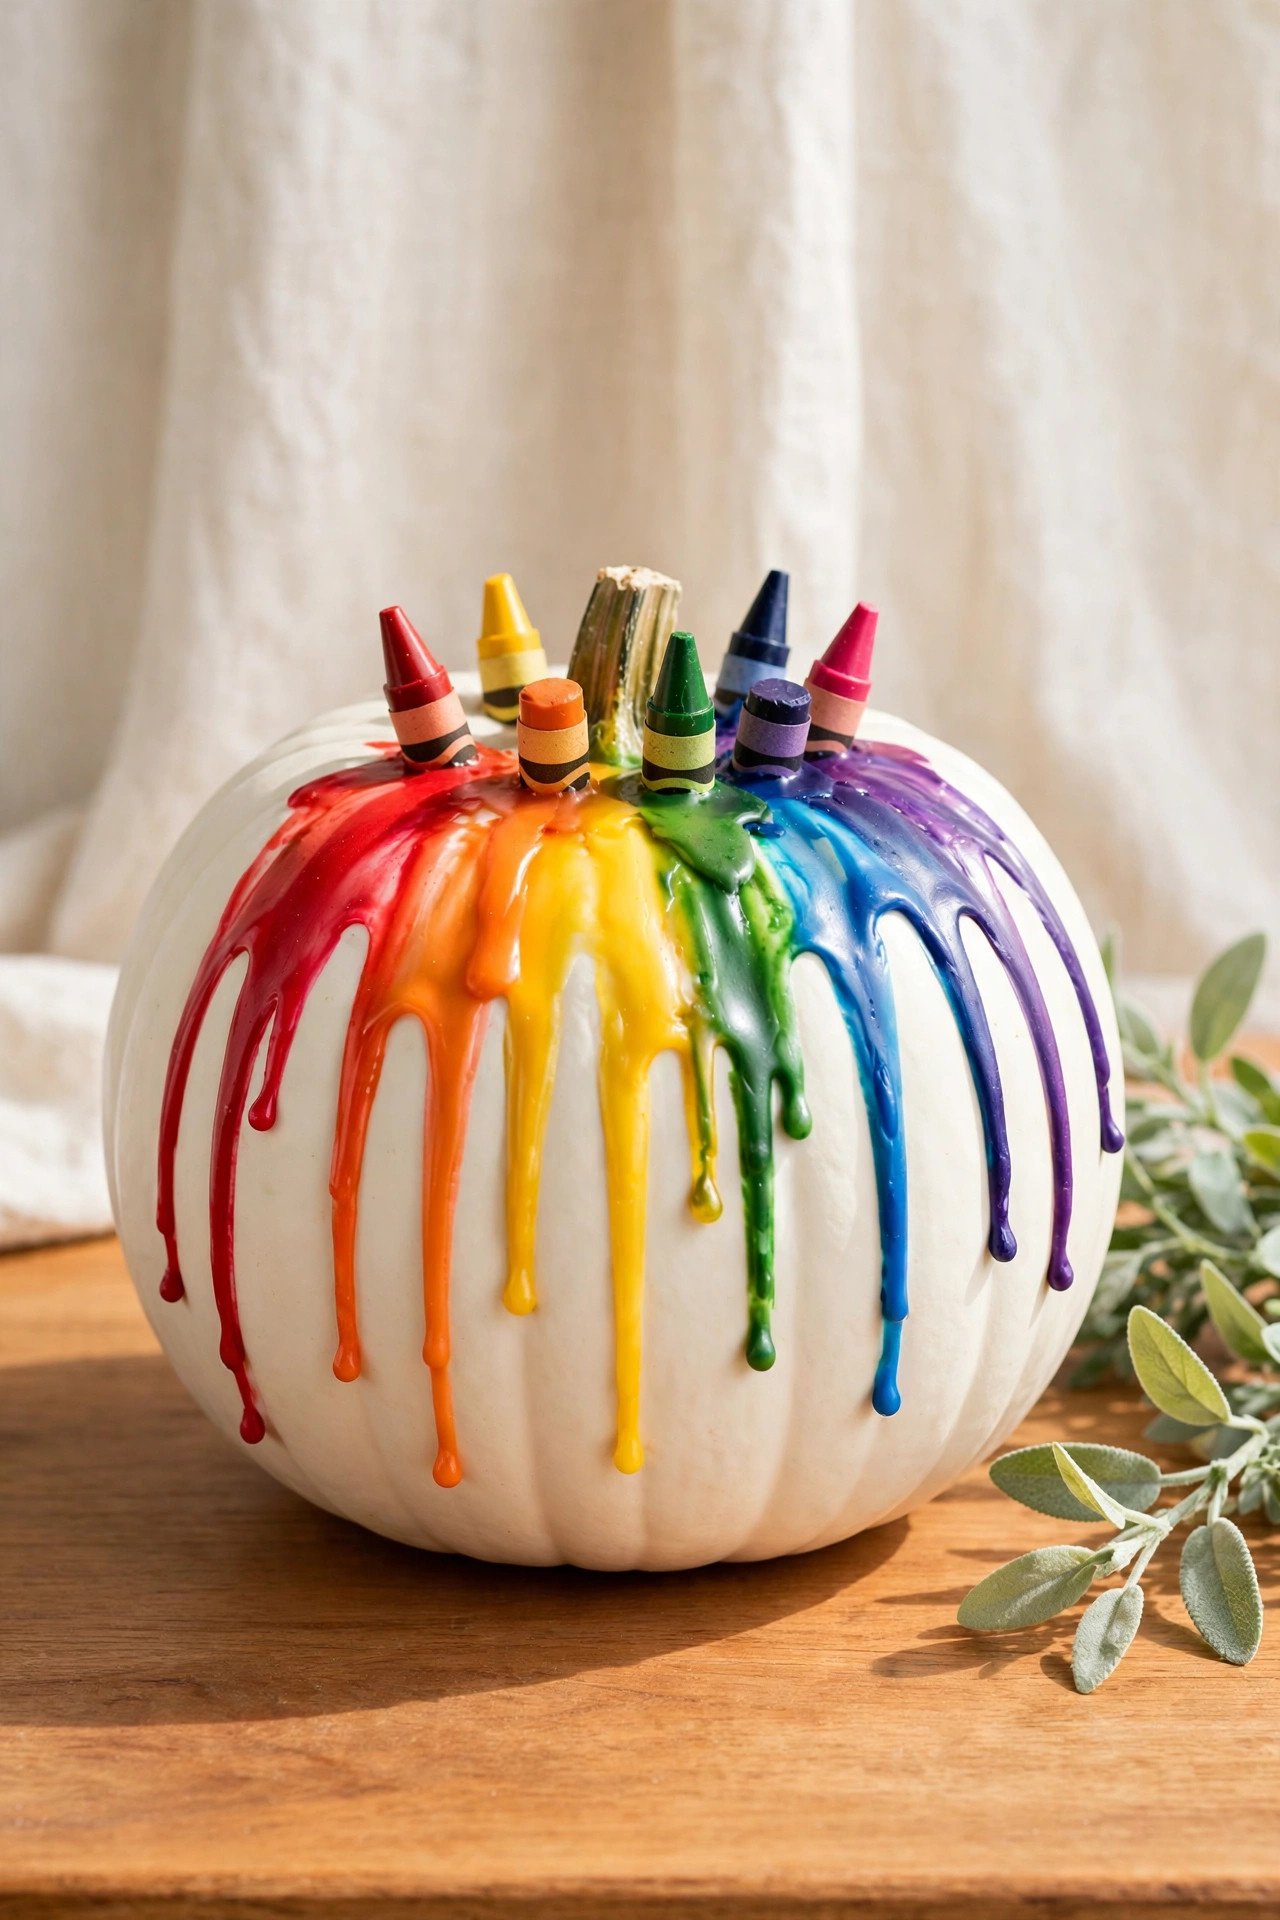
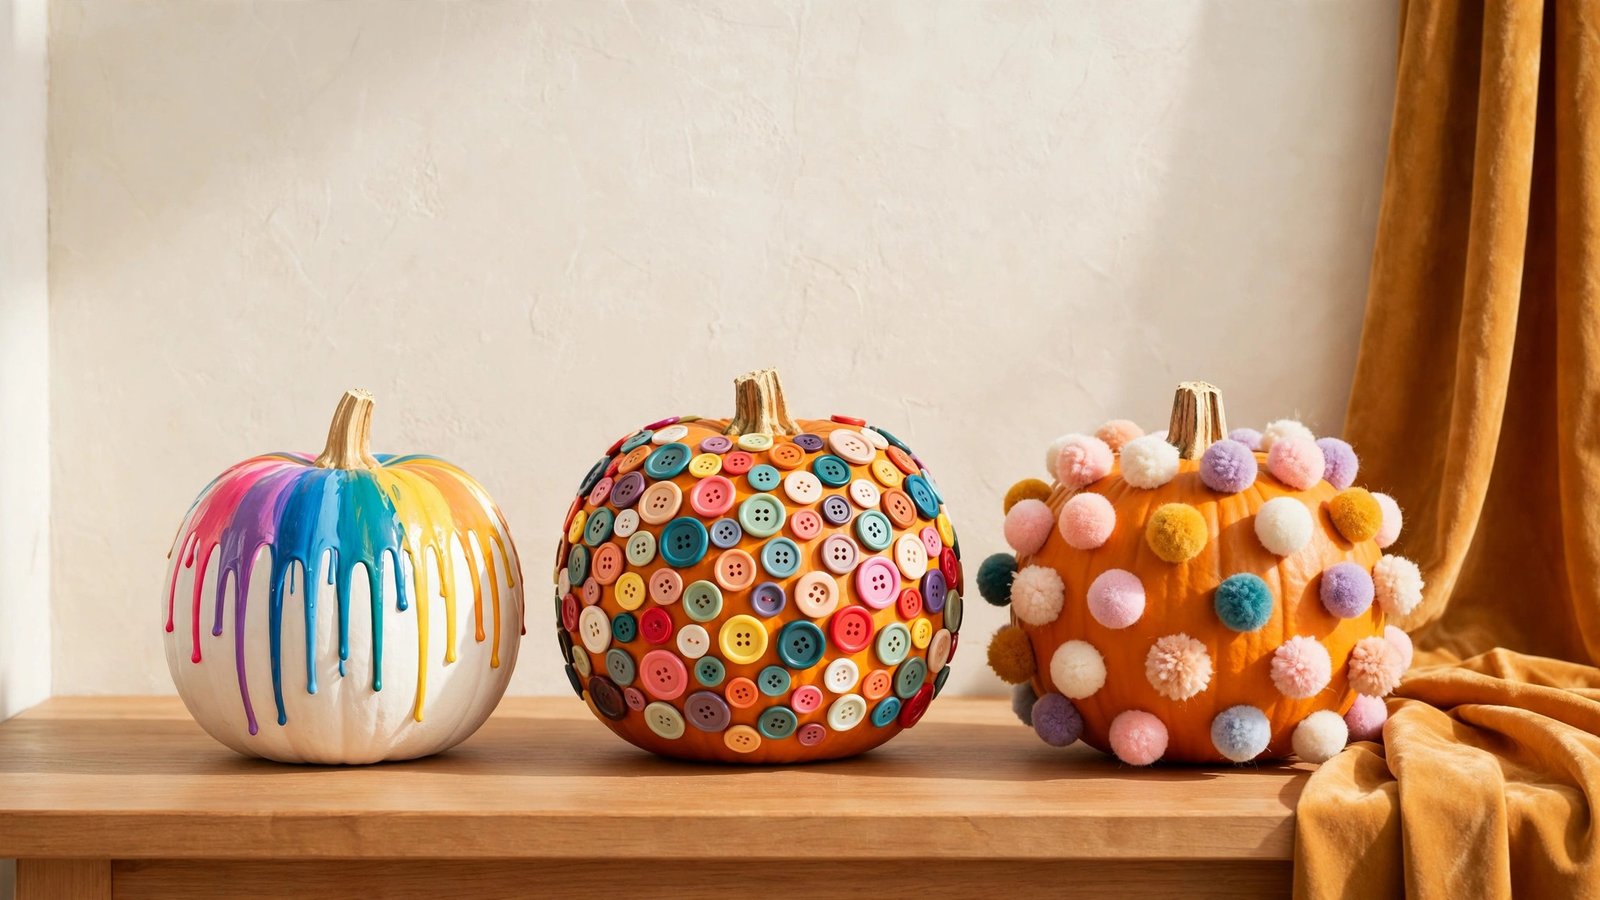
This idea turns an old box of broken crayons into a waterfall of color. Glue the crayons around the stem of a white pumpkin, then warm them gently with a hair dryer so the wax melts and flows down the sides. The white skin makes every color pop, and the finished pumpkin looks like it is wearing a rainbow.
A hair dryer on the lowest heat setting gives you the most control. Tilt the pumpkin slightly to guide the wax in the direction you like, and work over a cardboard box so stray drips stay off the table. A coat of white spray paint first helps the wax grip the surface if you start with an orange pumpkin.
2. Sprinkle Covered Party Cake Pumpkin
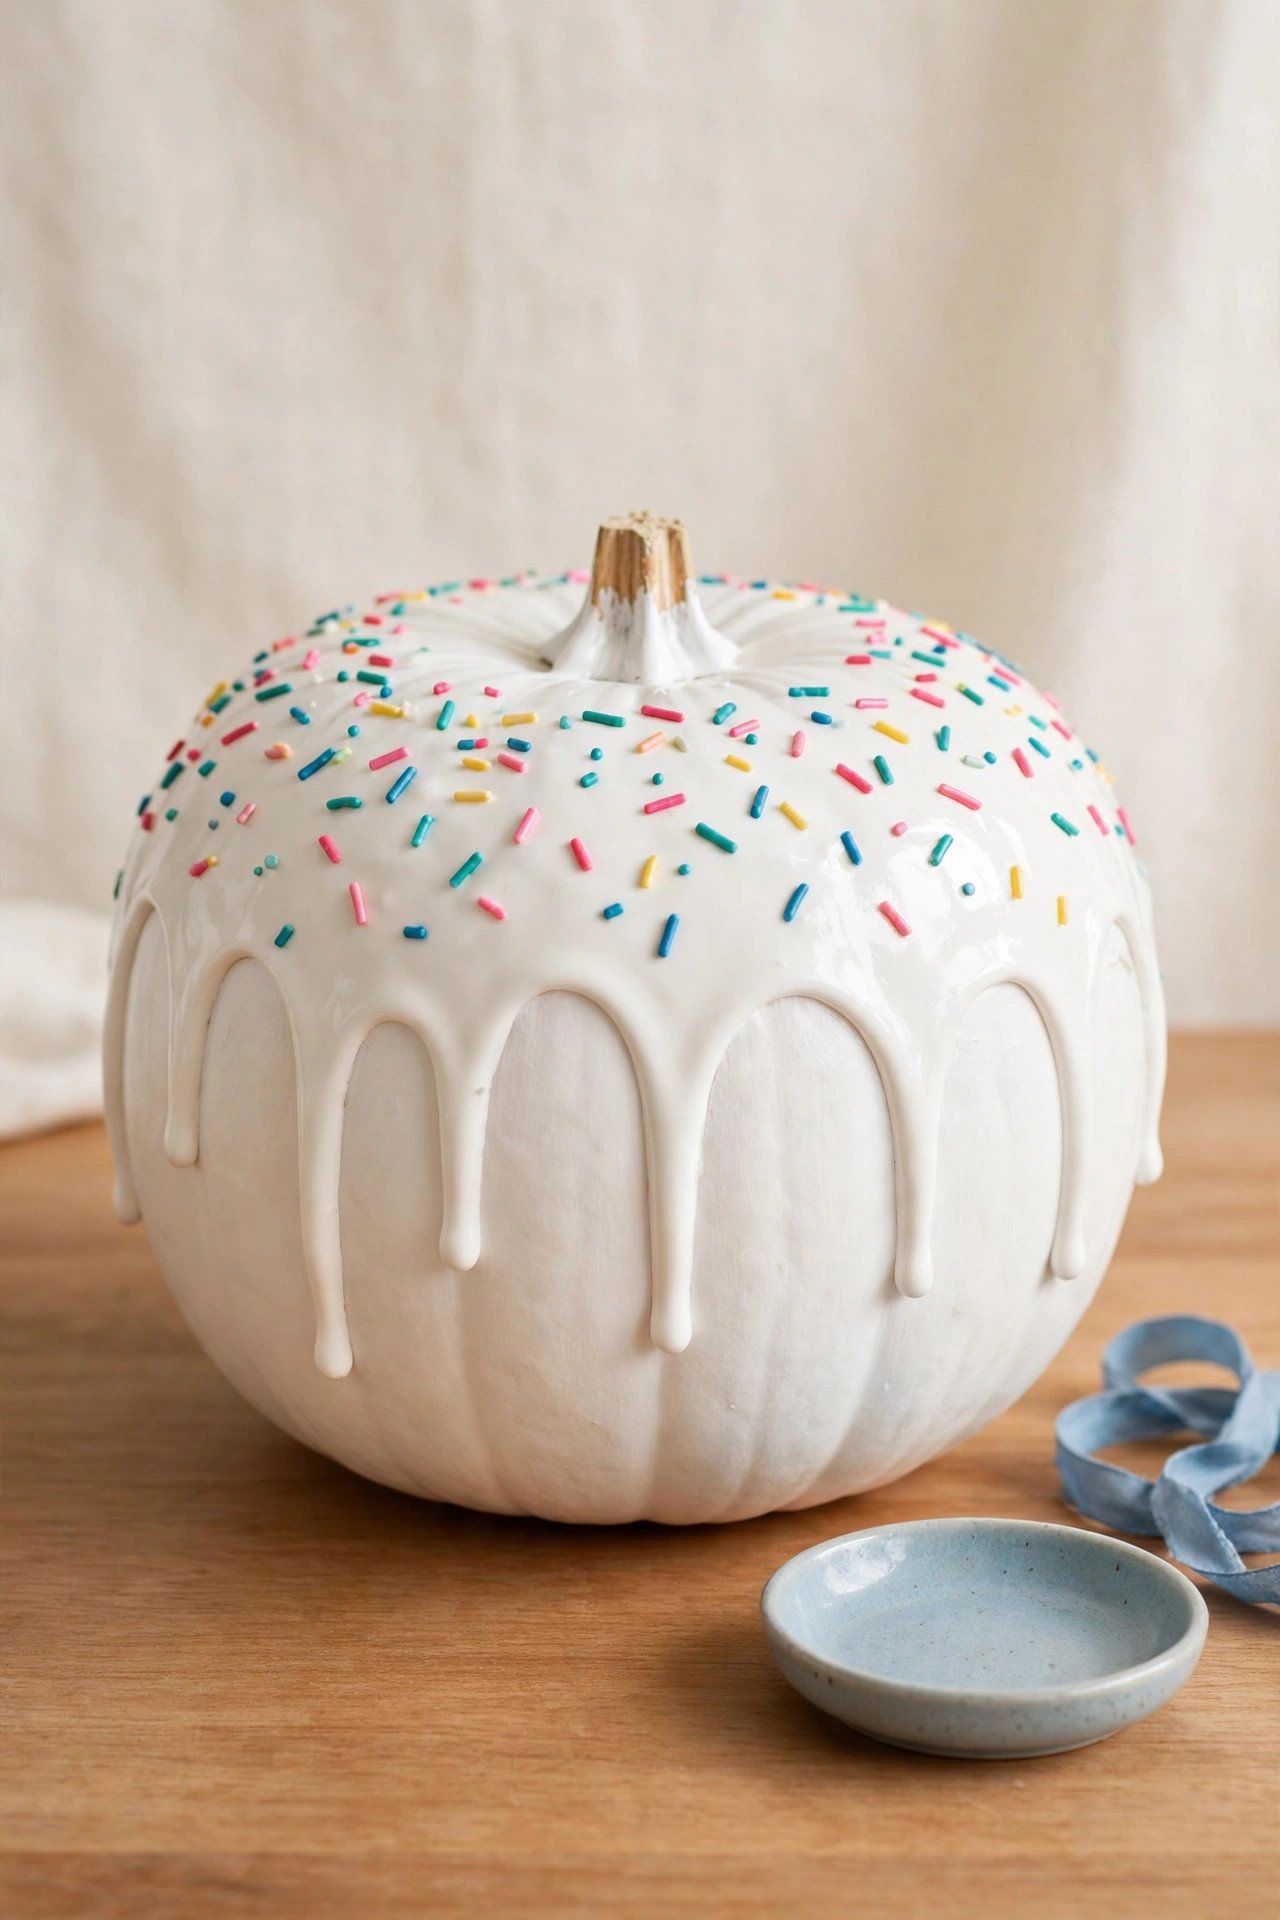
Paint a round, squat pumpkin white and you have the base of a layer cake. Then add rows of colorful painted sprinkles with short, upright brush strokes. A final layer of clear gloss sealer makes the whole thing shine like real frosting at a birthday party.
Pick a pumpkin that is wide and round so the cake shape reads clearly. Acrylic craft paint gives you the brightest colors, and you should let each color dry before you add the next one. Real polymer clay sprinkles glued on top give a fun three-dimensional texture if you want to go further.
3. Button Mosaic Pumpkin
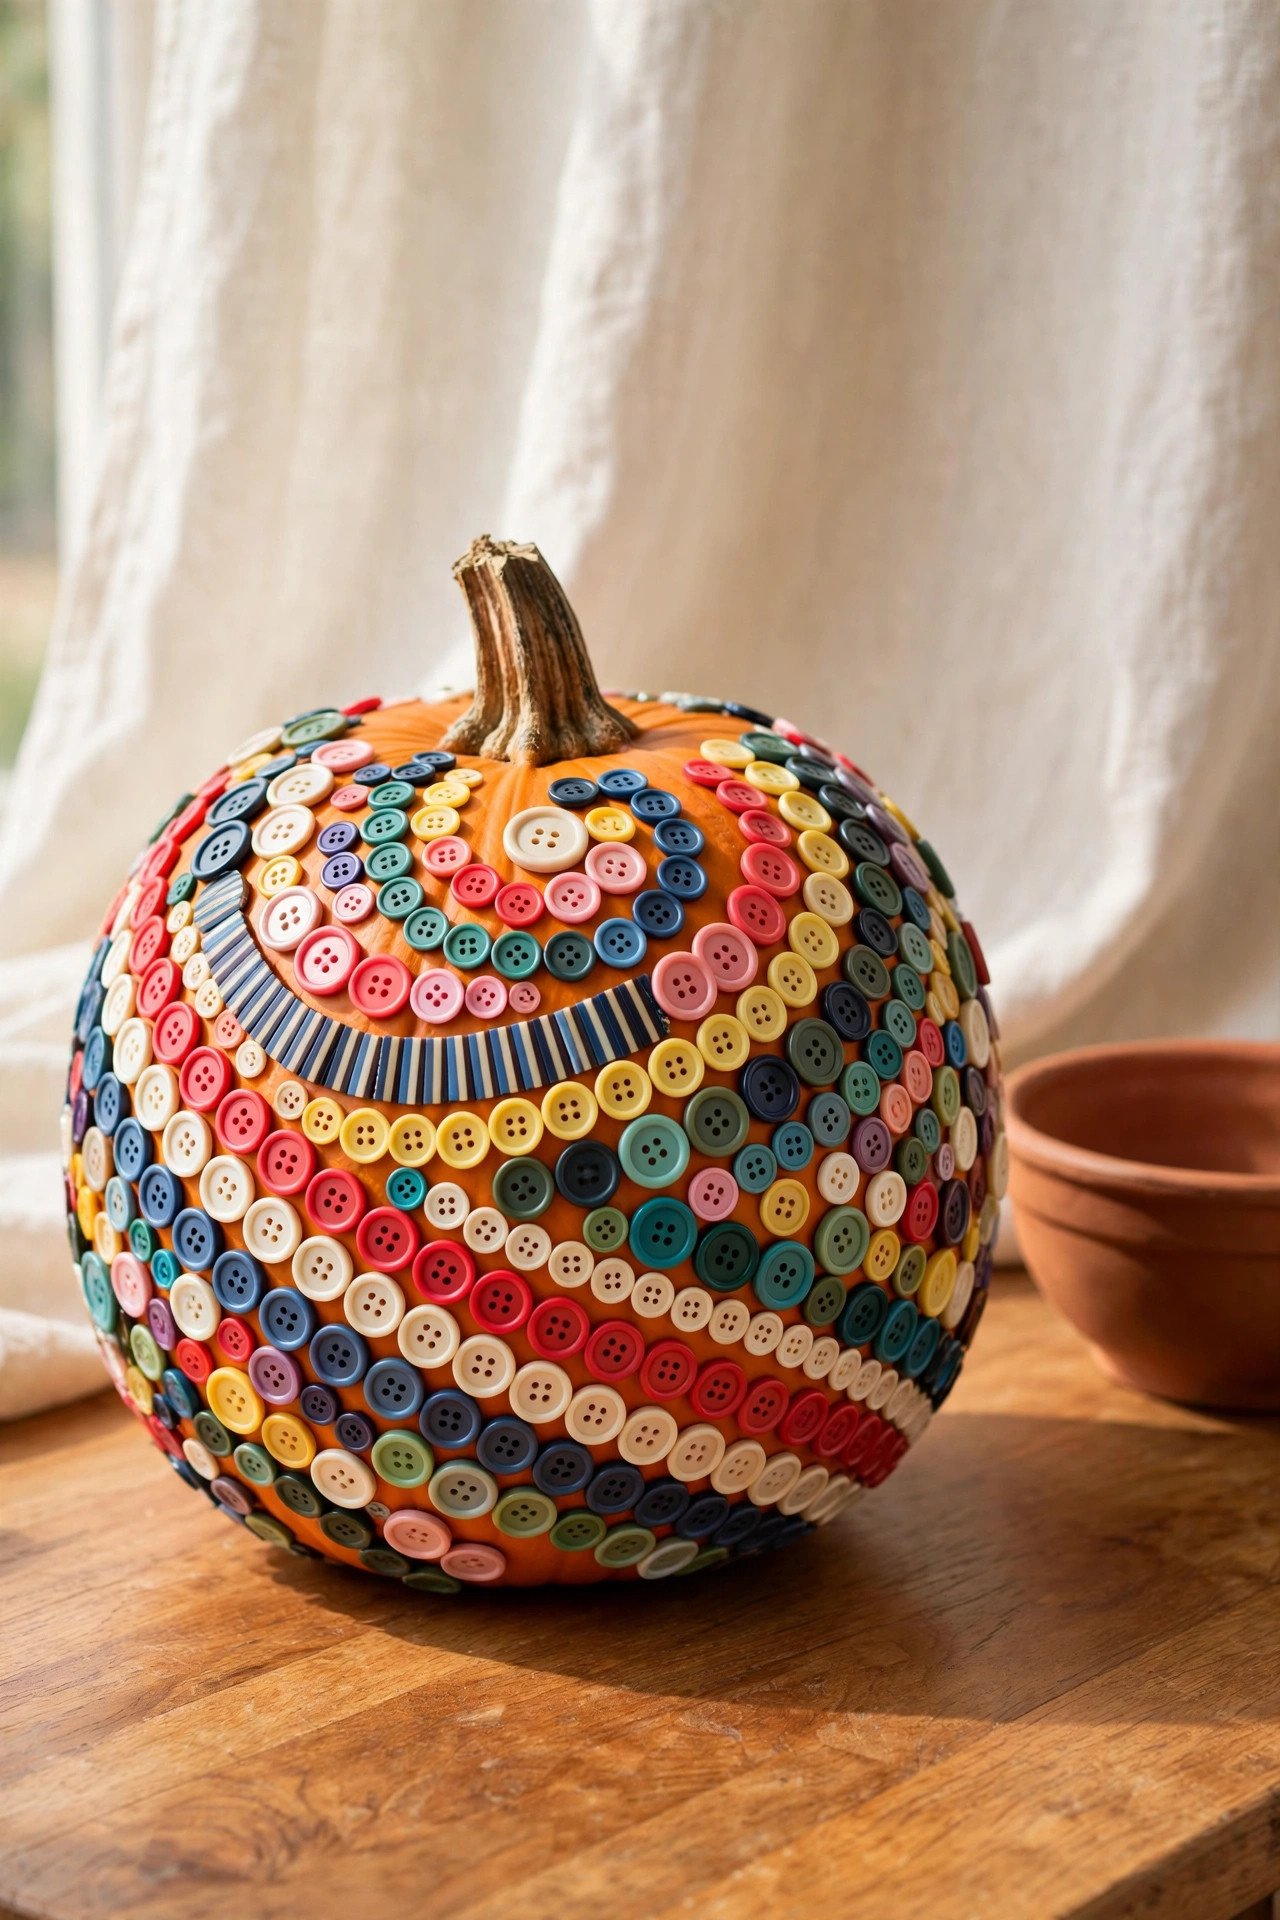
Buttons from an old sewing box make a rich, textured surface on a pumpkin. Glue them on in swirls, stripes, or little flower shapes, mixing sizes and colors as you go. The more you overlap the edges, the more polished and mosaic-like the result looks.
A low temperature glue gun is the safest tool for this project because it will not damage the pumpkin skin. Sketch your pattern lightly with a pencil first, then fill it in section by section. Leaving the natural stem unpainted gives a nice contrast against all that bright plastic and wood.
4. Rainbow Paint Pour Pumpkin
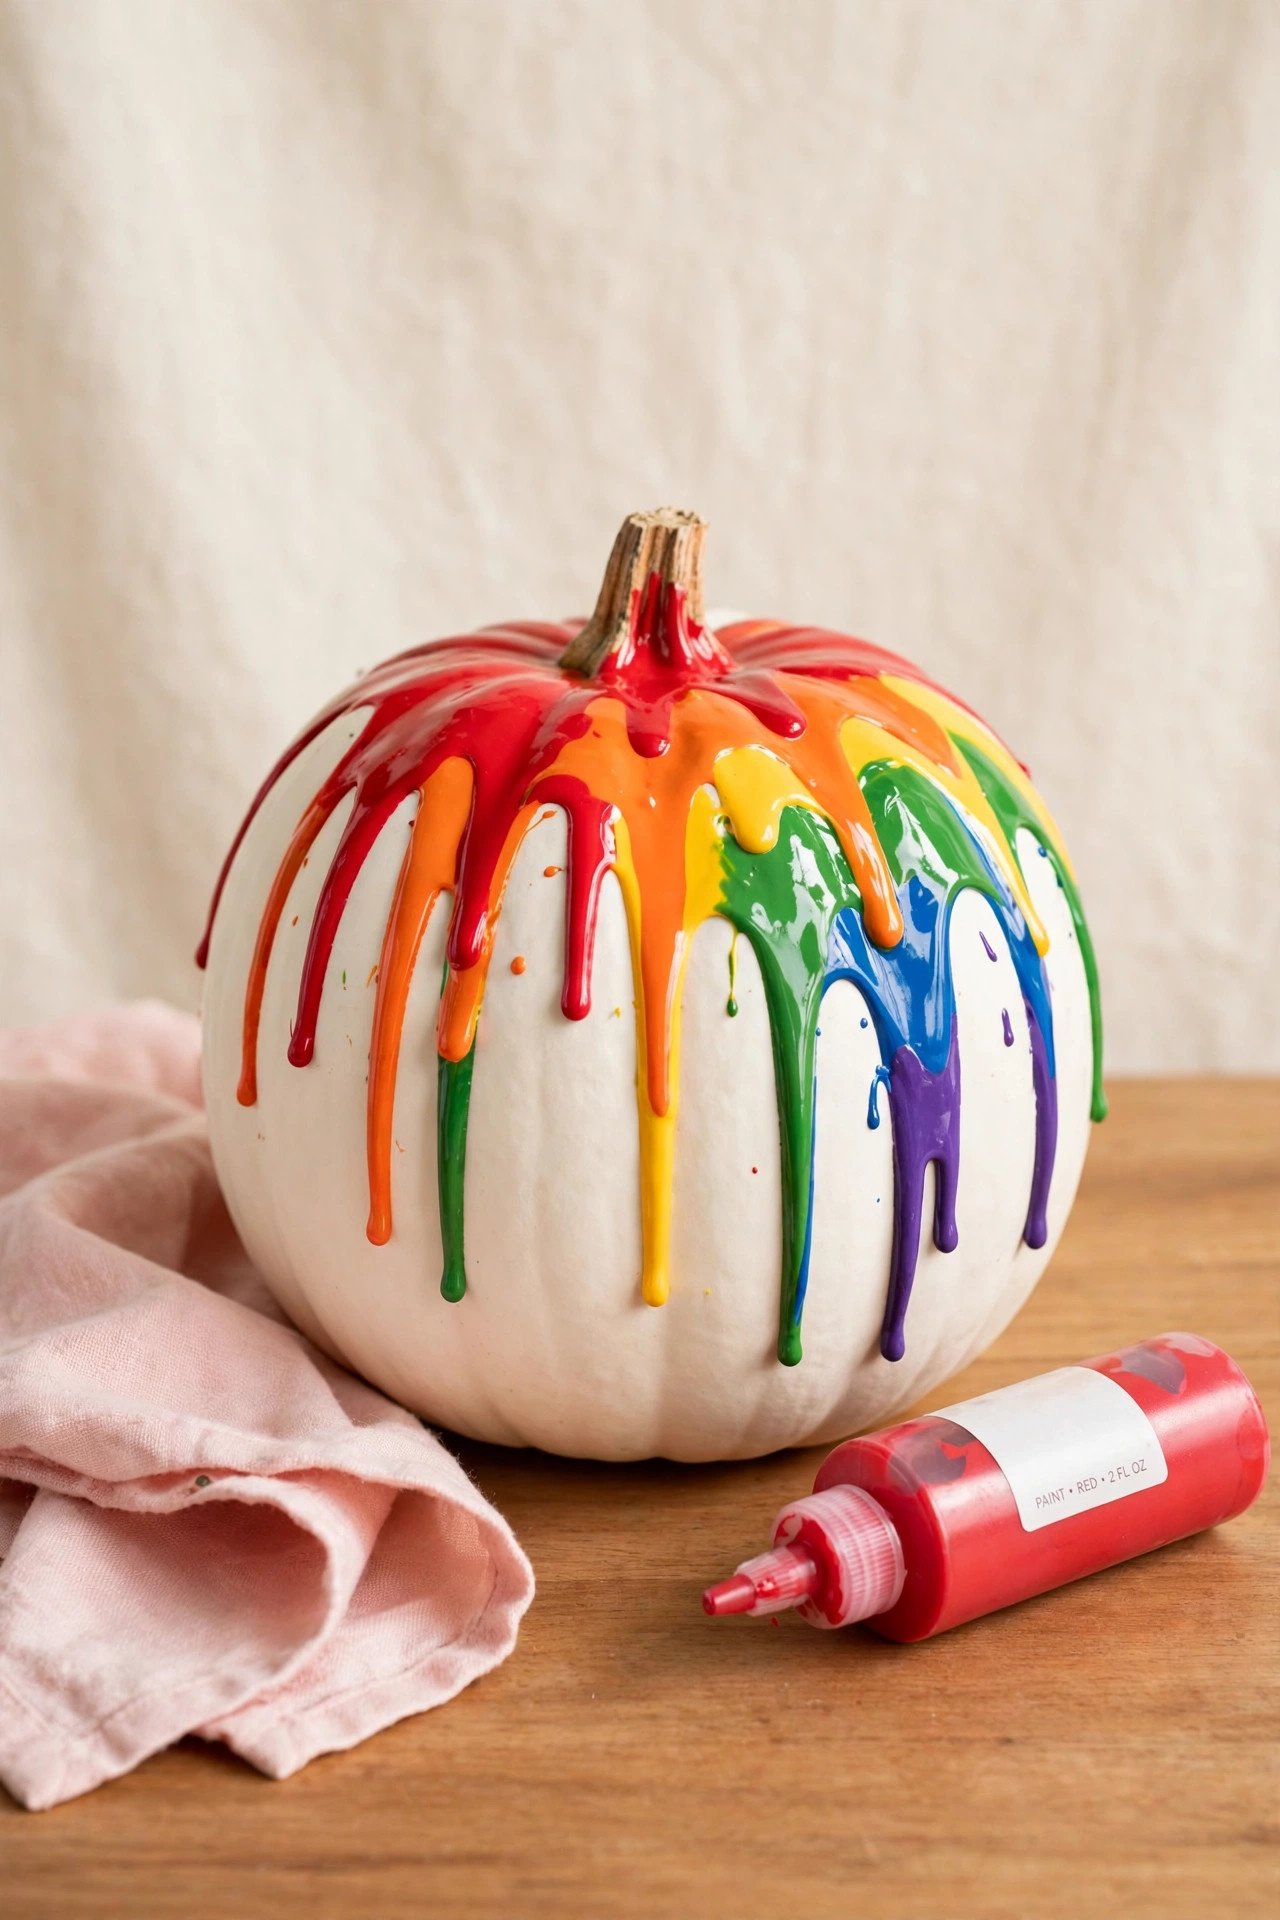
This design starts at the stem and pours downward. Squeeze thick ribbons of rainbow paint around the stem and let them drip naturally down the sides of the pumpkin. Keep the base color simple, white or black, so the dripping colors stay the star of the show.
Heavy body acrylic paint holds thick, beautiful drips that do not run too thin. Tilt the pumpkin slowly as you pour to guide each color, and let each one set for a few minutes before you add the next so the colors do not turn muddy. A squeeze bottle gives you far more precision than a brush.
5. Tissue Paper Stained Glass Pumpkin
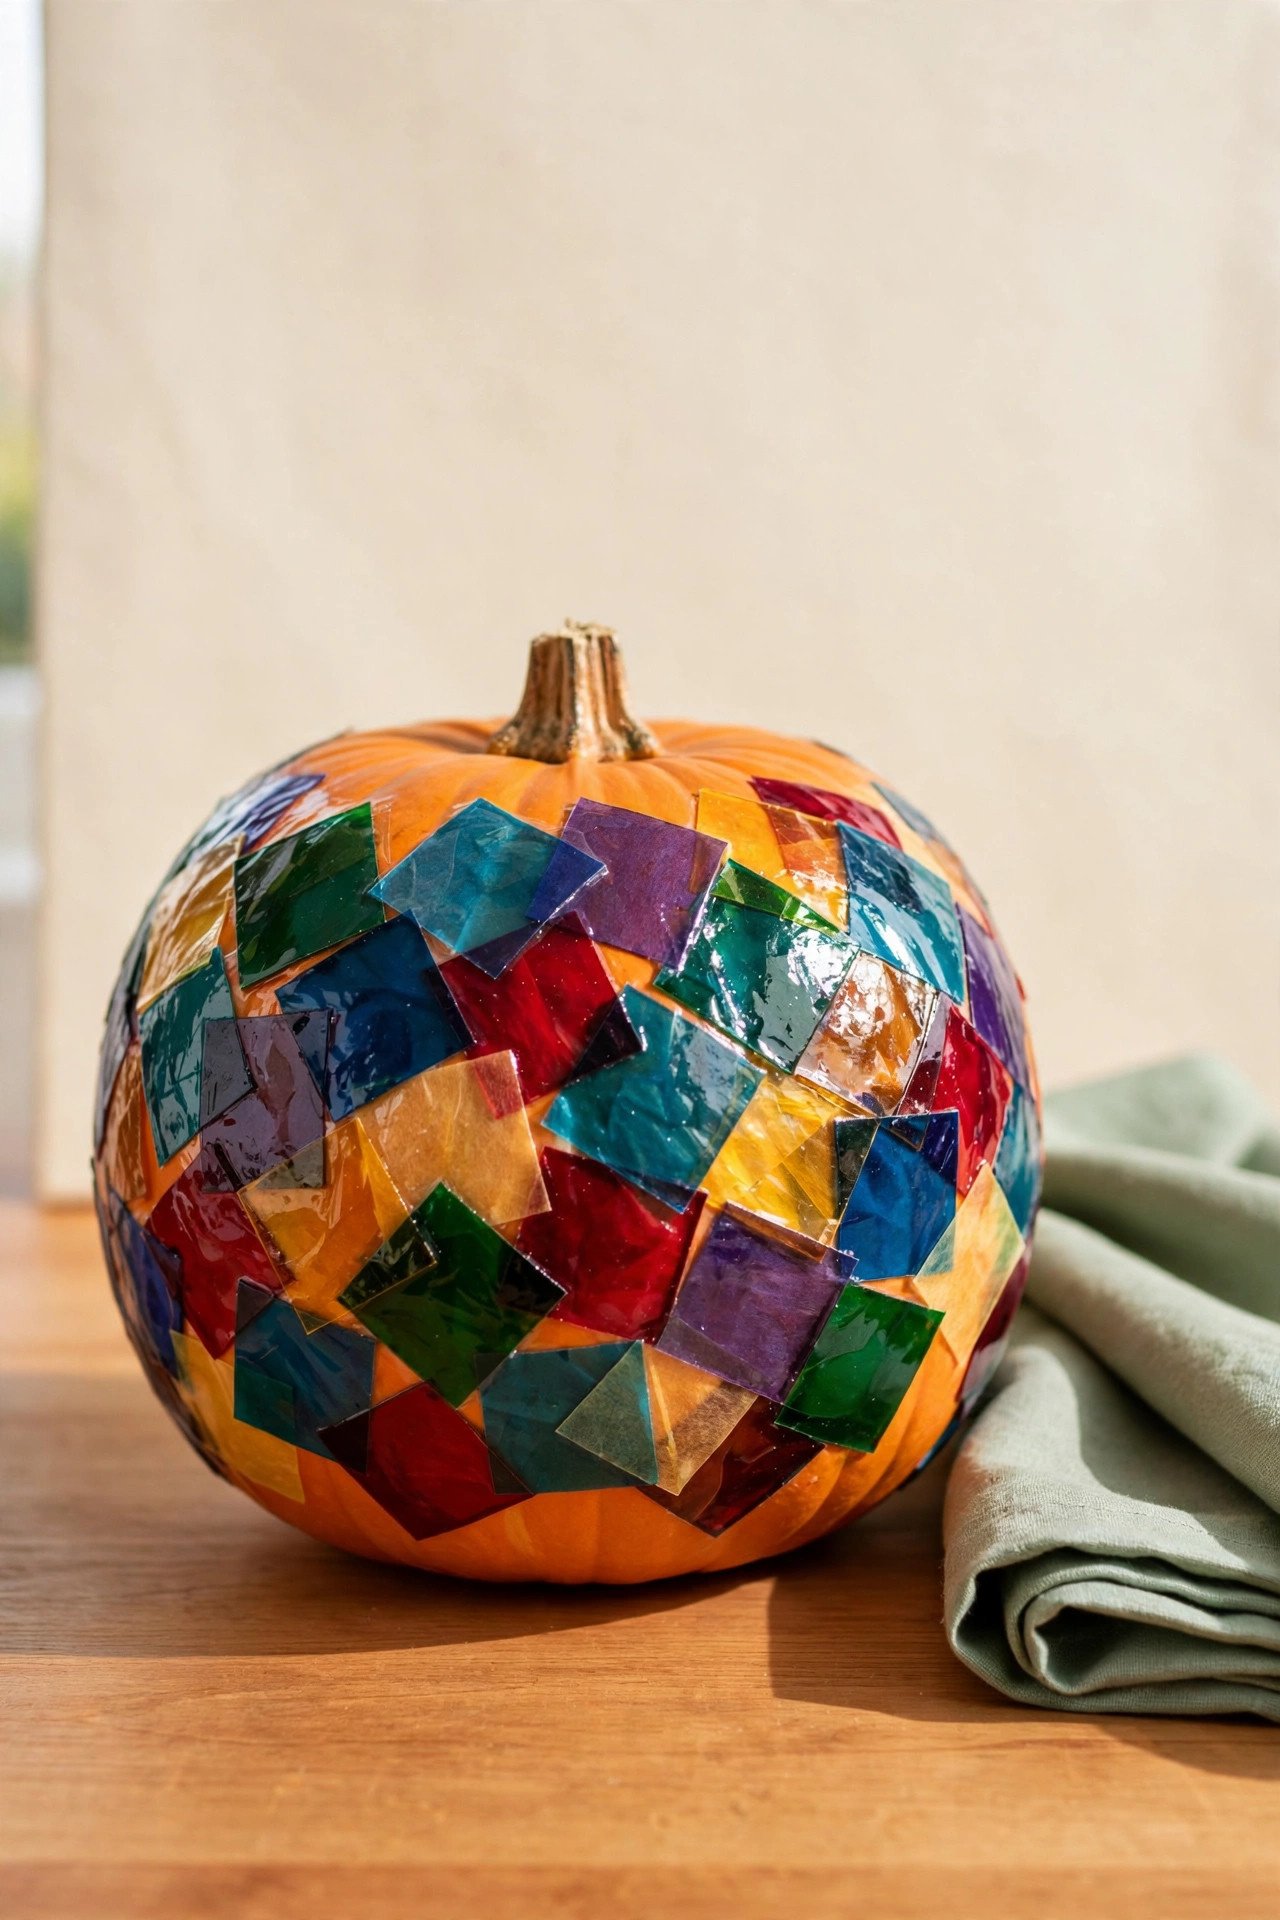
Small squares of colorful tissue paper, layered with decoupage glue, turn a pumpkin into a glowing stained glass lantern. The overlapping pieces catch the light beautifully, especially when you set the finished pumpkin near a window or on the mantel.
Start with a white pumpkin or a white primer so the tissue colors stay bright and clear. Apply the glue under and over each piece to seal it down, and keep a damp cloth handy for drips. Precutting the tissue into squares or triangles makes the whole process much faster.
6. Googly Eye Monster Pumpkin
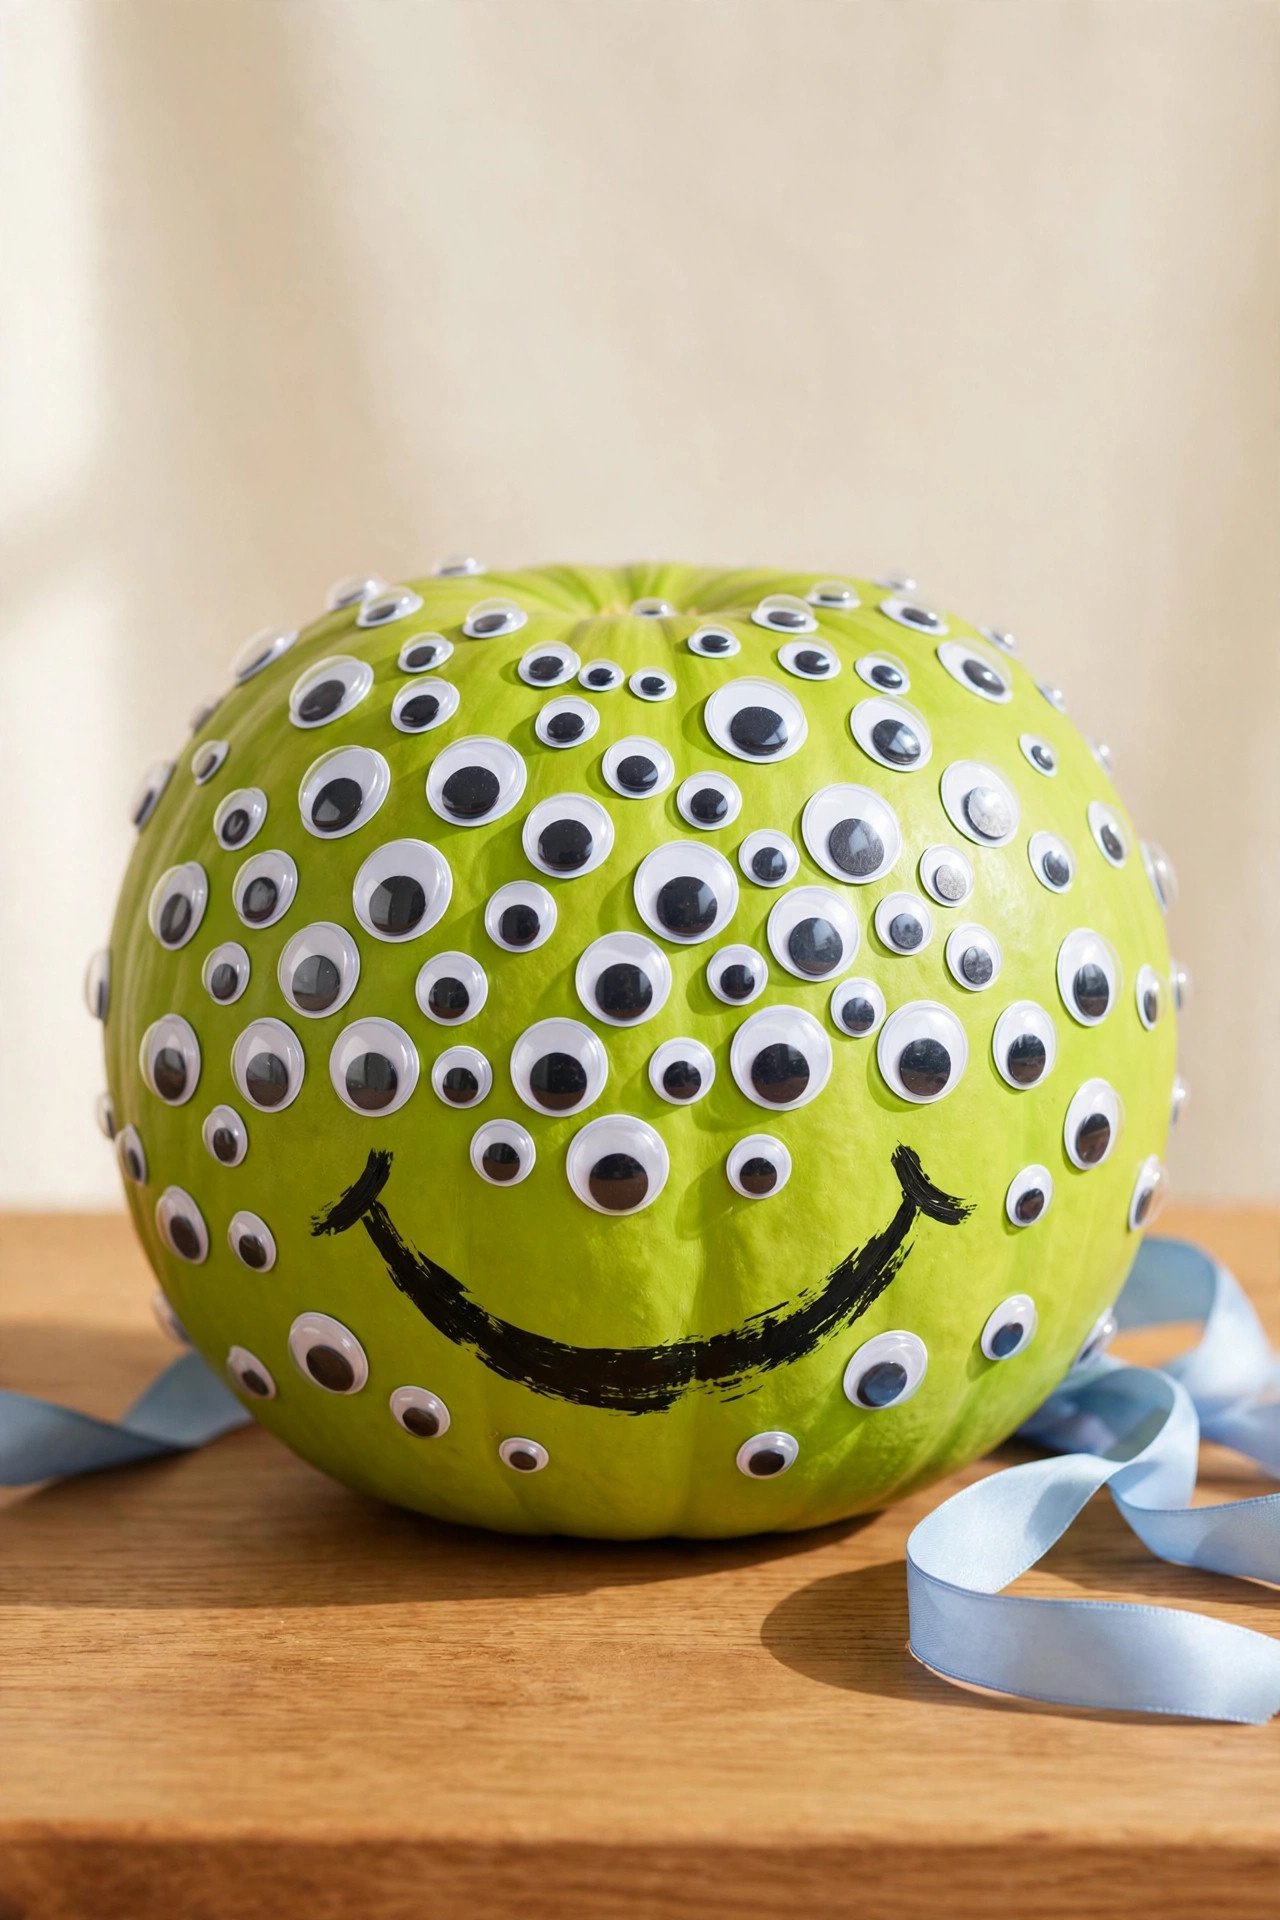
Cover a pumpkin with googly eyes in every size and you get an instant Halloween monster. Add a big painted grin, and the silly creature comes alive. Clustering the eyes in groups makes the monster look more expressive and a little chaotic, which is exactly the point.
Self-adhesive googly eyes make this the fastest project on the list and a perfect one for kids. Paint the pumpkin a bright color like lime green first so the white eyes stand out. Cardstock horns or ears glued to the sides give your monster even more personality.
7. Pom-Pom Polka Dot Pumpkin
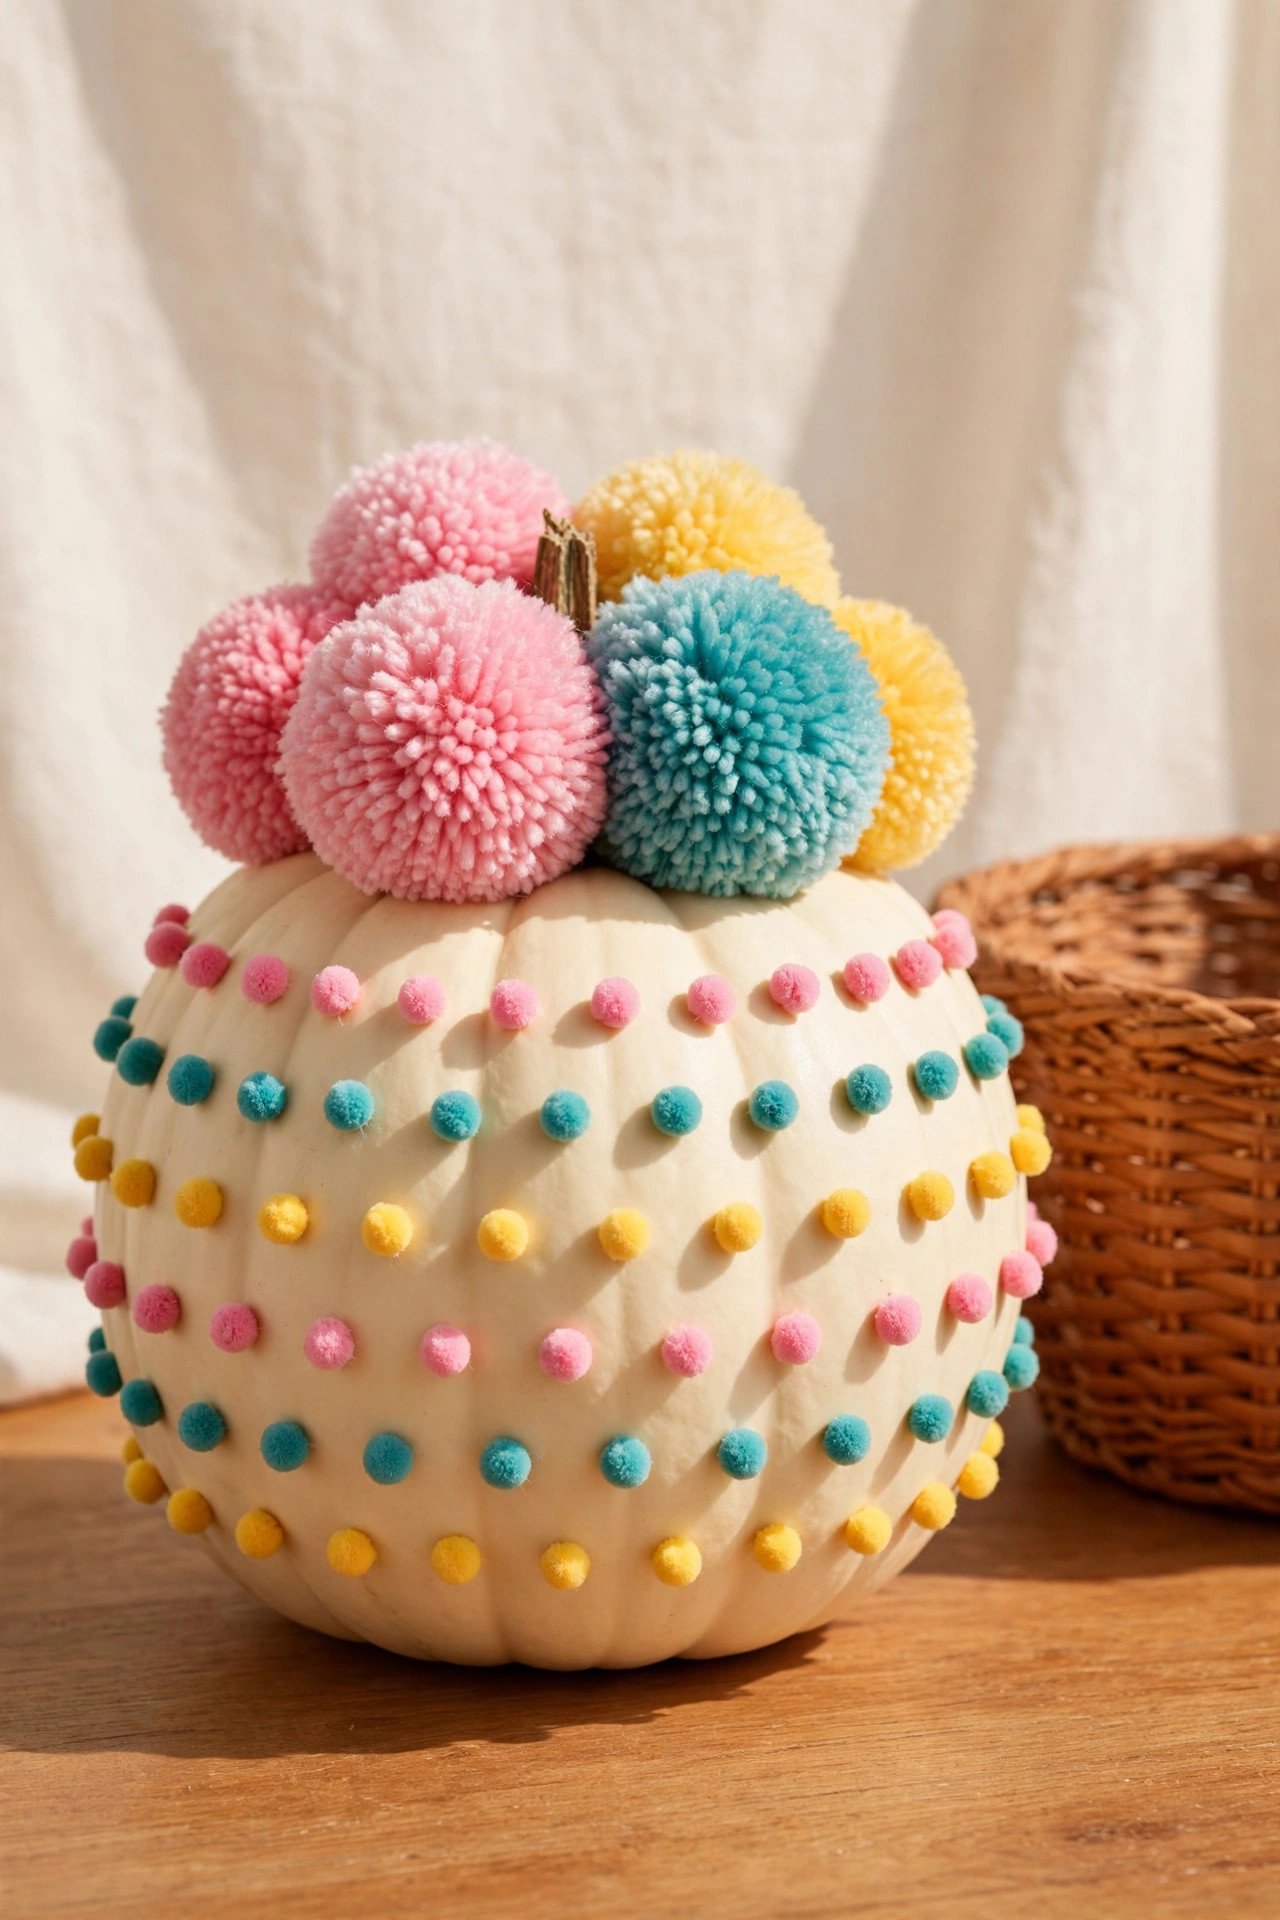
Tiny pom-poms glued across a pumpkin make a soft, playful polka dot pattern. Choose three or four colors that go well together, space the pom-poms evenly, and finish with oversized fluffy ones around the stem. It is a gentle, kid-friendly look that works even for toddlers helping with craft glue.
A pumpkin with deep ribs helps you line the rows up neatly. High tack craft glue is a safer choice than a hot glue gun when little hands are involved. Glitter pom-poms mixed in here and there add a sparkle that catches the light, and this mess-free craft is one of the easiest rental friendly decor projects for fall.
8. Chalkboard Art Pumpkin
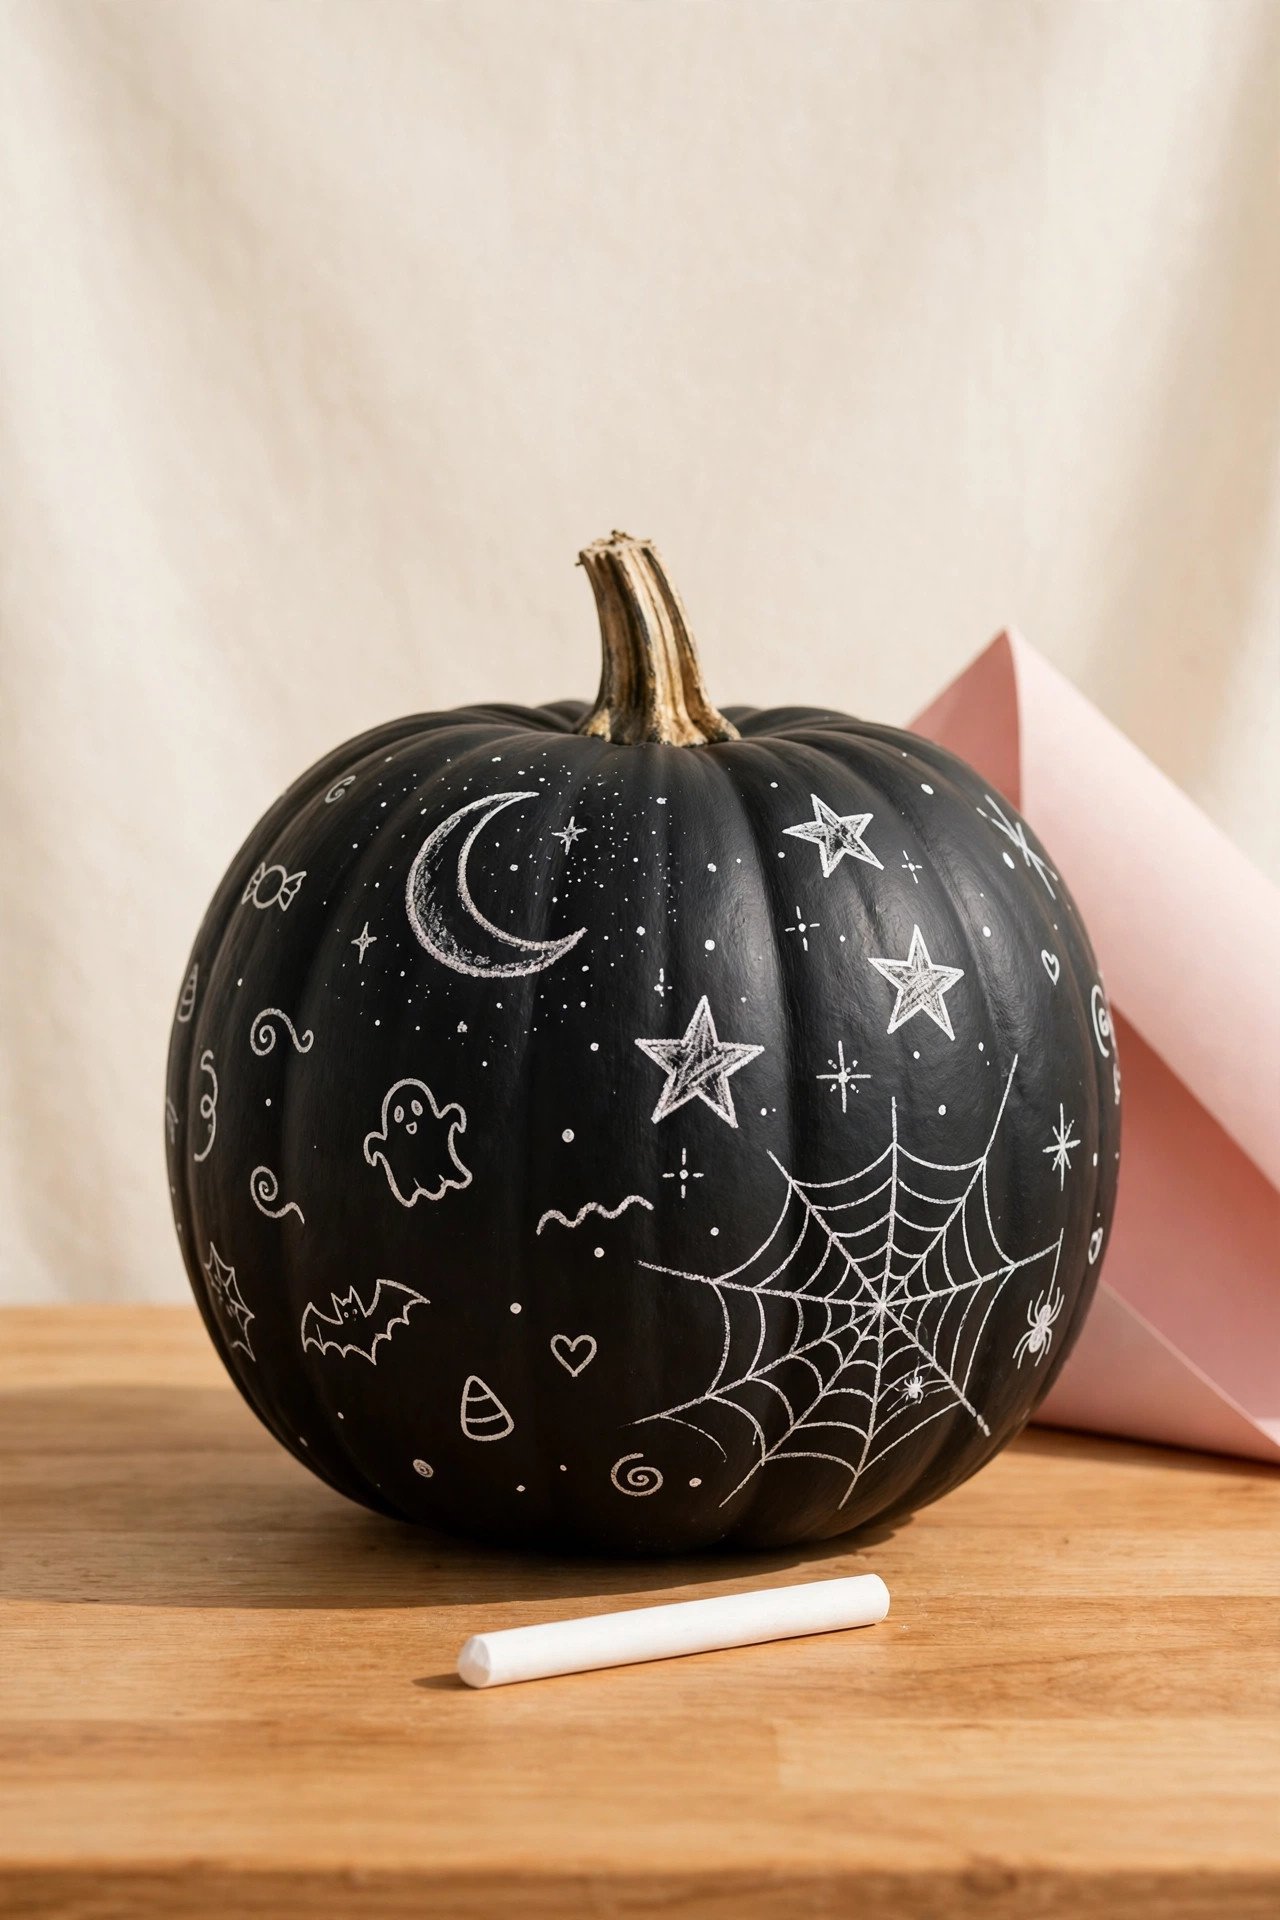
A coat of black chalkboard paint turns your pumpkin into a reusable drawing board. Draw stars, spiderwebs, funny faces, or a Halloween countdown with chalk markers. When you want a new design, you simply wipe it off and start again.
Two thin coats give a smoother surface than one thick coat. Wait a full day for the paint to cure before you draw on it, and use liquid chalk markers for crisp lines that will not smudge on the way to a contest table. A damp cotton swab erases small mistakes with precision.
9. Washi Tape Striped Pumpkin
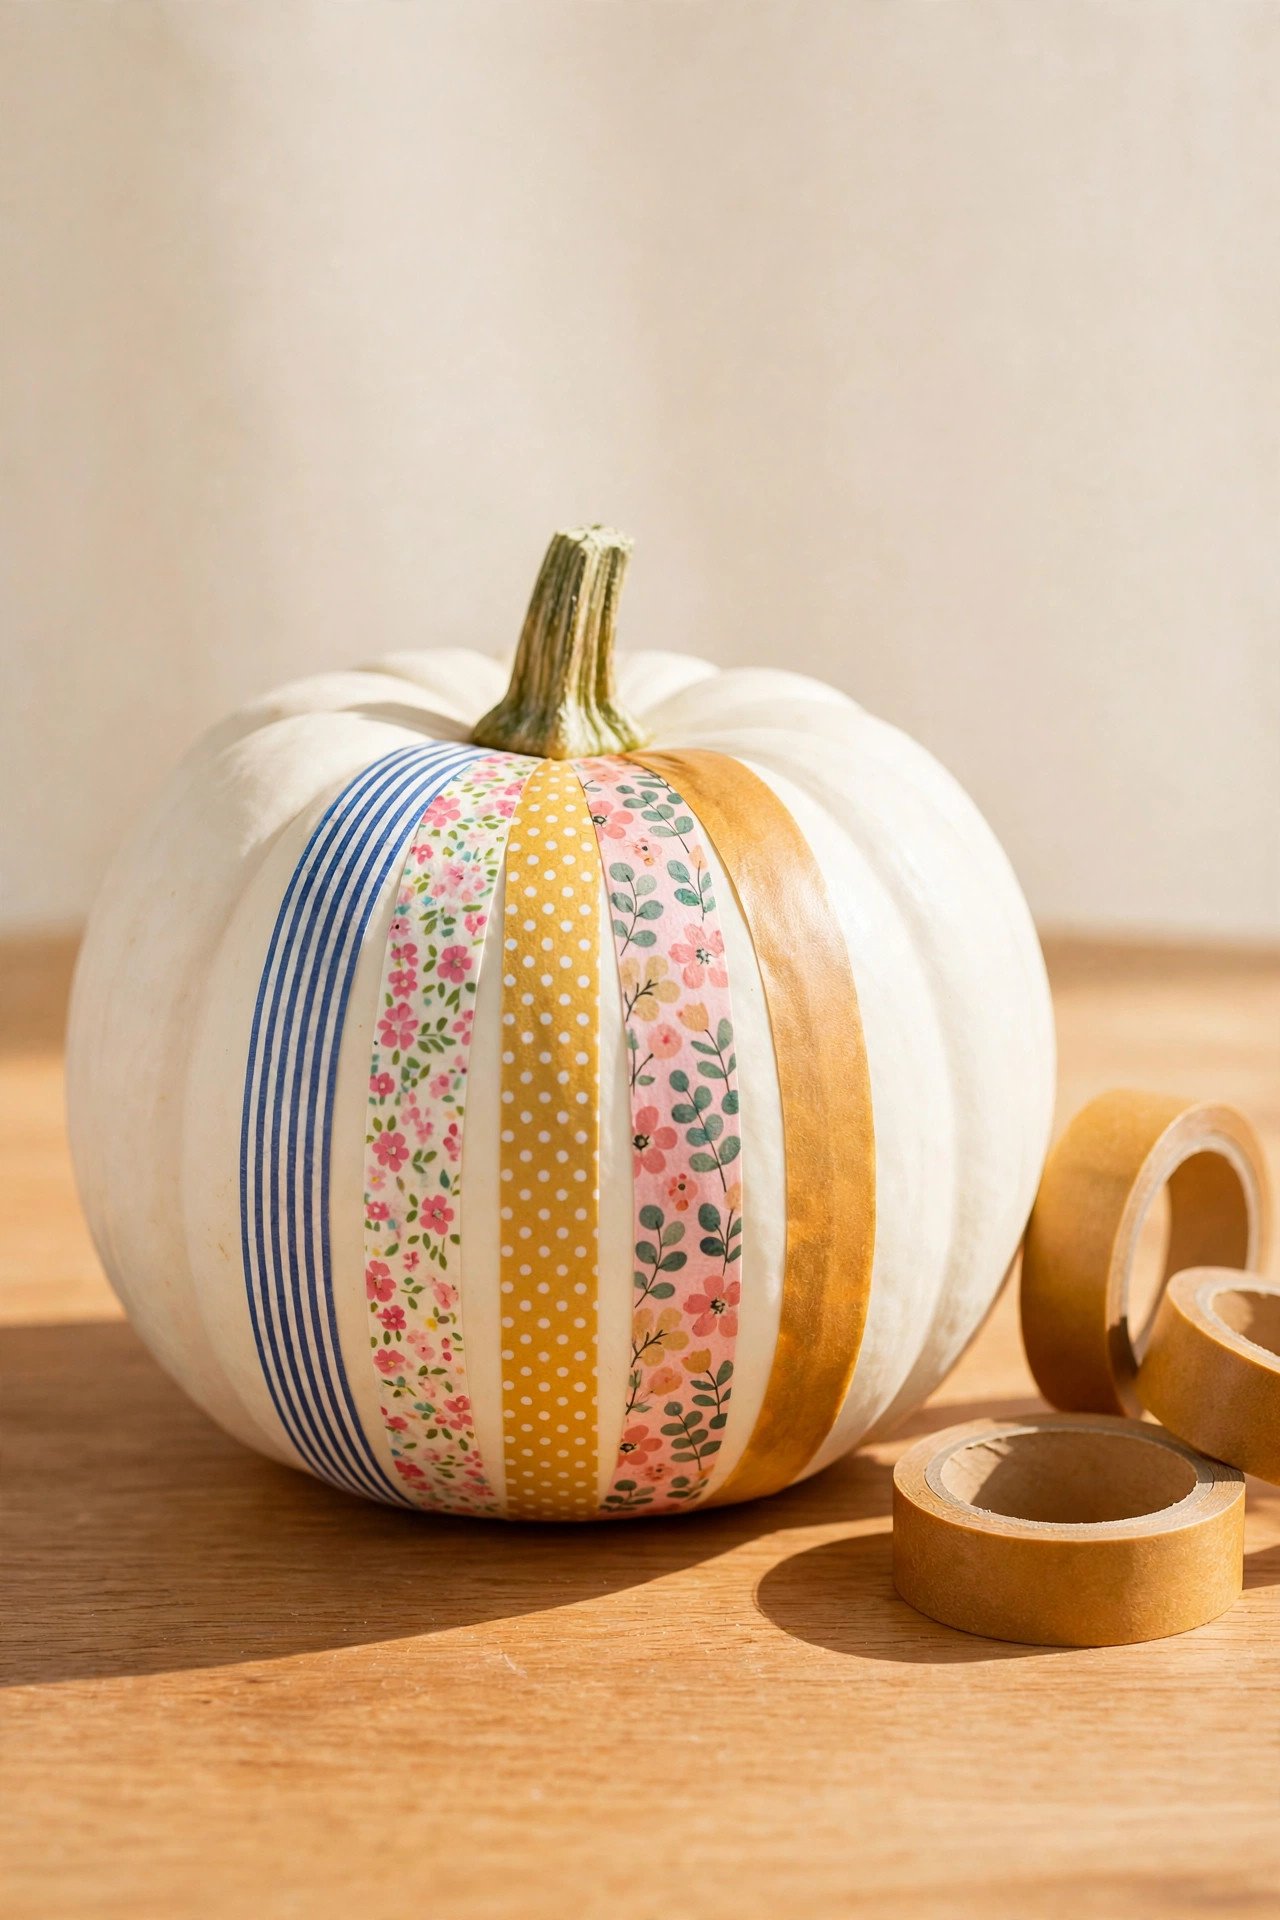
Strips of patterned washi tape, pulled tight from the stem to the bottom, make a polished geometric pumpkin in minutes. Alternate stripes, dots, and solid colors for a design that looks far more careful than it actually is. There is no drying time and no mess at all.
Press the tape down firmly with your fingertip so the edges do not lift. Start at the stem and pull each strip straight to the bottom, trimming it where it hides under the base. A tiny dab of clear glue on the ends keeps everything stuck through a cold October night.
10. Glow in the Dark Ghost Pumpkin
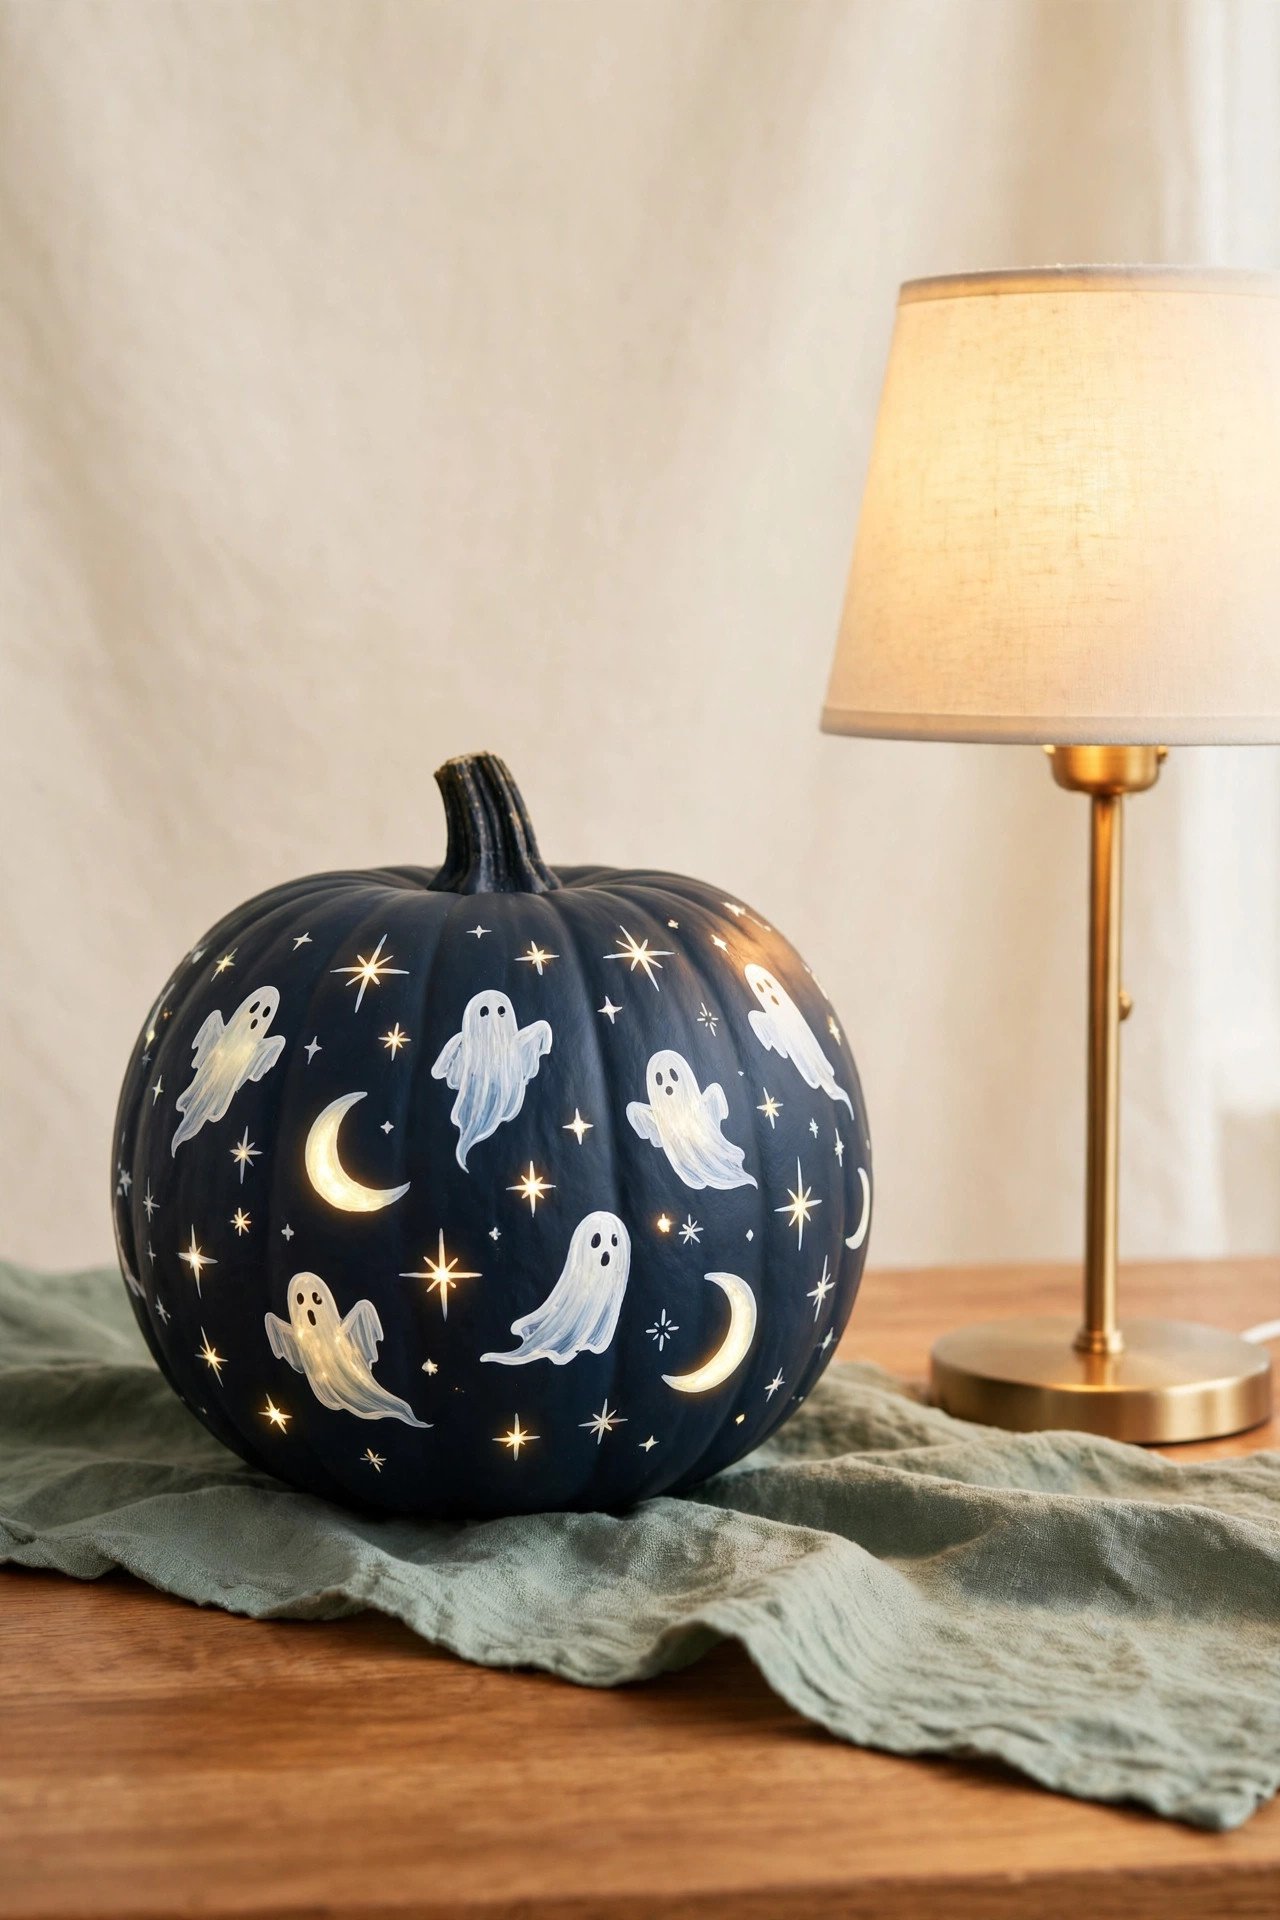
Glow in the dark paint turns an ordinary pumpkin into a night-time showpiece. Paint ghosts, stars, or dripping slime on a dark blue base, then charge it under a bright lamp before the contest. In a dim room, the designs light up and everyone gathers around.
Glow paint goes on thin, so plan for several coats of each design. A dark background makes the glowing parts shine much brighter. Keep a small blacklight flashlight nearby during the judging so your pumpkin stays charged and glowing the whole evening.
11. Creepy Crawler Spider Pumpkin
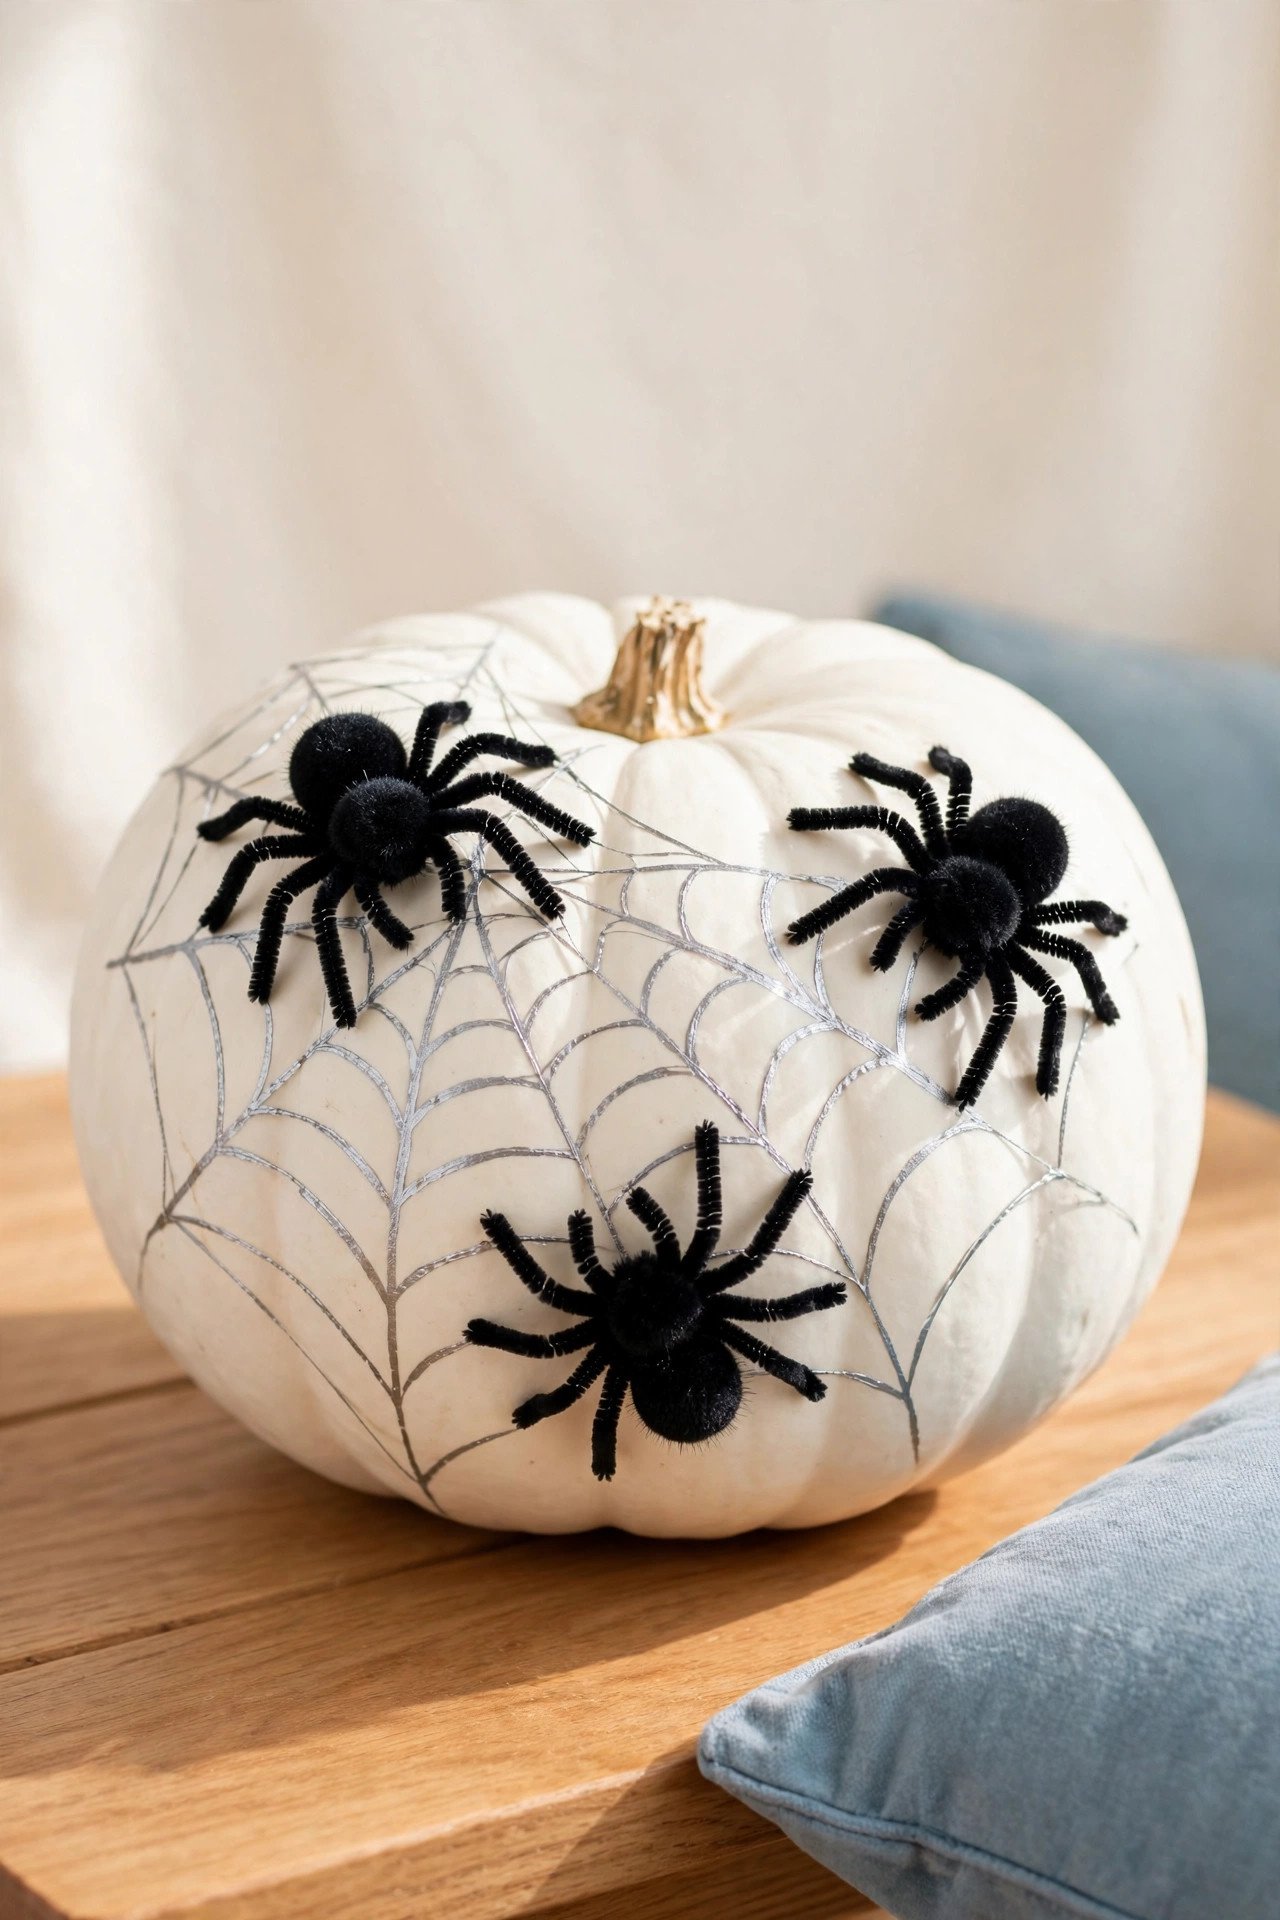
Little spiders made from black pom-poms and pipe cleaner legs crawl across a white pumpkin. A silver painted web connects them, and suddenly you have a spooky three-dimensional display. The black against white contrast is bold enough to read from across the room.
Build each spider first by gluing the legs to the body, then attach the finished spiders with a dab of hot glue. Use a white pumpkin or white paint underneath so the spiders pop. This dramatic piece looks wonderful on a fall entryway, and if you style your porch around it, you will find plenty of inspiration in these romantic porch decor ideas.
12. Storybook Character Pumpkin
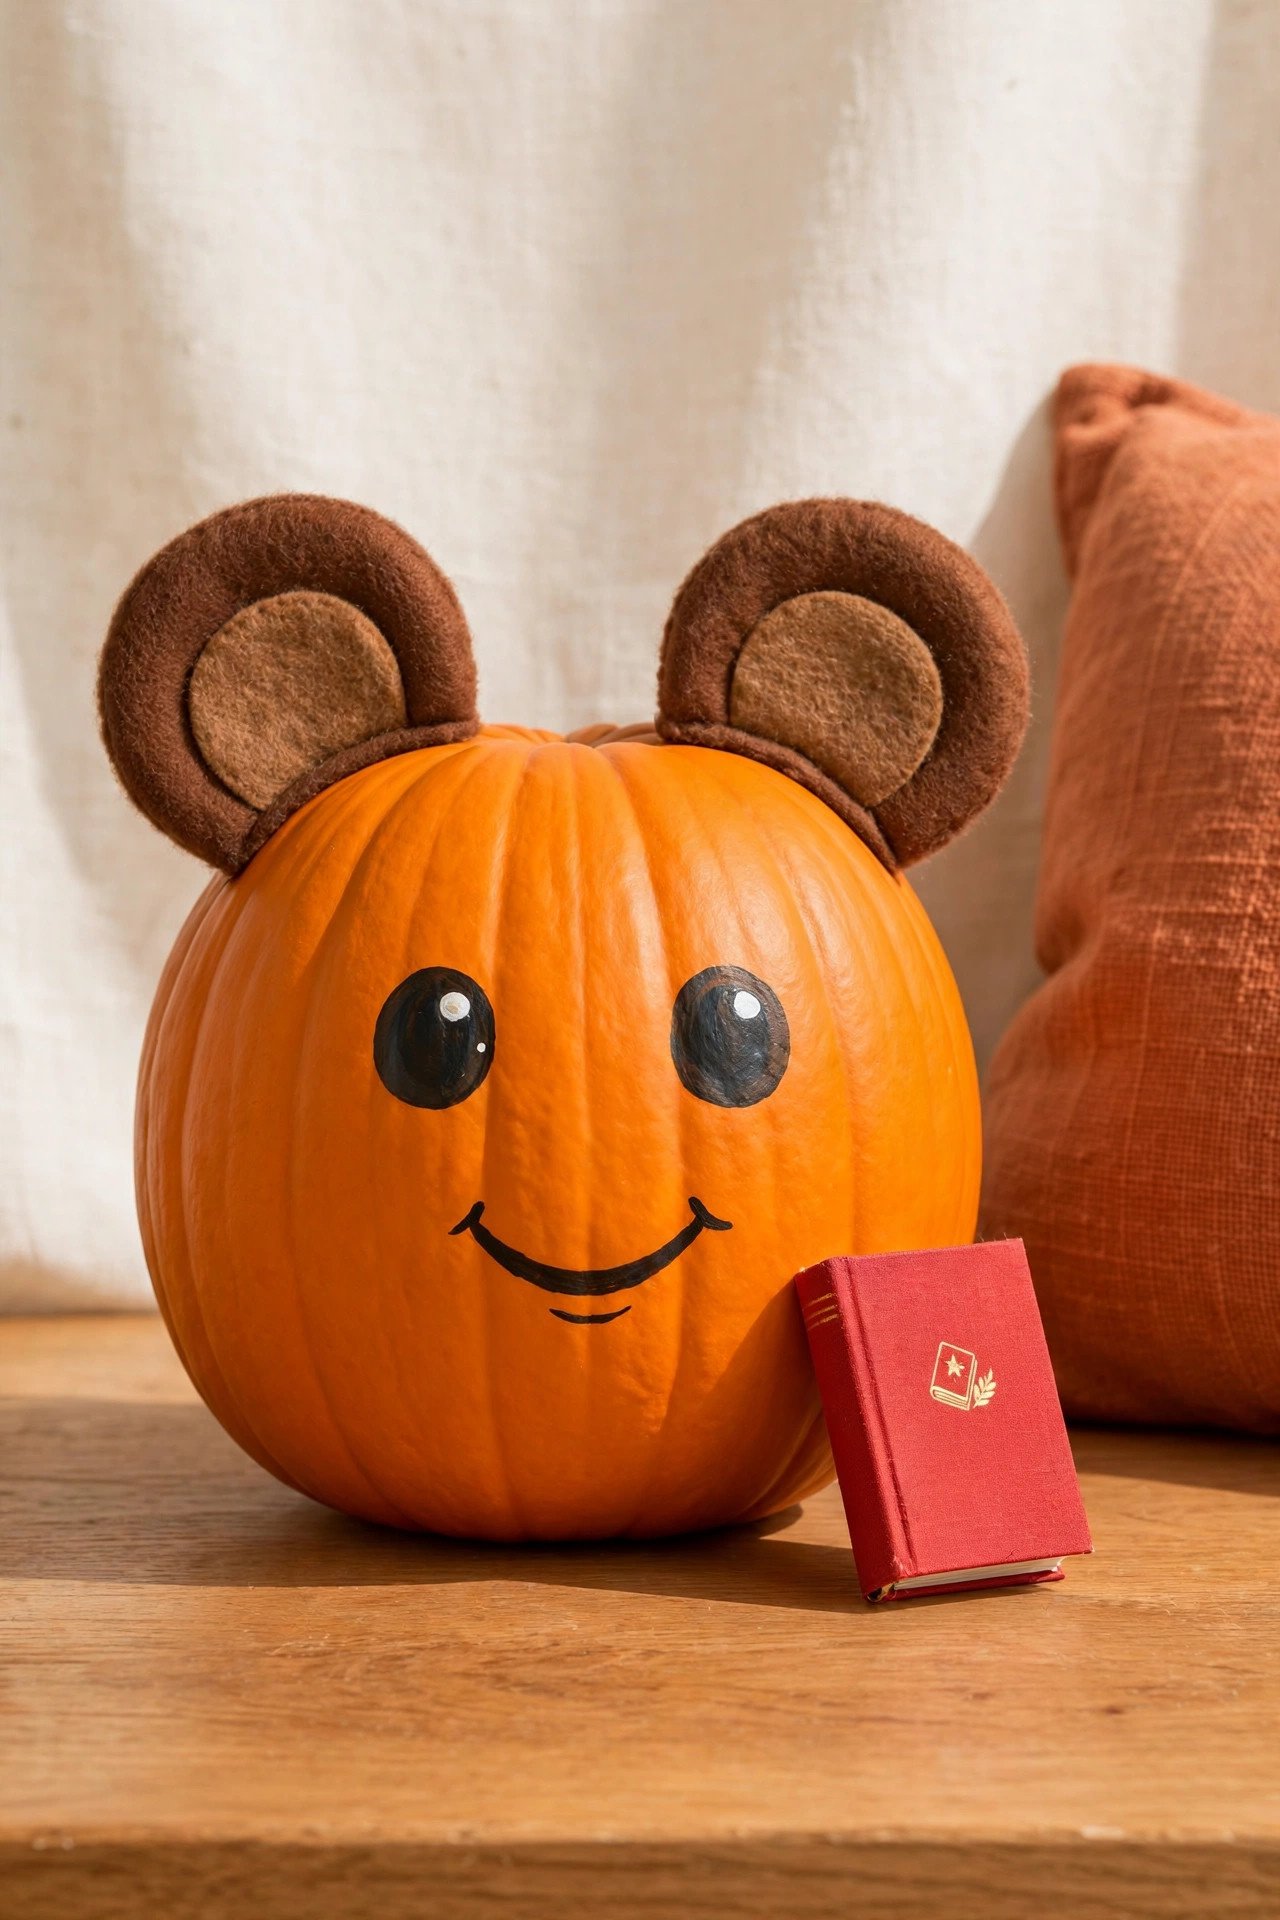
Turn a pumpkin into a favorite storybook character using felt ears, cardstock details, and acrylic paint. A round pumpkin already has the perfect face shape, so characters with round faces work best. Set the book beside the finished pumpkin at a school contest and it becomes an instant favorite.
Heavy cardstock holds hats, glasses, and ears upright without flopping. Acrylic paint dries fast and gives strong color, and a light coat of matte spray sealer keeps the paper pieces from peeling. Choose a character you love, because your enthusiasm will show in the details.
13. Hungry Bookworm Pumpkin
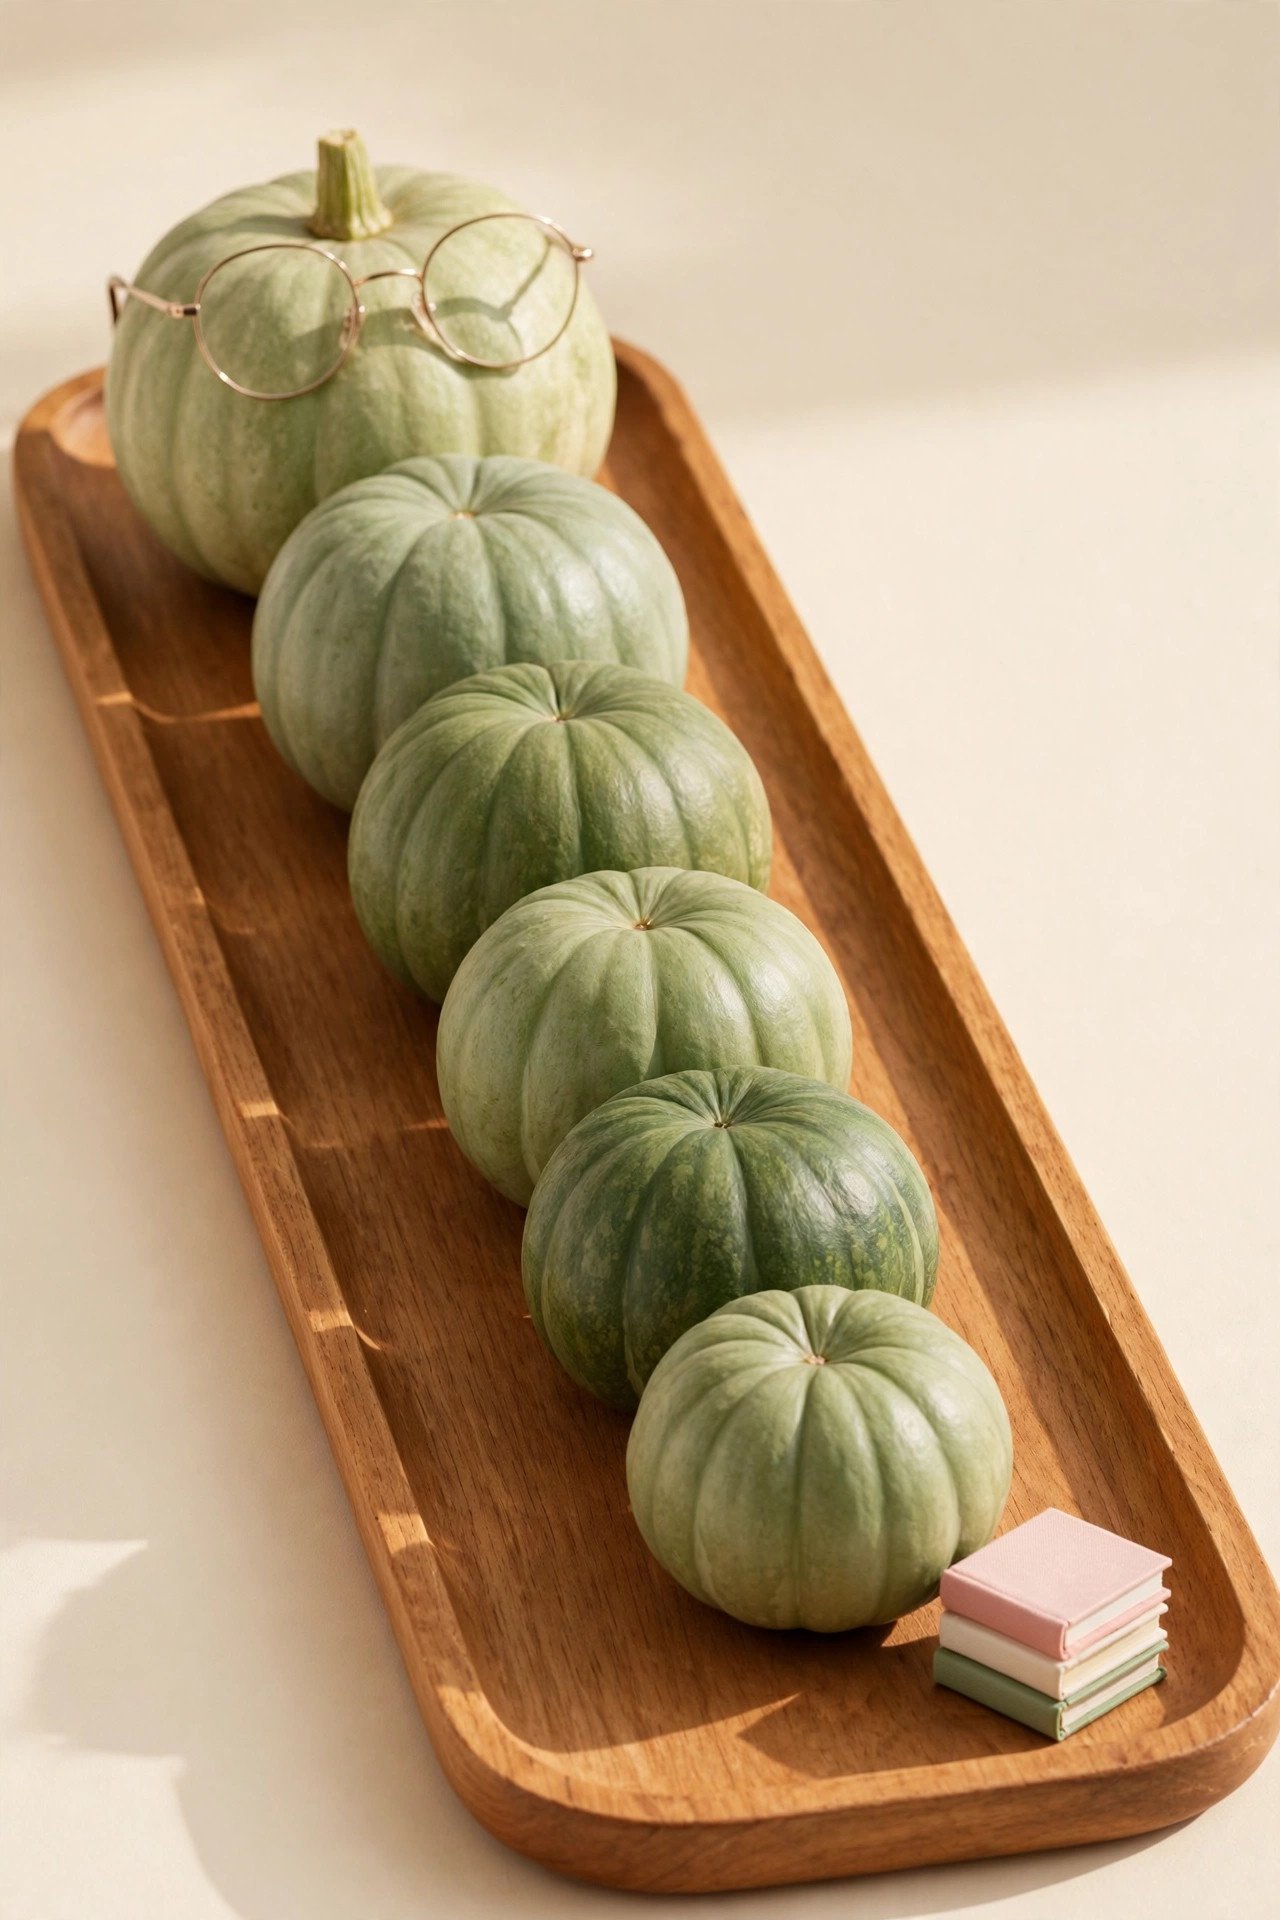
Line up several small pumpkins to build a long, segmented bookworm body. Paint each one a slightly different shade of green for depth, add wire-rimmed glasses, and pile tiny books around it. The whole scene tells a story all by itself.
A bag of small pie pumpkins gives you evenly sized segments. Connect them with sturdy toothpicks or floral wire, and set the whole worm on a long tray so it travels to the contest in one piece. A little museum putty under each segment keeps the worm from rolling.
14. Mini Library Shelf Pumpkin
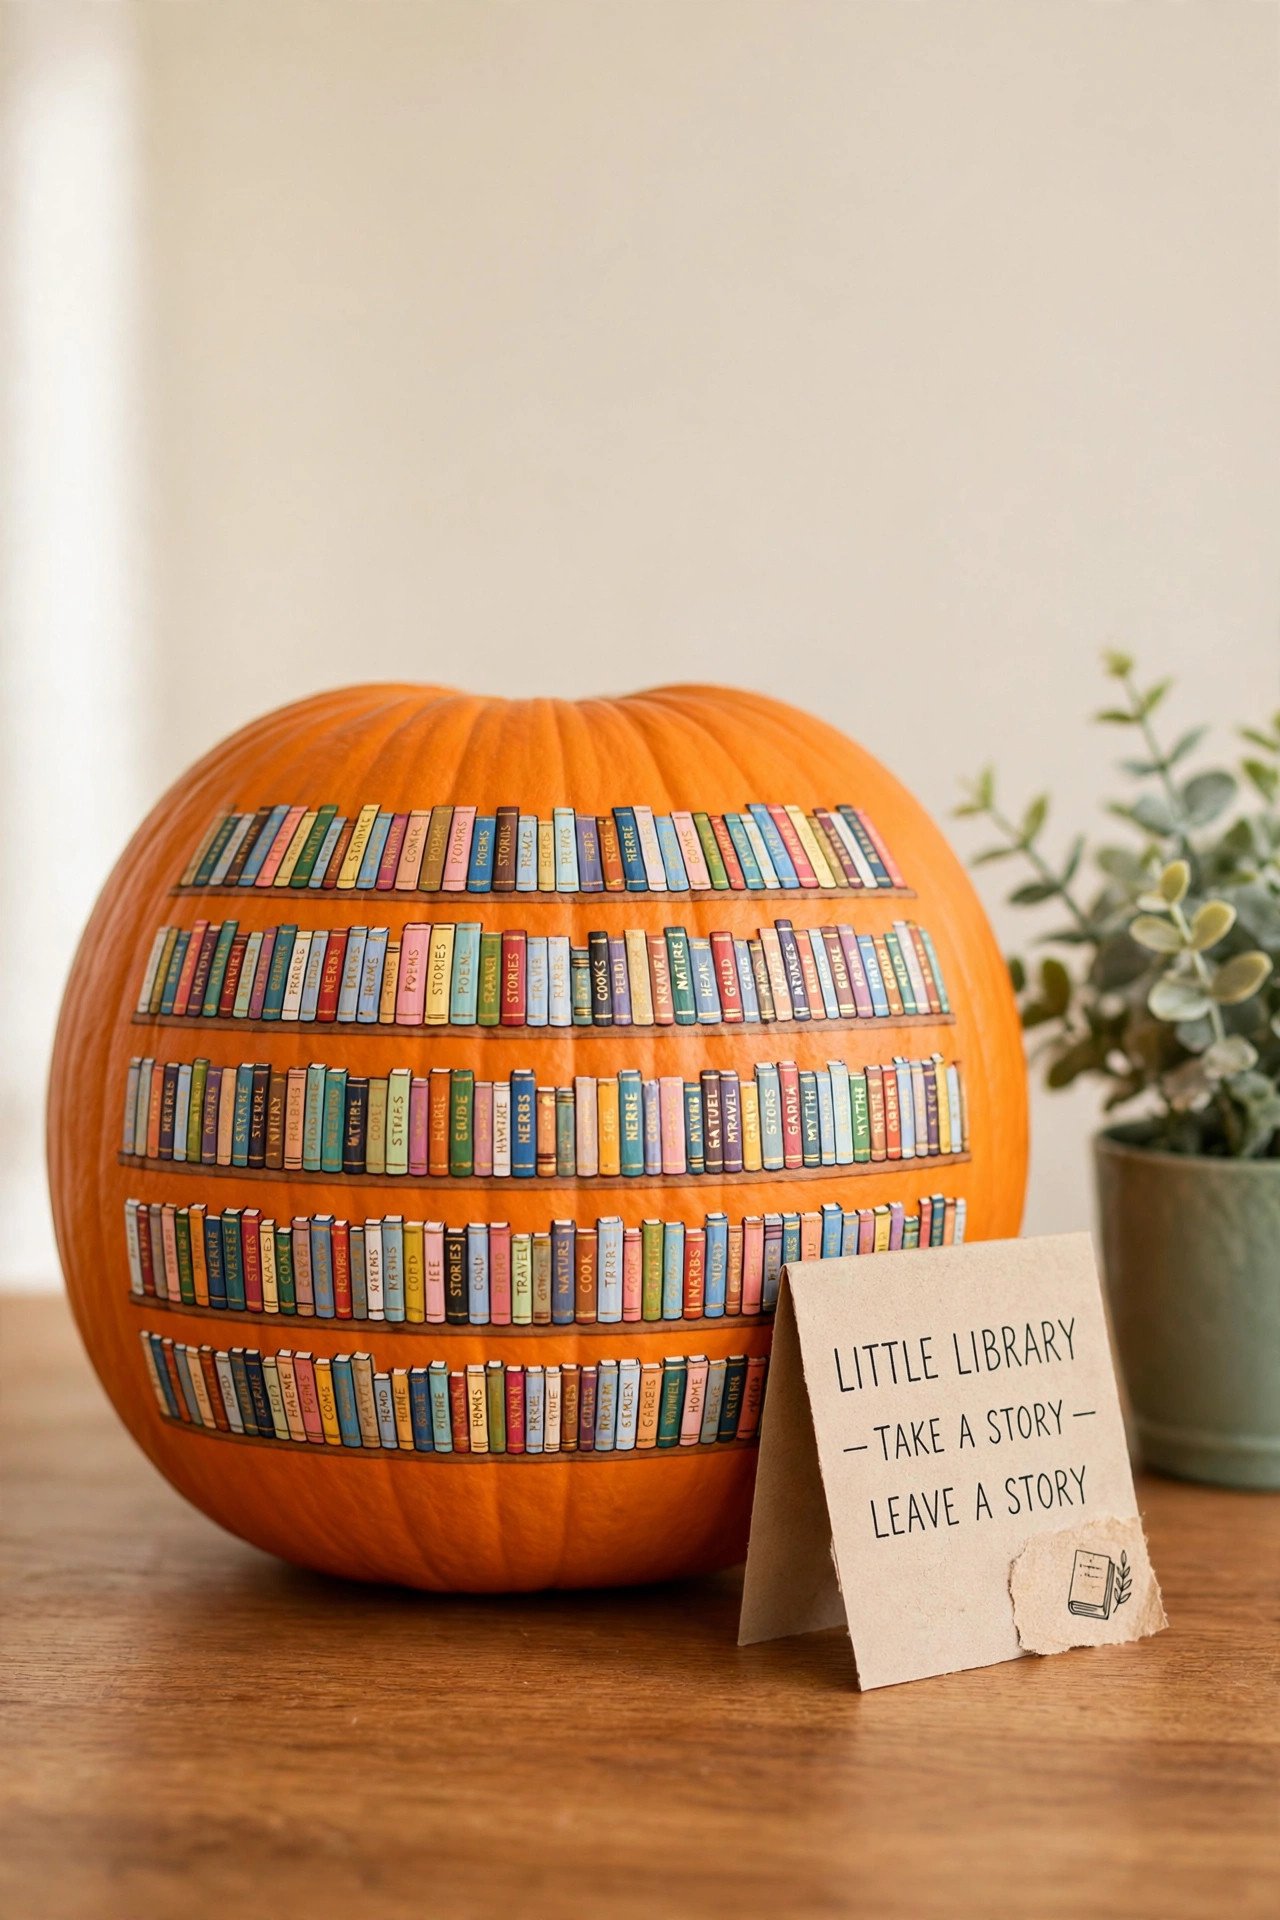
Paint rows of tiny, colorful books across the pumpkin and you get a miniature library. A sponge dipped in paint stamps the book shapes quickly, and a gold marker adds little titles to the spines. A small handmade sign finishes the display like a real exhibit.
Pick a pumpkin with a flat front so the stamping stays neat. Keep the book colors varied, like different genres on a shelf, and use a fine paint marker for the gold details. Flat rectangles stamped in neat rows read clearly as books even from a few steps away.
15. Wise Reading Owl Pumpkin
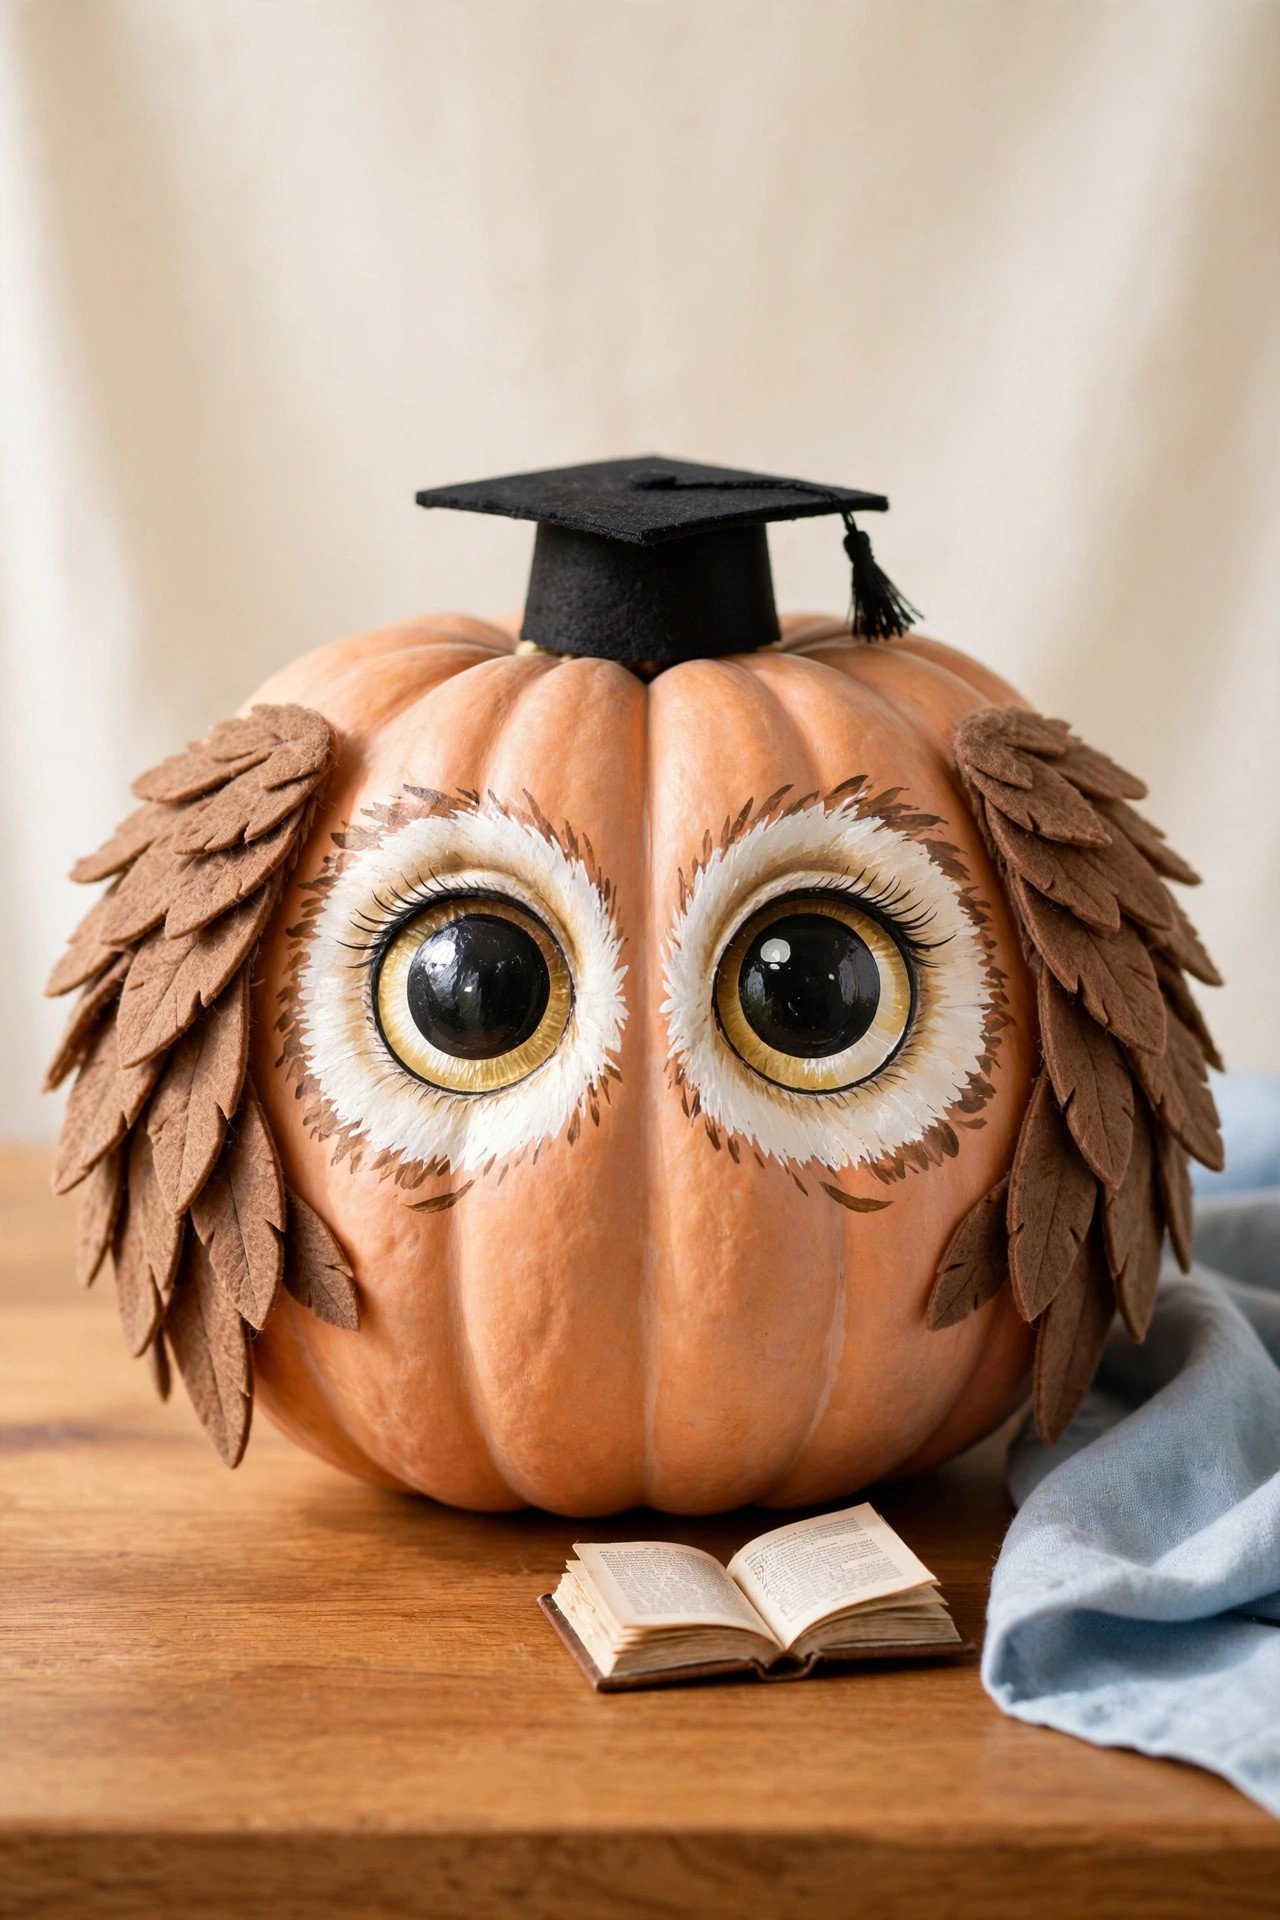
A squat, wide pumpkin has the perfect shape for an owl. Paint big round eyes, add cardstock beak and wings, then layer felt feathers over the paint for texture that judges love. A miniature graduation cap makes it a charming school-themed entry.
Stiff felt holds the wings out from the body nicely. Large white cupcake liners make perfect eye bases without any measuring. Glue a small open book at the base to strengthen the reading theme and give the owl something to sit on.
16. Giant Yellow Pencil Pumpkin
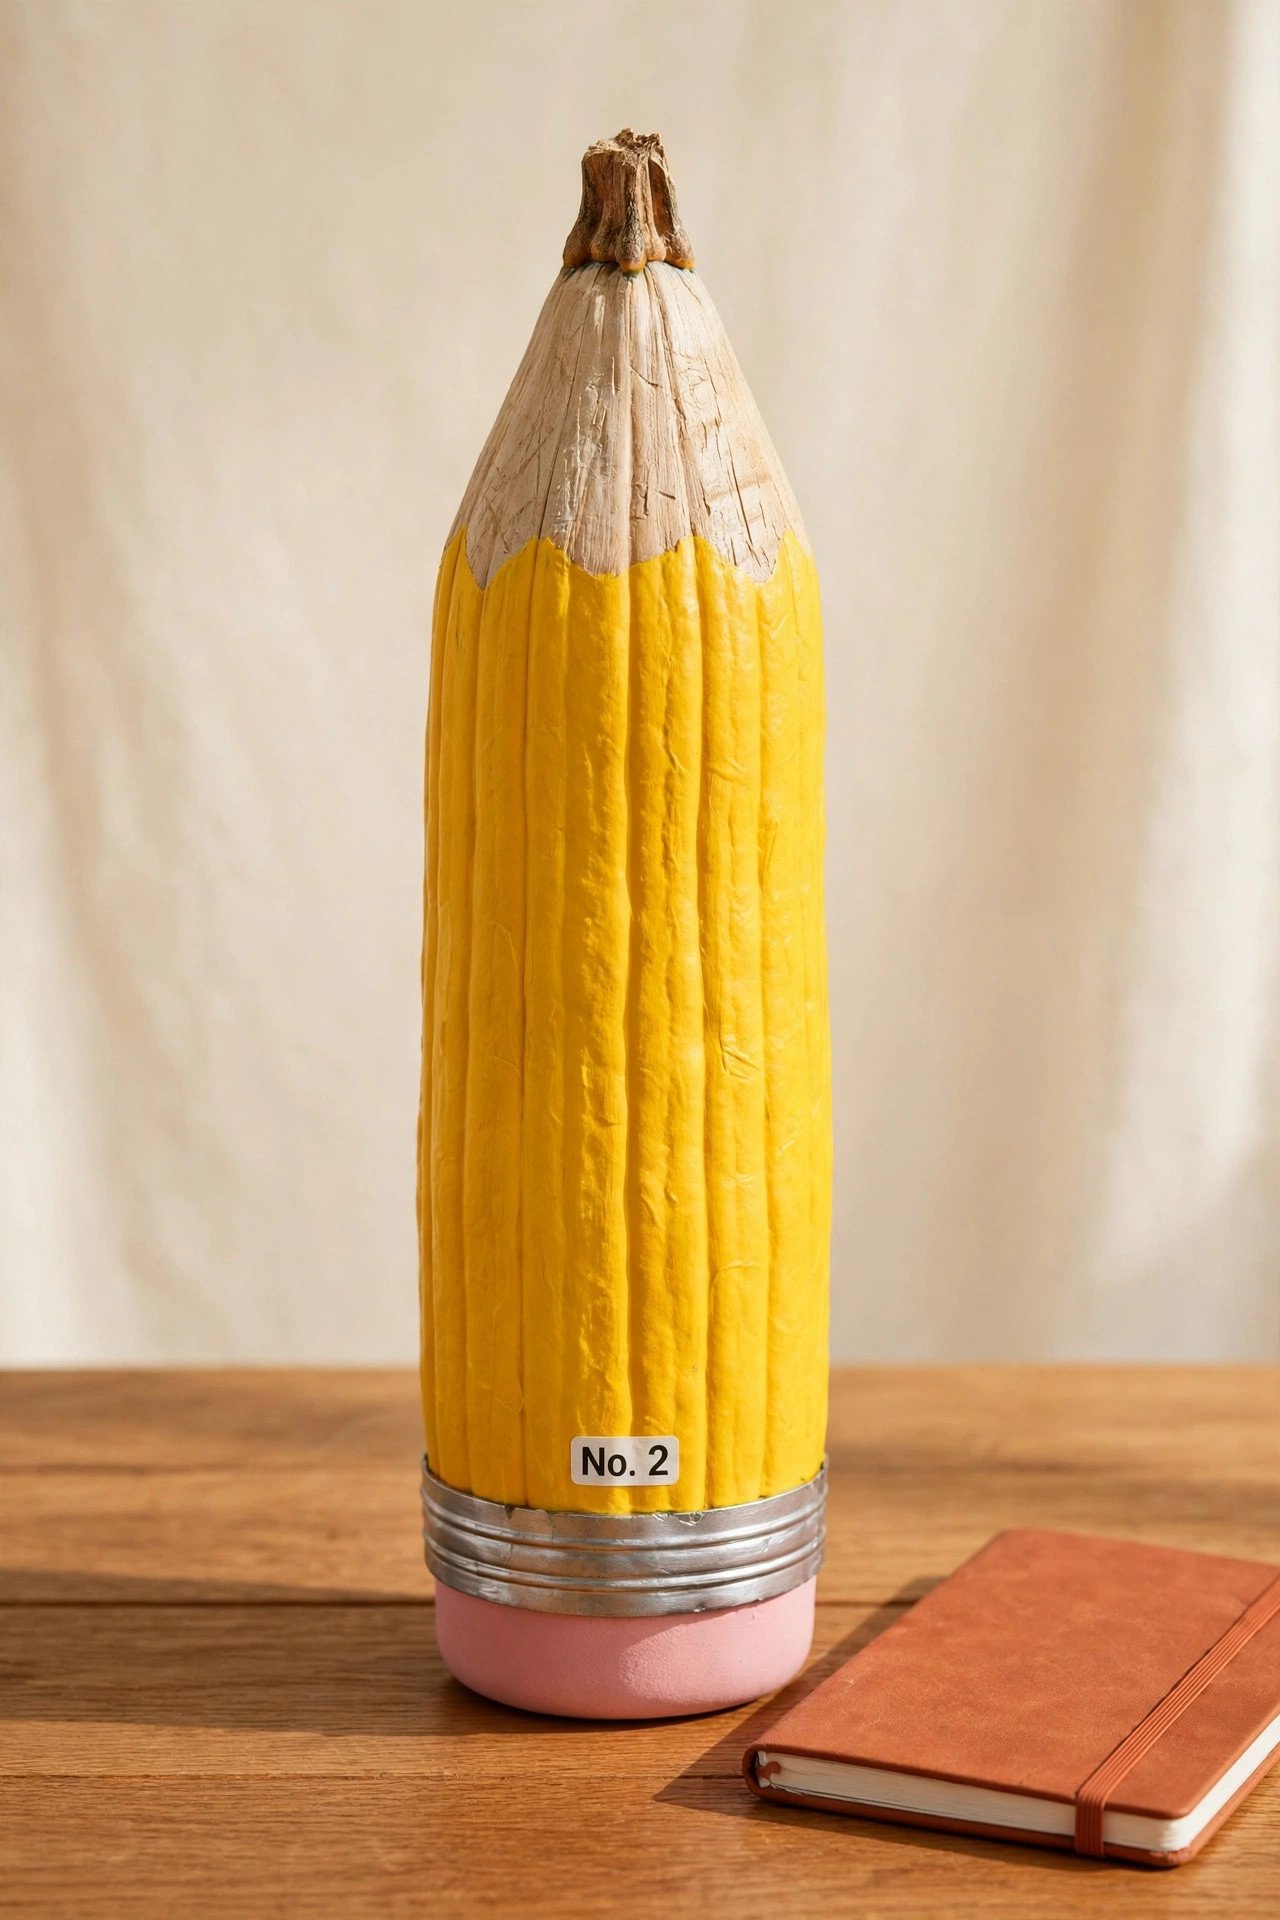
A tall, narrow pumpkin makes a convincing giant pencil. Paint it classic yellow, paint the area around the stem a light wood color like a sharpened tip, and add a pink eraser at the bottom. Add a No. 2 mark and everyone recognizes it instantly.
Painter’s tape gives you crisp lines between the yellow body and the eraser band. A strip of metallic silver tape mimics the metal ferrule perfectly. Look for a tall heirloom variety or a large butternut squash to get the right long shape.
17. Yellow School Bus Pumpkin
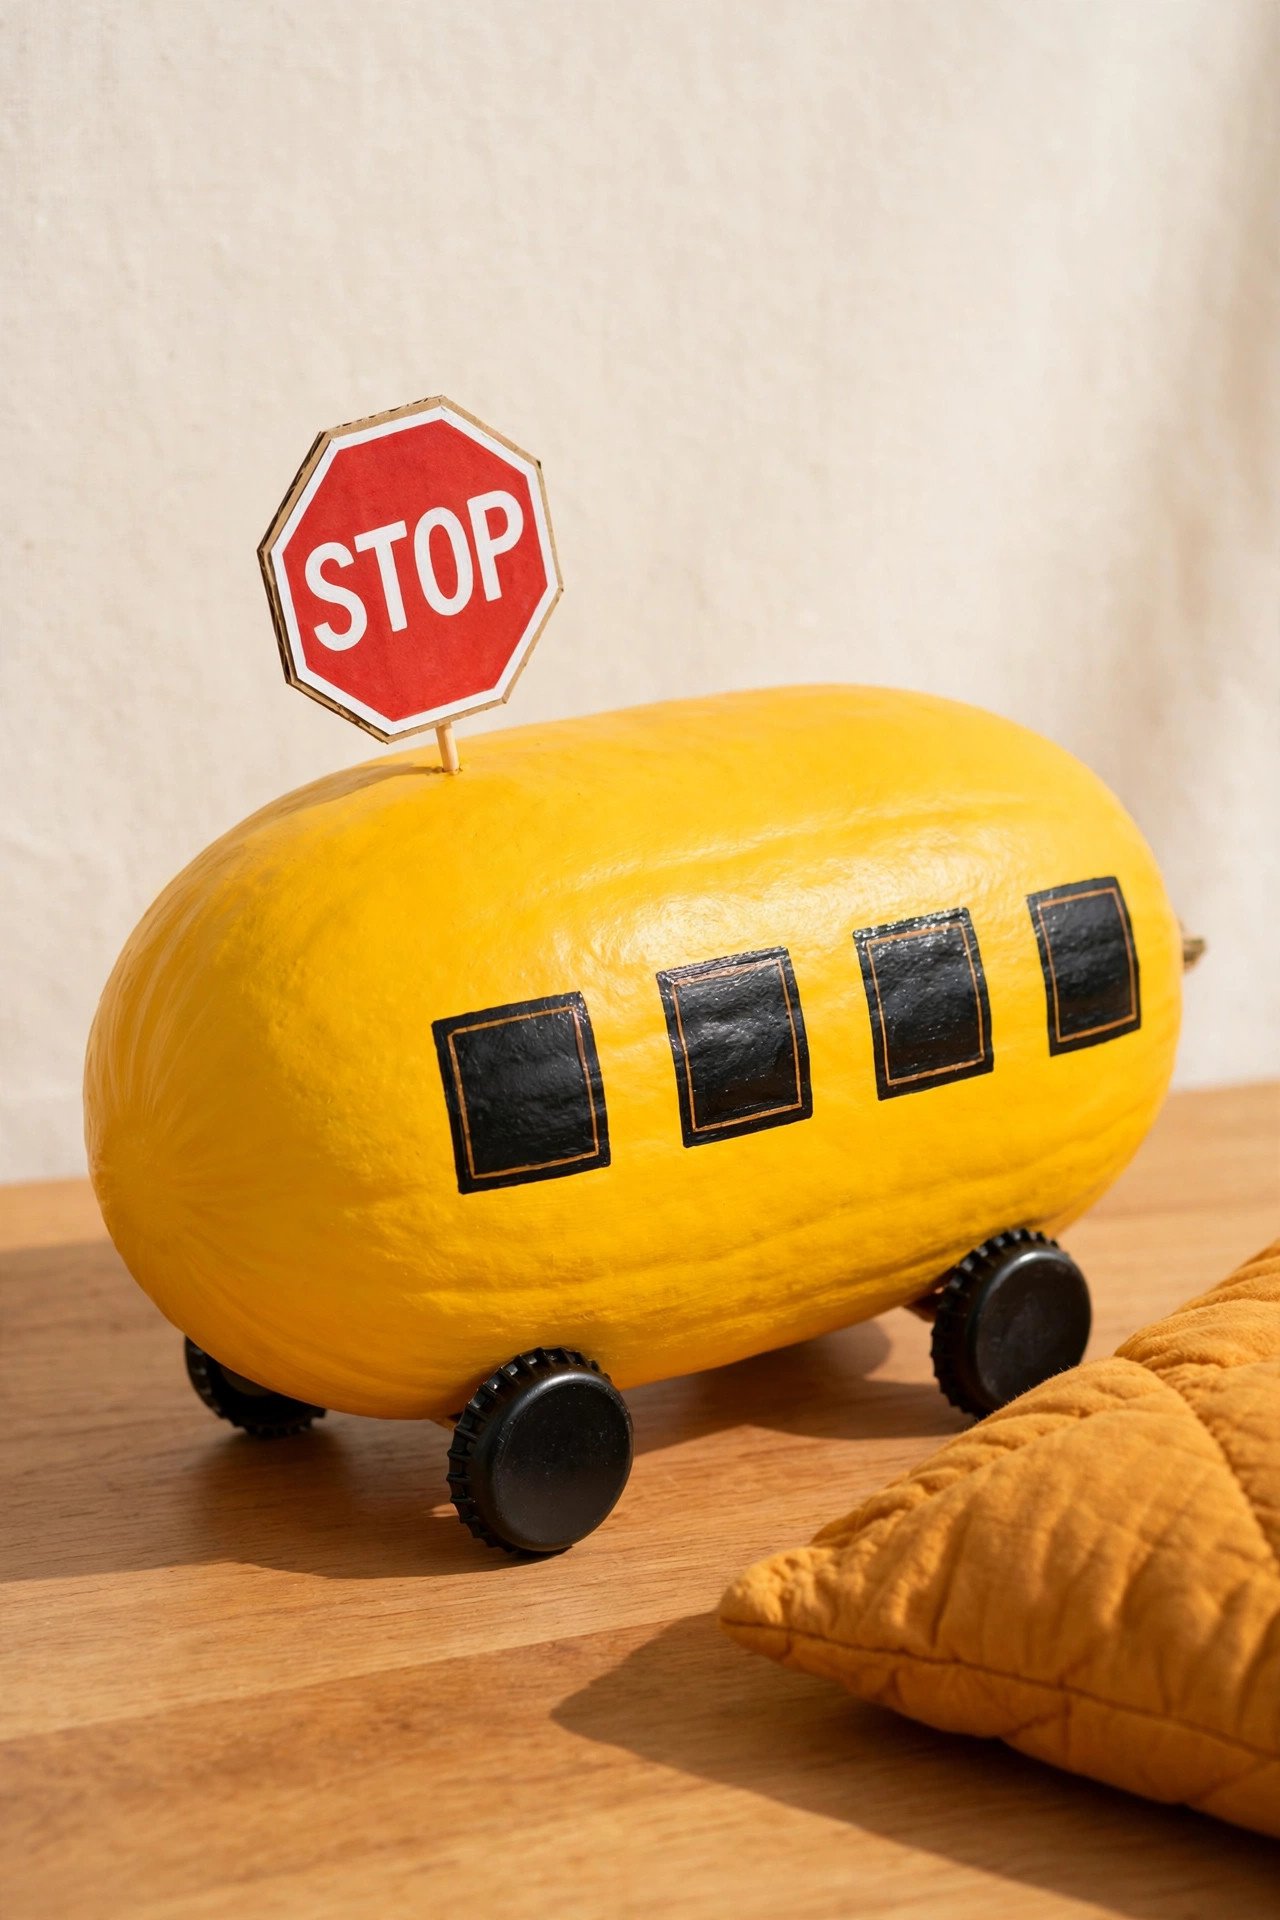
An oblong pumpkin, painted bright yellow with black windows, becomes a little school bus. Bottle caps painted black make perfect three-dimensional wheels, and a cardboard stop sign glued to the side adds a playful detail. Glue tiny student drawings in the windows for extra charm.
Use a square sponge or stencil to keep all the windows the same size. A black permanent marker handles the fine lines of the grille and door outline. This cheerful bus sits happily on front steps, and it pairs beautifully with a warm autumn entry like these Mediterranean porch ideas for a cozy seasonal welcome.
18. World Globe Pumpkin
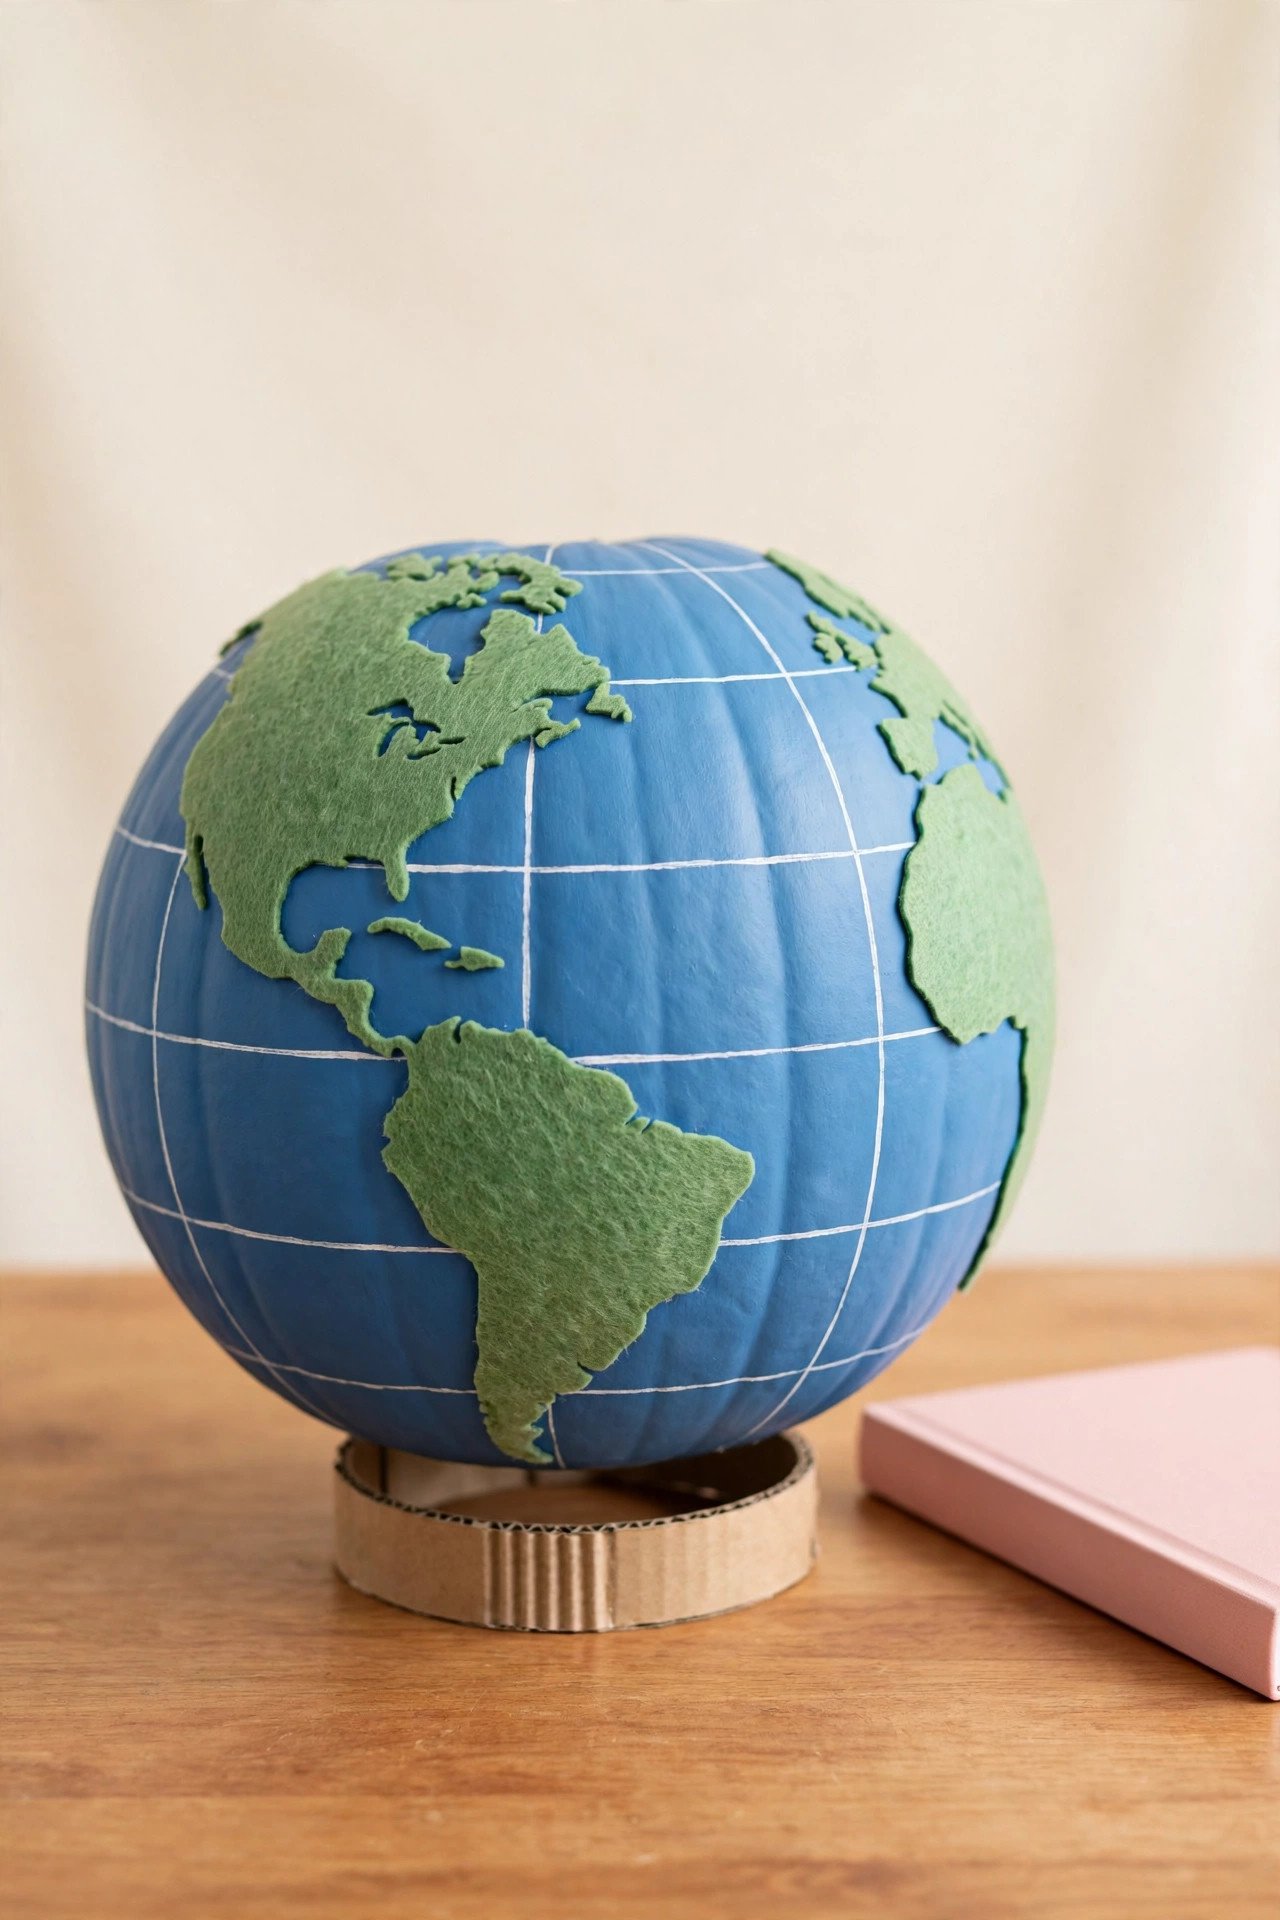
A round pumpkin painted ocean blue becomes the Earth, with green felt or foam continents glued on top. Printing a small map to use as a cutting template keeps the landmasses accurate and professional. A cardboard ring base lets the globe tilt at a realistic angle.
Matte blue paint avoids glare under contest lights. Trace the map shapes onto felt or craft foam before you cut them out, and add latitude lines with a white paint pen. Green sponge pieces dabbed on instead of flat felt give the continents a textured, topographical feel.
19. Box of Crayons Pumpkin Display
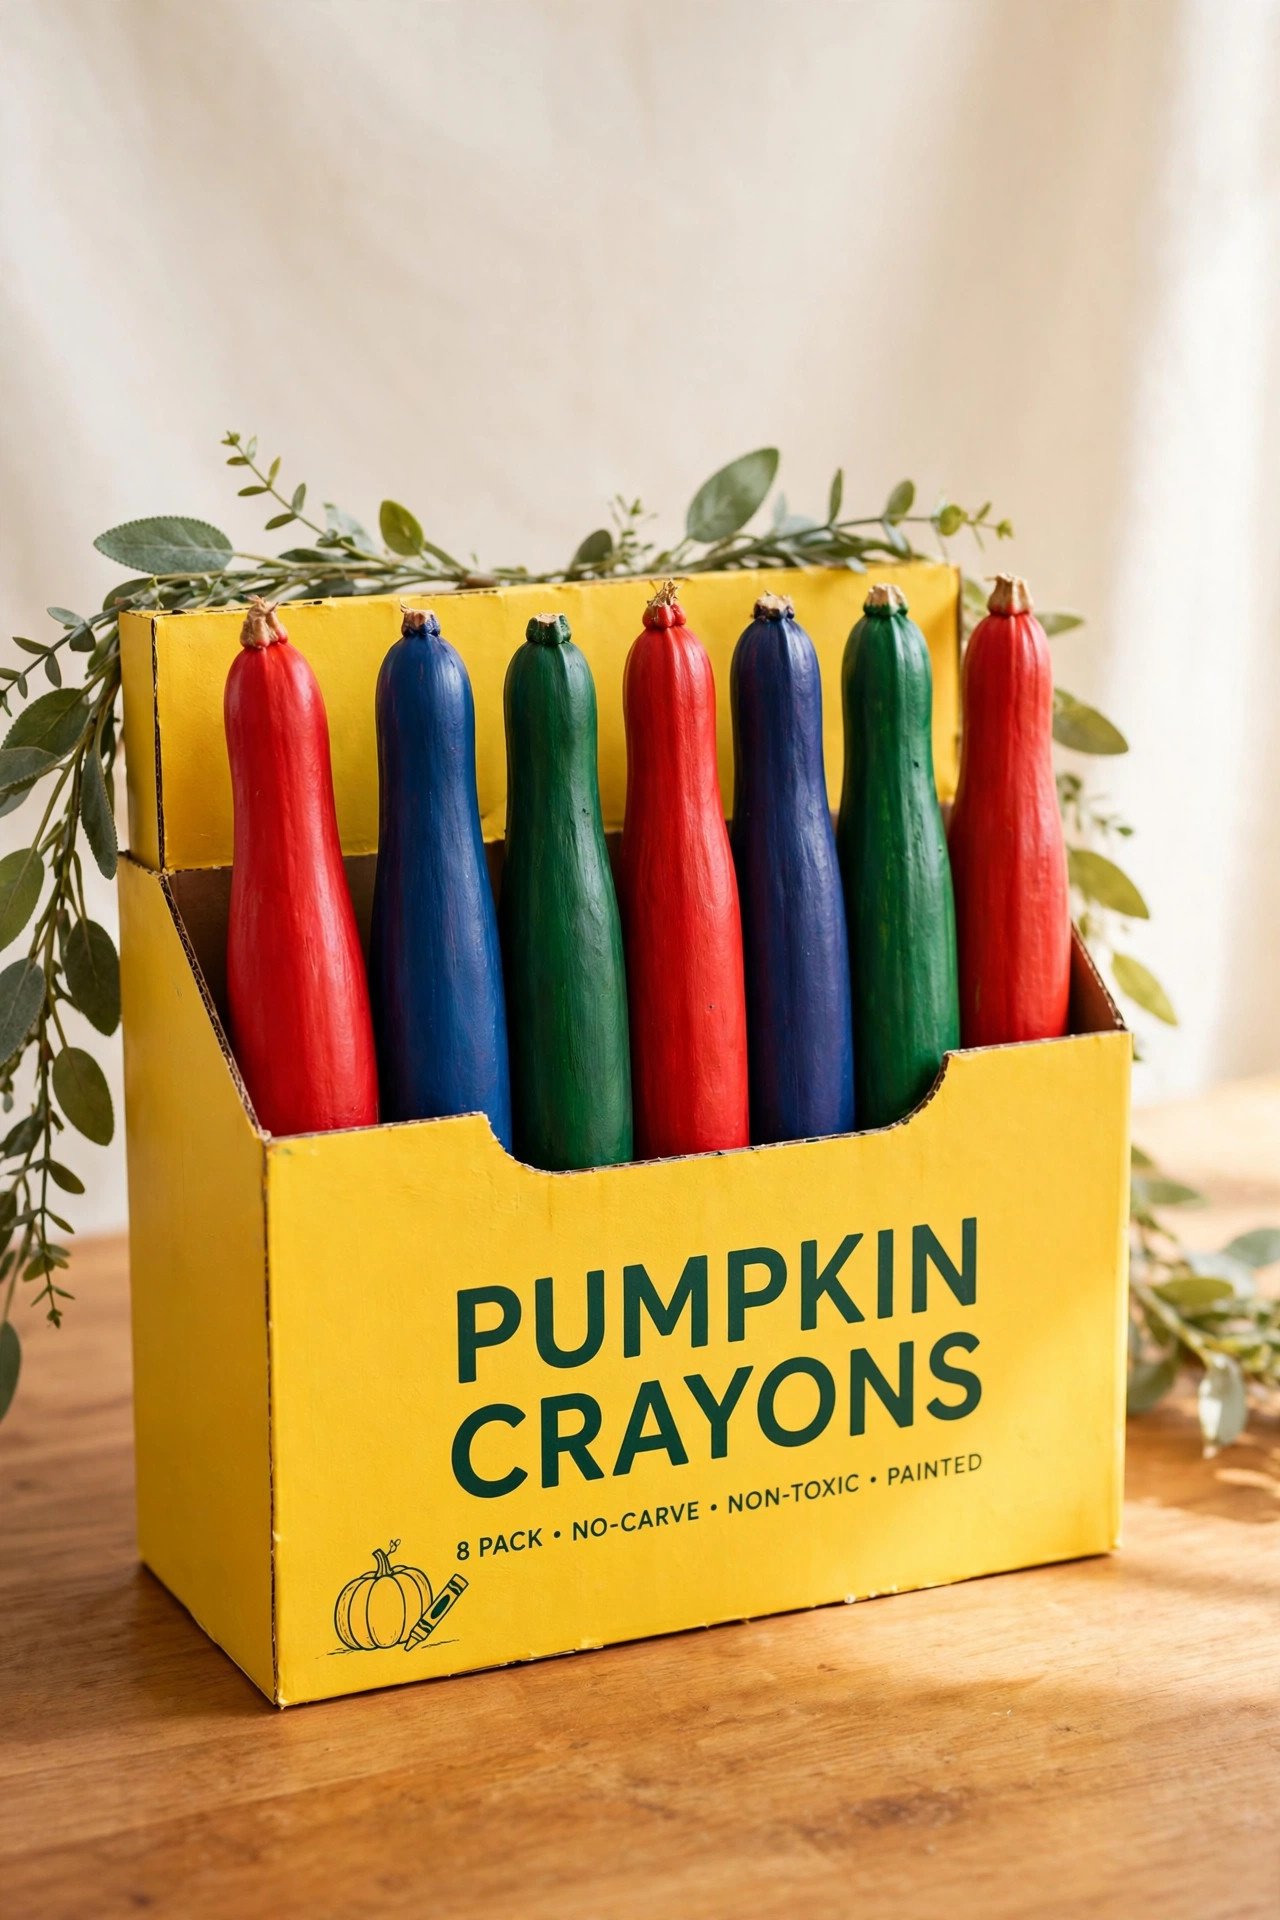
Paint several small, narrow pumpkins in bright crayon colors and tuck them into a yellow-painted cardboard box. The result looks like a giant pack of crayons and uses multiple pumpkins in one high-impact entry. It is a joyful group project for a classroom.
A recycled shipping box, cut down to size, makes the perfect container. Match the pumpkin colors to classic crayon shades like scarlet, indigo, and forest green. Cut the box so the pumpkins sit at slightly different heights for a more realistic look, and tape the box to the table so it cannot tip. This compact display even works in tight spaces, like these small balcony ideas prove for seasonal styling.
20. Bubbling Science Lab Pumpkin
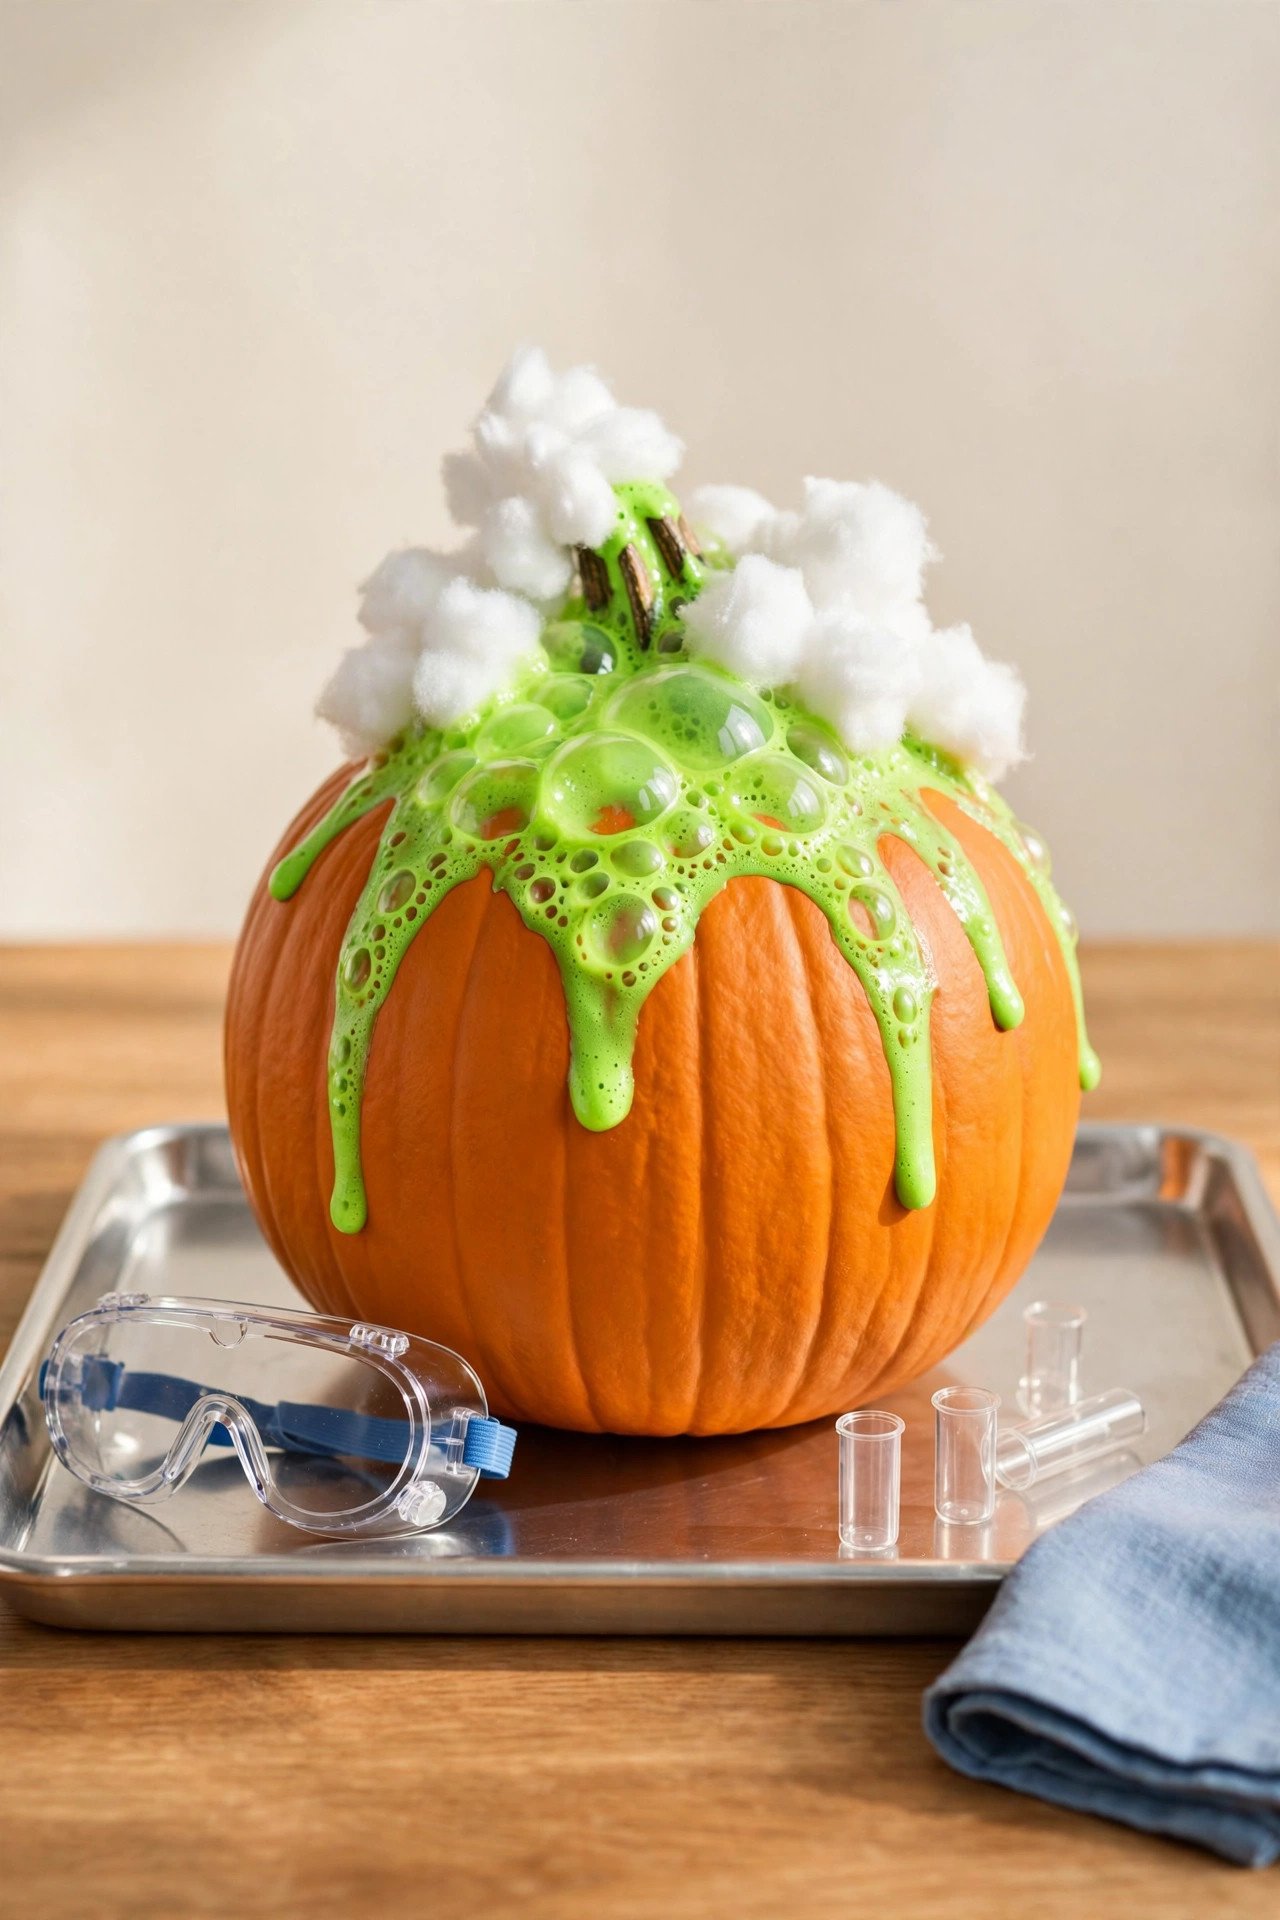
Neon green paint bubbling over the top of a pumpkin looks like a chemistry experiment gone wild. Cotton balls glued around the stem mimic foamy fizz mid-explosion, and empty plastic test tubes and safety goggles complete the mad scientist theme. Set it on a silver tray for a laboratory bench effect.
Neon or glow in the dark paint gives the strongest visual punch. Attach the test tubes with a low temperature glue gun, and place everything on a tray so it is easy to carry. A drop of dish soap mixed into the paint gives the bubbles a lovely iridescent sheen.
Conclusion
You do not need a carving kit to make a pumpkin that turns heads. With paint, paper, and simple craft supplies, you can build everything from a rainbow waterfall to a tiny library. Each of these ideas keeps the pumpkin whole, so your creation stays fresh and beautiful for weeks instead of days.
Pick the project that matches your mood and your skill level, gather the supplies, and have fun with it. When the contest table fills up, the boldest colors and the cleverest details always win, and now you have twenty ways to bring both.
Frequently Asked Questions About Pumpkin Decorating Ideas
How long do no-carve decorated pumpkins last?
A no-carve pumpkin stays fresh for two to four weeks indoors because the skin is never cut. Keep it in a cool, dry spot away from direct heat, and the paint and decorations will hold their color the whole season.
What kind of paint works best on pumpkins?
Acrylic craft paint sticks best to pumpkin skin and dries fast with bright color. Apply a coat of white primer or white paint first if you want light, vivid colors on an orange pumpkin.
Do no-carve pumpkins rot more slowly than carved ones?
Yes. Carving opens the flesh to air and mold, so carved pumpkins usually sag within a week. A decorated but uncut pumpkin lasts much longer because the protective skin stays intact.
How do I make decorations stick to a pumpkin?
A low temperature glue gun works for most decorations, from buttons to felt and pom-poms. For kid-safe projects, use strong craft glue instead of hot glue, and press each piece firmly for a few seconds.
Are these pumpkin decorating ideas safe for young children?
Yes. No-carve decorating uses no knives, so it is safe for kids of all ages. Projects like the pom-pom pumpkin, washi tape stripes, and sticker designs are especially good for little hands with adult supervision.

Hi, I’m Emily! I turn messy corners into cozy, organized spots. DreamNestDecor is where I share simple, practical home ideas — decor, organization, and small-space solutions that work in real life, not just in photos. Every idea here is carefully researched before it’s shared.